
Table of Contents
- Safety Precautions Before Cleaning Smoke Damage
- Essential Supplies and Tools for Smoke Damage Cleanup
- Is Smoke Damage Toxic to Clean Yourself
- Dry Cleaning vs. Wet Cleaning Methods for Smoke Damage
- Using the Best Chemical Sponge for Soot Removal
- How to Remove Smoke Smell From Walls
- How to Seal Smoke Damaged Walls Before Painting
- When to Call Professional Smoke Damage Restoration Services
Last Updated: August 9, 2026
Safety Precautions Before Cleaning Smoke Damage
Cleaning smoke damage from walls yourself requires serious precautions. Soot particles are incredibly fine and can lodge deep in your respiratory system, and smoke residue often contains volatile organic compounds that pose health risks during cleanup. Before touching anything, assess whether the fire was small and contained or large-scale. If your entire home was affected or structural damage is visible, stop and call professionals. Aquaflame Restores it handles these situations with IICRC-trained technicians who arrive within 30 minutes across metro Atlanta, but for manageable smoke damage, you can proceed safely with the right approach.
Start by establishing proper ventilation. Open all windows and doors, and run exhaust fans continuously throughout the cleaning process. If you have an HVAC system, run it to circulate air, but consider having it inspected afterward since soot can clog filters and ducts. Set up box fans to push air out of the affected space rather than spreading particles deeper into your home.
Respiratory protection is non-negotiable. A standard dust mask won’t cut it, you need an N95 or N100 respirator rated for particulate matter. Better yet, invest in a P100 respirator if the damage is extensive. These are available at most hardware stores and provide genuine protection against the finest soot particles. Wear long sleeves, pants, and gloves throughout the entire process. Soot stains skin and can be absorbed, so barrier protection matters more than you might think.
Protect your eyes with safety glasses. Soot particles become airborne during cleaning, and even small particles cause irritation and potential scratching. Cover any open cuts or abrasions on your hands with bandages before gloving up.
If anyone in your household has respiratory conditions, heart disease, or is pregnant, they should leave the area entirely during cleanup. [Smoke damage cleanup](/smoke-damage-cleanup-odor-removal/) is not safe for vulnerable populations, even with protective gear.
Essential Supplies and Tools for Smoke Damage Cleanup
You’ll need specific supplies to clean smoke damage from walls yourself effectively. The right tools make the difference between removing surface soot and actually restoring the wall’s appearance.
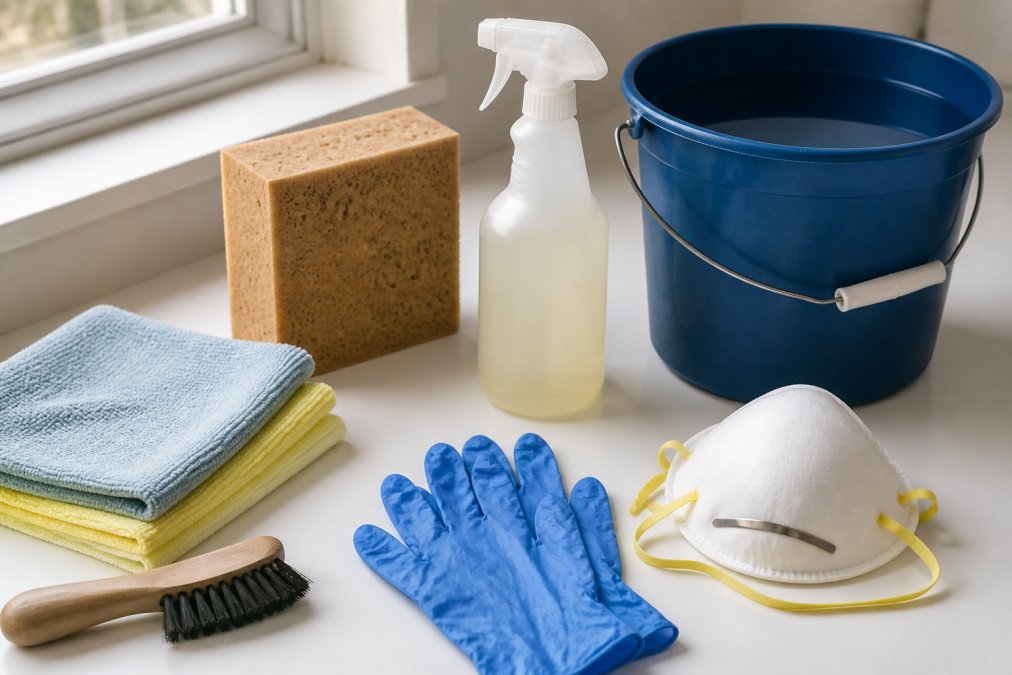
Dry cleaning supplies:
- Chemical sponge (also called dry cleaning sponge or soot sponge), this is your primary tool for initial soot removal
- Soft wire brush for loosening debris without damaging paint
- Microfiber cloths or lint-free rags
- HEPA filter vacuum for collecting loose particles
Wet cleaning supplies:
- Trisodium phosphate (TSP), a powerful degreaser that cuts through smoke residue
- Mild detergent or dish soap as an alternative to TSP
- White vinegar solution for odor neutralization
- Buckets for mixing solutions
- Sponges or soft-bristled brushes for application
- Towels for drying
Protective equipment:
- P100 or N100 respirator (not a dust mask)
- Safety glasses
- Heavy-duty rubber gloves
- Long sleeves and pants
- Shoe covers or dedicated cleanup shoes
Miscellaneous:
- Plastic sheeting and tape for containing dust
- Drop cloths or plastic tarps
- Ladder for reaching high walls
- Dehumidifier to manage moisture after wet cleaning
Don’t skimp on the respirator. This is the one item where cheap doesn’t work. A proper respirator costs $20-40 and provides genuine protection; a basic dust mask provides almost none against fine soot particles.
Is Smoke Damage Toxic to Clean Yourself
Yes, smoke damage contains toxic compounds that require careful handling during cleanup. The question isn’t whether it’s toxic, but whether you can manage the risks safely.
Smoke residue contains volatile organic compounds, heavy metals from combusted materials, and microscopic soot particles that penetrate deep into lungs. Prolonged exposure causes respiratory irritation, coughing, and in vulnerable people, serious complications. The particles are so fine they bypass your body’s natural filtering mechanisms.
The key is controlling your exposure. With proper ventilation, respiratory protection, and limited cleanup duration, DIY cleaning is manageable for small to moderate smoke damage. Most homeowners spend 2-4 hours on active cleaning, which is brief enough that even with imperfect technique, exposure remains within acceptable levels.
Where it becomes genuinely dangerous is attempting large-scale cleanup alone without proper equipment, or staying in the space for extended periods. If the smoke damage covers more than one room, or if you’re experiencing respiratory symptoms during cleanup, stop immediately and call professionals. Aquaflame Restores it has the equipment and training to handle extensive smoke damage safely.
Smoke damage cleanup is toxic but manageable for small areas with proper protective gear and ventilation. Large-scale damage requires [professional restoration](/fire-damage-restoration/).
Dry Cleaning vs. Wet Cleaning Methods for Smoke Damage
The best approach to cleaning smoke damage from walls yourself depends on the damage severity. Dry cleaning removes loose soot; wet cleaning tackles stubborn smoke residue and odor. Most effective restoration uses both methods in sequence.
Dry cleaning first: Start with dry cleaning using a chemical sponge. This removes the bulk of loose soot without introducing moisture that can damage drywall or paint. Dry cleaning is faster, requires less setup, and works well for light to moderate surface damage. The soot sponge absorbs particles as you rub, and you simply discard it when saturated. Most light smoke damage responds completely to dry cleaning alone.
When to use wet cleaning: Wet cleaning becomes necessary when dry cleaning doesn’t fully remove discoloration, when smoke smell persists, or when the damage is heavy. Wet cleaning uses TSP or mild detergent solutions to dissolve smoke residue rather than just moving it around. It’s more thorough but introduces moisture that must be managed carefully.
The combined approach: Professional restoration typically uses dry cleaning first to remove loose debris, then wet cleaning to address stubborn residue. This prevents moisture from reactivating loose soot and reduces the overall moisture exposure to your walls.
For porous surfaces like textured drywall, dry cleaning is often sufficient. For non-porous surfaces like painted walls or glossy finishes, wet cleaning penetrates better and provides superior results. If you’re uncertain which method your walls need, start with dry cleaning. If results are unsatisfactory after 24 hours, move to wet cleaning.
Using the Best Chemical Sponge for Soot Removal
The chemical sponge is your primary tool for dry cleaning smoke damage from walls yourself. These sponges work differently than regular cleaning sponges, they chemically absorb soot rather than just wiping it away.
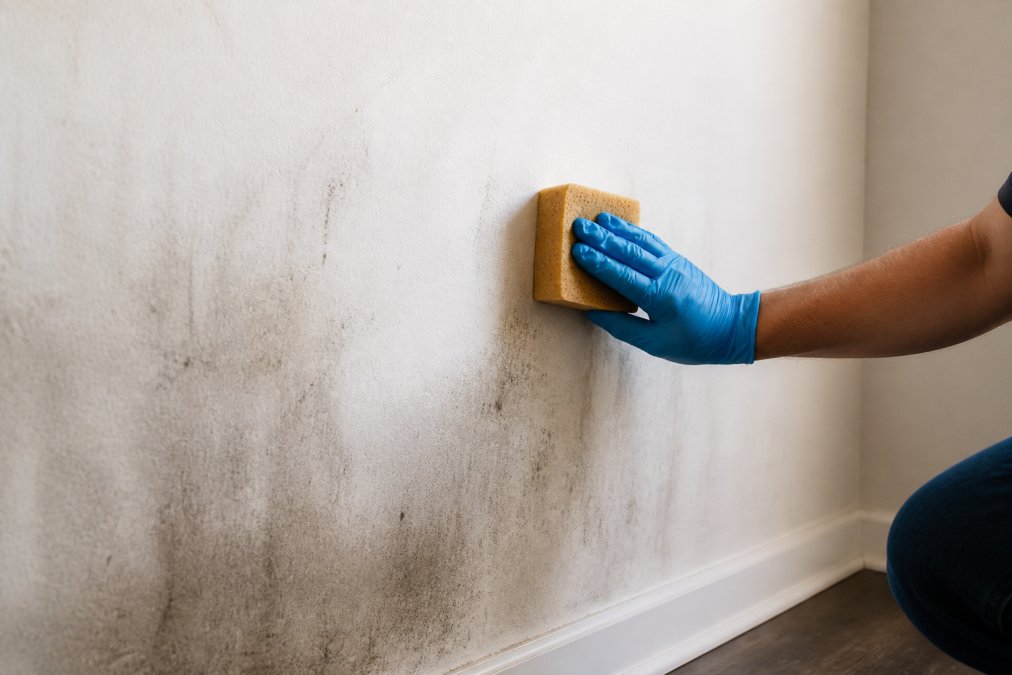
A quality soot sponge is made from a vulcanized rubber material that actively absorbs fine particles. As you rub the wall, the sponge’s porous surface traps soot, and the material darkens as it fills. When saturated, you discard it and use a fresh sponge. One sponge typically covers 50-100 square feet depending on damage severity.
Proper technique matters:
- Use light to moderate pressure, don’t scrub aggressively
- Work in small circular motions, about 12 inches at a time
- Rinse the sponge frequently under clean water to reveal fresh surface
- Replace the sponge when it stops absorbing (when it stays dark even after rinsing)
- Work from top to bottom to prevent drips from dirtying cleaned areas
Start in an inconspicuous corner to test how the wall responds. Some painted surfaces are fragile after smoke exposure, and aggressive sponging can damage the paint. Light pressure with a quality sponge removes soot without harming the underlying surface.
The best chemical sponges are made from natural rubber rather than synthetic materials. They’re slightly more expensive but absorb better and last longer. Expect to spend $3-5 per sponge, and budget 3-6 sponges for a typical room with moderate smoke damage.
Rinse your chemical sponge under running water frequently, every 10-15 minutes of rubbing. A saturated sponge stops absorbing and just pushes soot around. Fresh surface area is essential for effectiveness.
How to Remove Smoke Smell From Walls
Smoke smell persists in walls long after visible soot is gone because odor molecules embed in porous materials and paint. Removing smoke smell requires addressing both the surface and the underlying material.
Start with thorough wet cleaning using TSP or mild detergent solution. This removes odor-causing residue from the wall surface. Mix TSP according to package directions (typically 1/4 cup per gallon of water), apply with a sponge, and rinse thoroughly with clean water. The rinsing step is critical, leftover TSP residue traps odor molecules.
White vinegar neutralizes odor molecules rather than just masking them. After wet cleaning and rinsing, apply a vinegar solution (one part vinegar to three parts water) with a spray bottle or sponge. Let it sit for 10-15 minutes, then wipe dry. The vinegar smell dissipates within 24 hours, taking smoke odor with it.
Activated charcoal or baking soda placed in open containers absorbs lingering odors from the air. After cleaning walls, place these throughout the room. Change them every few days for 1-2 weeks. This addresses airborne odor molecules that surface cleaning doesn’t reach.
For severe odor that doesn’t respond to these methods, the smell has likely penetrated the drywall itself. At that point, surface cleaning won’t solve it, you need professional odor remediation or drywall replacement. Aquaflame Restores it uses specialized equipment and techniques to neutralize deep odors that DIY methods can’t reach.
Ensure proper ventilation continues for several days after cleaning. Open windows and run fans to allow odor molecules to escape rather than recirculating through your home.
How to Seal Smoke Damaged Walls Before Painting
Before painting over smoke damage, you must seal the wall properly. Smoke residue can bleed through paint if not sealed, causing discoloration to reappear within weeks. Sealing also prevents odor from returning.
Step 1: Clean thoroughly first. Complete all dry and wet cleaning before any sealing or priming. Any remaining soot or residue will prevent proper adhesion and sealing.
Step 2: Apply a stain-blocking primer. This is not optional. Standard primer won’t seal smoke damage. You need a primer specifically formulated to block stains, look for products labeled "stain-blocking primer" or "smoke damage primer." These contain special binders that trap odor molecules and prevent residue from bleeding through topcoat paint.
Apply primer according to product instructions, typically with a brush or roller. One coat is usually sufficient, but heavy damage may need two coats. Let primer dry completely (usually 1-3 hours depending on product) before painting.
Step 3: Paint with quality paint. Use a good-quality interior latex or acrylic paint. Cheap paint won’t adhere well to primer or provide adequate coverage. Two coats are standard for best results and color consistency.
Step 4: Manage moisture carefully. Smoke damage often occurs alongside water damage from firefighting efforts. If walls are damp, they must dry completely before sealing. Moisture trapped under primer causes peeling and mold growth. Use a dehumidifier and ensure proper ventilation for several days before priming.
For walls with heavy smoke damage or persistent odor issues, consider using a primer with odor-neutralizing properties. These cost more but provide superior results for severe damage.
Never paint directly over smoke damage without primer. Paint alone won’t seal the damage, and you’ll see discoloration bleeding through within weeks. Stain-blocking primer is essential.
When to Call Professional Smoke Damage Restoration Services
Some smoke damage is beyond DIY capability. Knowing when to call professionals prevents costly mistakes and ensures complete restoration.
Call professionals if:
- Smoke damage covers more than one room
- The damage is heavy (walls are dark, discoloration is severe)
- Smoke smell is overpowering or doesn’t improve after initial cleaning
- You have respiratory conditions or health vulnerabilities
- Structural damage is visible (charring, wall softness, sagging)
- The fire involved hazardous materials (electrical fires, chemical fires)
- You’re uncertain about the damage extent
Professional restoration handles aspects DIY cleaning can’t address. They have industrial-grade equipment for air circulation and odor removal. They can test for hazardous residues and ensure complete safety. They manage moisture precisely to prevent secondary damage. They provide documentation for insurance claims.
Aquaflame Restores it arrives within 30 minutes across metro Atlanta with IICRC-trained technicians who assess damage professionally and handle restoration completely. They manage direct insurance billing, eliminating the stress of fighting with adjusters. For metro Atlanta homeowners with significant smoke damage, professional restoration is faster, safer, and often less expensive than attempting DIY cleanup that requires repeated attempts.
The cost of professional restoration is typically less than the cost of failed DIY attempts followed by professional remediation anyway. If you’re uncertain whether your damage qualifies as DIY-manageable, call for a free assessment. Professionals can confirm whether you can handle it yourself or should hand it off to them.
Smoke damage cleanup is manageable for light to moderate damage when you approach it systematically with proper protection and the right tools. Start with dry cleaning using a quality chemical sponge, follow with wet cleaning if needed, seal with stain-blocking primer, and ensure complete ventilation throughout. For extensive damage, structural concerns, or persistent odor, professional restoration delivers faster, safer results. Aquaflame Restores it provides 24/7 emergency response with IICRC-certified technicians who handle everything from initial assessment through final reconstruction, managing your insurance claim directly so you can focus on recovery rather than logistics.
Frequently Asked Questions
Can you clean smoke damaged walls yourself, or do you always need a professional?
Light to moderate smoke damage on small wall areas can be cleaned yourself with proper safety precautions, the right supplies, and patience. You'll need a chemical sponge, TSP solution, protective gear including a HEPA-filter respirator, and good ventilation. However, extensive smoke damage, damage from large fires, or situations where soot has penetrated deep into porous surfaces often require professional restoration services. If smoke damage covers more than 30% of a room or if you're unsure about the extent, contact a professional like Aquaflame Restores it for assessment.
Will vinegar remove smoke from walls?
Vinegar can help with light smoke residue and odor neutralization, but it's not the most effective primary cleaning solution for heavy soot particles. A mixture of vinegar and water works better as a secondary rinse after using TSP or a chemical sponge to remove the bulk of the soot. For best results, start with a dedicated soot removal method, then use vinegar solution as a final step to help deodorize and remove any remaining discoloration. Always test on an inconspicuous area first, especially on painted walls.
Is smoke damage toxic to clean yourself?
Smoke residue contains volatile organic compounds and particulate matter that can pose health risks during cleanup. The primary danger comes from inhaling soot particles and chemical fumes, which is why respiratory protection with a HEPA filter is essential. Wear a properly fitted N95 or P100 respirator, gloves, and eye protection. Ensure proper ventilation by opening windows and using fans to circulate air. If you have respiratory conditions, heart disease, or are pregnant, avoid cleaning smoke damage yourself and hire professionals instead.
What's the best way to remove smoke smell from walls after cleaning?
After removing visible soot with a chemical sponge or TSP solution, deodorize by using a vinegar and water solution (1:1 ratio) as a final rinse. Open windows for continuous air circulation and run HVAC systems to help remove lingering volatile organic compounds. Activated charcoal or baking soda placed in affected rooms can absorb remaining odors over several days. If odor persists after these steps, it may have penetrated into wall cavities or insulation, requiring professional restoration services to identify and address the root cause.
This article was written using GrandRanker