
Table of Contents
- Immediate Steps to Stop Ceiling Water Leaks
- Signs of Water Damage in Ceiling and How to Identify Them
- Finding the Source of Your Ceiling Leak
- Tools for Stopping Ceiling Leaks and Drying Out the Area
- Preventing Mold and Secondary Water Damage
- When to Call a Professional for Ceiling Leaks
- Ceiling Leak Insurance Claim Process
- Conclusion
Last Updated: August 6, 2026
Immediate Steps to Stop Ceiling Water Leaks
The first few minutes after you notice water dripping from your ceiling determine whether you contain the damage or let it spread. Your immediate action prevents structural damage, electrical hazards, and secondary water damage that costs far more to repair than the leak itself.
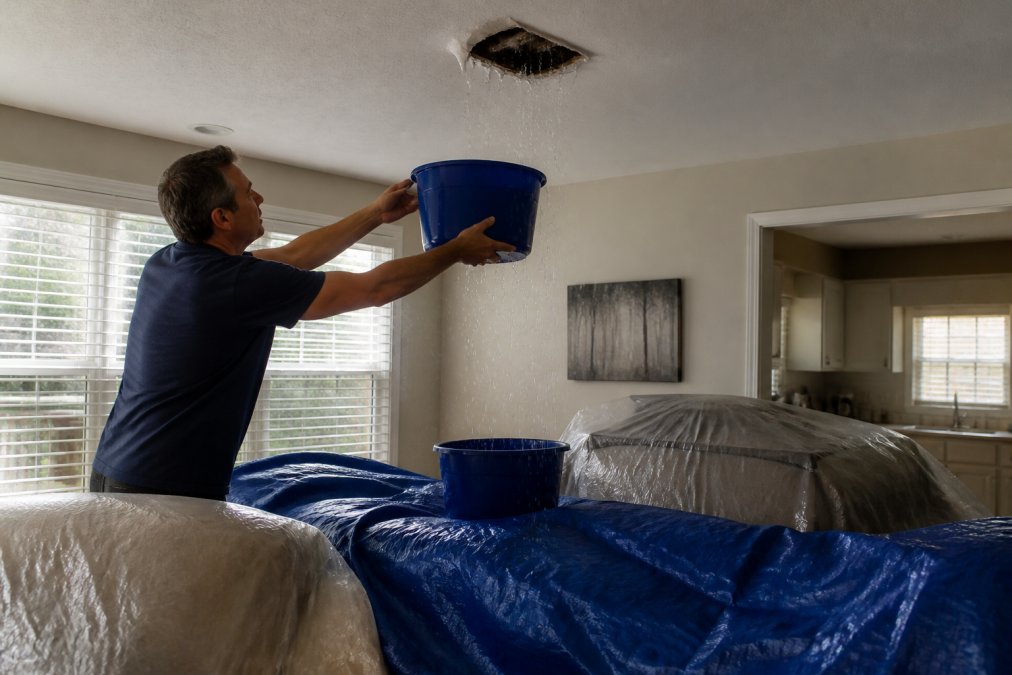
Start by placing buckets directly under the drip. If water is flowing steadily, position multiple containers to catch it all. Move furniture, electronics, and valuables away from the affected area, as water spreads horizontally along ceiling joists and vertically down walls.
Contain the water and protect your property
Create a temporary barrier using tarping or plastic sheeting. Tape plastic directly to the ceiling around the leak if you can safely reach it, directing water flow toward your bucket system. For larger leaks, lay tarps on the floor beneath the affected area to protect your flooring and contents.
Document everything with photos and video before moving anything. Your homeowners insurance will require evidence of the water damage and the steps you took to mitigate it.
Turn off electricity in the affected area
Water and electricity are a lethal combination. If the leak is near light fixtures, outlets, or any electrical wiring, turn off power to that circuit immediately at your breaker panel. If you’re uncertain which circuit controls the affected area, turn off the main breaker to be safe. Wet drywall conducts electricity, creating shock hazards.
Don’t attempt to use electrical equipment, fans, dehumidifiers, or pumps in a wet space until you’ve confirmed the electrical system is safe. Call a licensed electrician if you see any signs of electrical damage: sparks, burning smells, or discolored outlets.
Signs of Water Damage in Ceiling and How to Identify Them
Recognizing the difference between active leaks and old water damage tells you how urgently you need to act. Old water stains indicate past moisture problems that may have created hidden mold or structural weakness. Active water damage means the leak is ongoing and will worsen every hour you delay.
Visual indicators of active and past water damage
Active water damage appears as dark, spreading stains with soft, spongy drywall. The ceiling feels wet to the touch, and you’ll see visible dripping or water running down walls. The drywall may be sagging or bubbling as it absorbs moisture.
Past water damage shows as lighter brown or tan stains that have dried. The drywall feels firm, and there’s no active dripping. These stains indicate previous moisture exposure that may have already caused mold growth inside the wall cavity or attic space above.
Look for these specific warning signs: discoloration patterns that spread in irregular shapes, soft spots in drywall that feel spongy when pressed, peeling paint or wallpaper around the stain, visible mold growth appearing as black, green, or white spots, and sagging drywall that dips downward.
How to tell if a ceiling leak is from a pipe or the roof
The source of your ceiling leak determines your repair strategy. A plumbing leak requires shutting off water supply and replacing or patching the pipe. A roof leak requires structural repair from above. Condensation problems need ventilation solutions.
Plumbing leaks typically appear directly below the source with water dripping in a concentrated area. The leak is usually consistent, flowing whenever water is used in the rooms above. Check if the stain location aligns with bathrooms, kitchens, or HVAC drainage systems directly overhead.
Roof leaks create stains that may not align directly with the visible leak location. Water travels along roof framing, attic joists, or insulation before dripping through your ceiling, sometimes several feet away from where it entered the roof. Roof leaks worsen during heavy rain and may stop during dry periods.
Condensation issues create dampness rather than active dripping. They’re common around HVAC returns, in poorly ventilated bathrooms, or where warm indoor air meets cold exterior walls. Condensation typically affects large areas rather than concentrated spots.
Finding the Source of Your Ceiling Leak
Identifying the leak’s source is essential before calling a professional or attempting repairs. You’ll save time and money by narrowing down whether the problem is above your ceiling, inside your walls, or from an appliance connection.
Inspect the attic or space above the leak
If your home has an accessible attic, go directly above where you see the ceiling leak and look for visible water, wet insulation, or moisture on the roof framing. Bring a flashlight and look carefully along the roof line and down the attic joists. Water stains on wood indicate where water has been traveling.
Check the roof decking for holes, gaps, or damaged shingles. Look at roof flashing around chimneys, vents, and skylights, these are common entry points for water intrusion. Flashing should be sealed tightly and show no gaps or rust. Examine attic insulation for wet spots or compression, as saturated insulation becomes a breeding ground for mold.
Check roof flashing, HVAC drainage, and condensation sources
Roof flashing is metal trim that directs water away from vulnerable roof joints. Flashing around chimneys, plumbing vents, skylights, and roof penetrations commonly fails when sealant deteriorates or fasteners rust. Look for lifted flashing, missing sealant, or visible rust.
HVAC drainage can cause ceiling leaks if condensation lines become clogged or disconnected. Your air conditioning system produces condensation that drains through a small pipe. If this line clogs with algae or debris, water backs up and leaks through your ceiling. Locate your HVAC condensate drain line and ensure it’s clear and properly connected.
Plumbing connections in walls and attics leak silently until water reaches your ceiling. If you suspect a pipe leak, listen for water sounds in walls or look for water stains along pipe runs in the attic. Copper pipes corrode from the inside, and pinhole leaks develop slowly.
Check for condensation by observing moisture patterns. Condensation appears on large ceiling areas rather than concentrated spots and is common in bathrooms without proper exhaust fans or around poorly insulated exterior walls. If you see condensation, the fix involves improving air circulation and reducing humidity.
Tools for Stopping Ceiling Leaks and Drying Out the Area
Once you’ve contained the immediate water and identified the source, proper drying equipment prevents mold remediation needs and structural damage.
Essential equipment for emergency containment and drying
Buckets and tarps are your first line of defense. Heavy-duty plastic buckets catch dripping water, and tarps (at least 6-mil thickness) protect floors and contents.
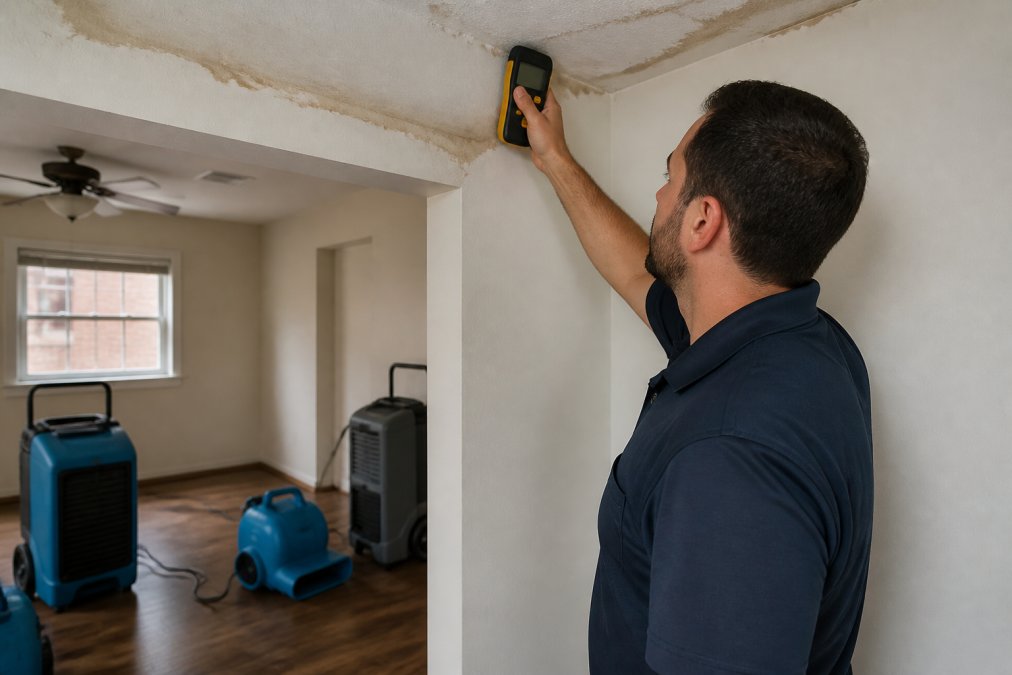
Dehumidifiers remove moisture from the air, accelerating drying. Portable units work for single rooms; larger commercial dehumidifiers are necessary for whole-house moisture problems. Run them continuously until humidity levels drop to normal (30-50% relative humidity).
Wet-dry vacuums extract standing water from floors and materials. These are designed to handle water without electrical hazard.
Air movers and fans increase air circulation, speeding evaporation from wet surfaces. Position fans to direct air across wet drywall, subflooring, and other materials.
Moisture meters, dehumidifiers, and ventilation techniques
Moisture meters measure water content in drywall, wood, and other materials. They tell you when materials are dry enough to safely repair. Most restoration professionals use meters to confirm drying is complete before replacing drywall or painting.
Commercial dehumidifiers remove 50-100 pints of water daily, far more than portable units. If your ceiling leak affected large areas, commercial dehumidification accelerates drying and prevents mold growth in hidden spaces.
Proper ventilation is critical for drying. Open windows when weather permits to exchange humid indoor air with drier outside air. Use bathroom and kitchen exhaust fans to remove moisture. If running dehumidifiers, ensure the space is reasonably sealed.
The drying timeline depends on materials involved and humidity levels. Drywall typically takes 3-7 days to dry completely; wood takes longer. Don’t rush this process, as incomplete drying leads to hidden mold growth.
Preventing Mold and Secondary Water Damage
Mold thrives in moist environments, and your wet ceiling is an ideal breeding ground. Preventing mold growth during the drying process saves thousands in mold remediation costs later.
Mold can begin growing within 24-48 hours of water exposure. It grows inside wall cavities where you can’t see it, spreading through insulation and along wood framing. Aggressive drying prevents this entirely.
Moisture mitigation and mold remediation steps
Immediate moisture mitigation starts with removing wet materials that can’t be dried. Wet insulation should be removed and replaced. Wet drywall beyond the first 12-24 inches of saturation should be cut out and replaced.
Keep humidity below 50% during drying. Moisture meters should show material moisture content below 17% for wood and below 12% for drywall before you consider the area dry.
Mold remediation, if mold has already appeared, requires professional intervention. Surface mold can be cleaned with bleach solutions, but mold inside walls requires removal of affected materials. Apply antimicrobial treatments to dried surfaces to prevent mold recurrence.
Why drywall saturation and structural integrity matter
Drywall saturation weakens the material permanently. Gypsum board loses strength when wet, and even after drying, it never fully regains its original properties. If drywall has been saturated for more than 48 hours, replacement is safer than attempting to dry and repair it.
Structural integrity is at risk when water reaches wood framing. Wood absorbs moisture, swells, and becomes susceptible to rot. Wood rot develops slowly but catastrophically weakens structural components.
Ceiling joists that have absorbed water can fail under normal loads. A ceiling that felt solid before water damage may sag or collapse if joists have rotted.
When to Call a Professional for Ceiling Leaks
Some ceiling leak situations demand professional expertise immediately. Knowing when DIY efforts are insufficient prevents costly mistakes and health hazards.
Signs you need professional water damage restoration
Call a professional immediately if the leak is large or actively flowing, water has affected more than one room or large ceiling areas, electrical systems are involved or potentially compromised, you suspect a hidden plumbing leak or structural roof damage, mold is visible on or around the affected area, the ceiling is sagging or shows signs of structural failure, water has reached your attic, crawlspace, or subflooring, or you’re uncertain about the leak source.
At Aquaflame Restores it, our IICRC-trained technicians assess water damage comprehensively, identifying hidden moisture in attics, wall cavities, and crawlspaces. We use thermal imaging and moisture meters to locate water that isn’t visible, then develop drying strategies specific to your materials and situation.
What IICRC-trained technicians handle that DIY cannot
Professional water damage restoration involves specialized equipment and knowledge beyond typical homeowner capability. IICRC (Institute of Inspection, Cleaning and Restoration Certification) training teaches technicians how to identify all moisture sources, operate commercial dehumidifiers and air movers, assess structural damage, prevent mold growth, document damage thoroughly for insurance claims, and handle hazardous materials safely.
Professionals have access to equipment you can’t rent, including thermal imaging cameras that show moisture distribution and commercial-grade dehumidifiers. They know how long different materials take to dry and can prevent secondary damage from incomplete or improper drying.
Insurance companies often require professional assessment for significant water damage. Your homeowners policy may cover restoration costs only if a licensed, insured company performs the work.
Ceiling Leak Insurance Claim Process
Documenting your water damage properly and filing promptly ensures your homeowners insurance covers restoration costs.
Documentation and evidence for your homeowners insurance claim
Photograph everything immediately. Take wide shots showing the entire affected area, close-ups of water stains and damage, and images of water actively dripping if possible. Photograph damaged contents, furniture, electronics, and flooring that will need replacement.
Write detailed notes about when you discovered the leak, what you did to contain it, and what damage you observed. Include dates and times.
Preserve damaged materials until the insurance adjuster inspects them. Don’t throw away wet drywall, insulation, or flooring immediately.
Keep receipts for all emergency supplies you purchase, buckets, tarps, fans, dehumidifier rentals. Insurance may reimburse these mitigation expenses.
Obtain written estimates from restoration companies. Insurance companies use these to determine settlement amounts.
How direct insurance billing simplifies your recovery
Working with a restoration company that handles direct insurance billing eliminates the stress of managing claims yourself. Aquaflame Restores it manages communication with your insurance adjuster, submitting documentation, and billing directly to your insurance company. Direct billing means you’re not paying out of pocket and waiting for reimbursement. The restoration company works with the insurance adjuster to establish scope and cost, then bills the insurance company directly, accelerating your recovery and reducing financial stress.
Water damage in your ceiling demands immediate action, but the right response prevents far costlier problems later. Aquaflame Restores it’s IICRC-trained technicians provide 24/7 emergency response across metro Atlanta with a 30-minute arrival guarantee, handling everything from immediate water extraction to complete structural drying and reconstruction. We manage your insurance claim directly, document damage thoroughly for your homeowners policy, and restore your home to its original condition without the stress of coordinating multiple contractors. When your ceiling is dripping, contact Aquaflame Restores it for emergency water damage restoration that stops the leak and prevents hidden mold growth.
Frequently Asked Questions
What is the first thing you should do when you see a ceiling leak?
Stop the water from spreading immediately. Place buckets or containers under the leak to catch dripping water, then move furniture and belongings away from the affected area. If water is actively dripping near electrical fixtures, turn off power to that circuit at the breaker panel. Once contained, locate the source of the leak by inspecting the attic or space above the ceiling. Quick action prevents secondary water damage and reduces mold risk significantly.
Does homeowners insurance cover water leaks from the ceiling?
Coverage depends on the leak's cause. Sudden, accidental leaks from burst pipes or roof damage are typically covered by homeowners insurance. However, gradual leaks from poor maintenance, roof neglect, or plumbing failures are usually not covered. Document the leak with photos and timestamps, note when you discovered it, and contact your insurance company immediately. Professional restoration companies like Aquaflame Restores It handle direct billing with your insurer, eliminating the need for out-of-pocket payments and simplifying the claims process.
How long can you leave a leaking ceiling before it becomes dangerous?
Active ceiling leaks pose immediate risks and should never be ignored. Water-saturated drywall can collapse within hours under weight, electrical hazards develop quickly, and mold begins growing within 24-48 hours of water intrusion. Even small leaks cause structural damage over time, weakening ceiling joists and compromising the integrity of your home. Address any ceiling leak within the first few hours of discovery by containing water and calling a professional if the source is not immediately obvious or if the leak is widespread.
How do you tell if a ceiling leak is from a pipe or the roof?
Location and timing reveal the source. Roof leaks typically occur during or immediately after rain, appear near the roof line, and may show water stains along ceiling joists. Pipe leaks can happen anytime, often appear in interior ceilings away from exterior walls, and may have a musty odor indicating hidden moisture. Check the attic directly above the leak for visible water intrusion, damaged roof flashing, or condensation on HVAC ducts. If you cannot identify the source safely, a professional inspection using thermal imaging or moisture meters pinpoints the exact origin and prevents recurring water damage.
This article was written using GrandRanker