
Table of Contents
- Emergency Water Extraction Steps: What to Do First
- Water Extraction Safety Precautions You Must Follow
- Emergency Water Removal Equipment and Methods
- How Long Does Water Extraction Take?
- When to Call Professional Water Damage Restoration
- Documenting Damage and Managing Insurance Claims
- Post-Extraction Monitoring and Air Quality Management
- Common Mistakes to Avoid During Water Mitigation
Last Updated: July 9, 2026
When water damage strikes your home, every minute counts. The difference between quick action and delay can mean the difference between salvageable property and total loss. Understanding emergency water extraction steps is critical for minimizing damage, protecting your family’s safety, and preserving your belongings. Below, we’ll walk you through the exact emergency water removal equipment, safety protocols, and extraction methods that professional restoration teams use.
Emergency Water Extraction Steps: What to Do First
Before you remove water, assess the source and severity. Water damage falls into three categories: Category 1 (clean water from broken pipes), Category 2 (gray water with some contamination), and Category 3 (black water from sewage or flooding). This determines whether DIY mitigation is safe or if you need professional intervention immediately.
If water is actively entering your home, locate your main water shut-off valve, typically found near your water meter in the basement, crawl space, or exterior wall. Turn it clockwise until it stops. If water is coming from outside (flooding, storm surge), focus on safety and documentation instead.
Document the water level and extent before removal. Take photographs from multiple angles, including close-ups of water lines on walls and furniture. This documentation is essential for your insurance claim and helps professional teams understand the scope of work.
Water Extraction Safety Precautions You Must Follow
Before removing water, address multiple hazards: electrical shock, mold exposure, contaminated water, and structural instability.
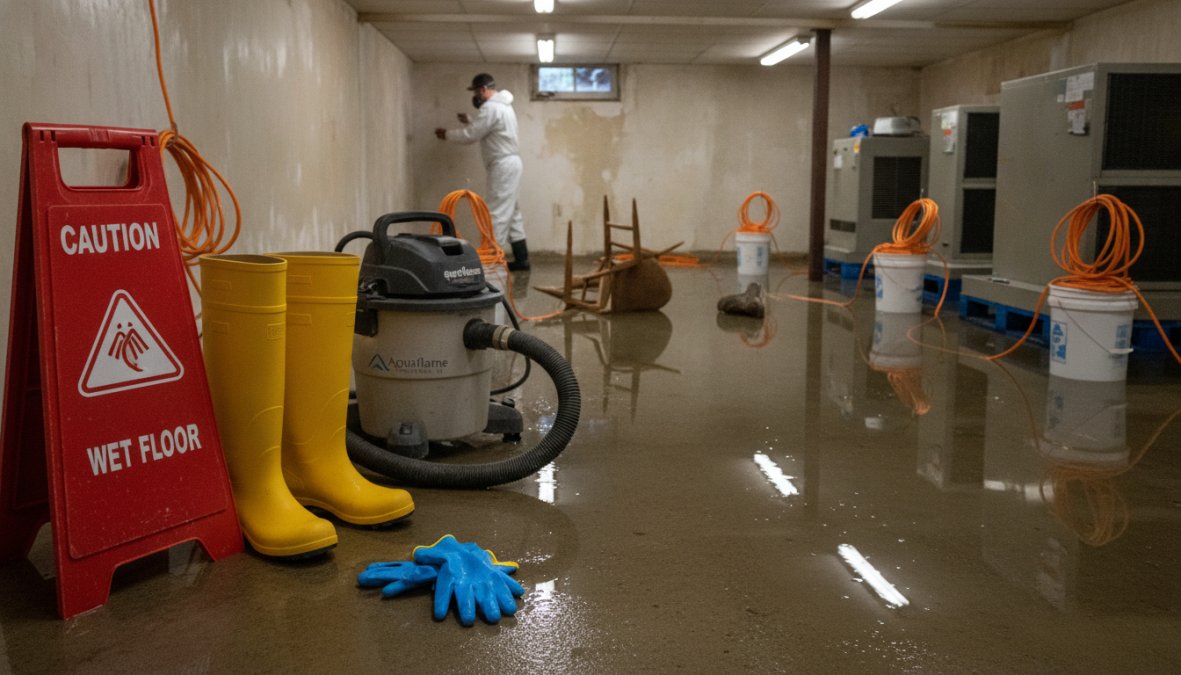
Essential PPE and protective equipment form your first line of defense. Wear waterproof gloves, closed-toe boots, long sleeves and pants. If the water is Category 2 or 3, or if you’re working in enclosed spaces where mold spores may be present, wear an N95 or P100 respirator mask. Eye protection prevents splashing water from reaching your eyes. Never work alone; have another person present who can call for help if needed.
Electrical hazards and power management demand immediate attention before any extraction begins. Water conducts electricity, and wet conditions dramatically increase electrocution risk. Turn off the main electrical panel for any room where water is present. Do not use standard electrical equipment that is not specifically rated for wet environments. If you must use electrical equipment, plug it into a GFCI-protected outlet. Never touch electrical switches, outlets, or appliances with wet hands or while standing in water.
Never enter a flooded basement or enclosed space without first turning off the electrical panel. Water in contact with live electrical current can be fatal.
Emergency Water Removal Equipment and Methods
Once you’ve secured the area and put on proper PPE, bulk water removal becomes your priority. Standing water that sits for more than 24-48 hours begins to develop mold and bacterial growth, and structural materials start absorbing moisture, leading to warping, rot, and secondary damage.
Bulk water removal with submersible pumps is the most efficient method for large volumes of standing water. A submersible pump sits directly in the water and pushes it out through a discharge hose. Small 1/4-horsepower models handle minor flooding and are affordable to rent, while larger models tackle serious flooding. For a typical basement with 2-4 inches of standing water, a small submersible pump removes the water in 2-4 hours. Position the pump at the lowest point where water collects and ensure the discharge hose runs far enough away from the building to prevent water from flowing back in. Check the discharge regularly and clear the intake filter every 30-60 minutes if the water contains sediment.
Wet/dry vacuums and squeegee techniques handle water remaining after bulk removal, typically the last inch or two of standing water. A wet/dry vacuum rated for water extraction uses suction to pull water into a tank. These vacuums are effective but slower than pumps; expect 1-2 hours to vacuum water from a 500-square-foot basement. After vacuuming, use a squeegee to push remaining water toward floor drains or the vacuum intake.
Combine bulk removal methods for speed: use a submersible pump for the first 3-4 inches of standing water, then switch to a wet/dry vacuum for the final inch. This approach cuts total removal time in half.
Tool rental vs. purchase considerations matter when deciding whether to invest in equipment or rent temporarily. Submersible pumps and quality wet/dry vacuums are available for rent at most hardware stores for $30-60 per day. If your emergency is a one-time event, renting is cost-effective. However, if you own a home in a flood-prone area, purchasing a small submersible pump ($100-200) and wet/dry vacuum ($150-300) makes financial sense over time.
How Long Does Water Extraction Take?
The timeline for water extraction depends on the volume of water, the equipment you’re using, and whether you’re handling it yourself or calling professionals.
For small water emergencies (burst pipe in a single room, overflowing washing machine), bulk water removal typically takes 1-3 hours with a submersible pump or wet/dry vacuum. For moderate flooding (basement with 4-6 inches of water from a failed sump pump), expect 4-8 hours of active extraction time. For serious flooding (Category 3 water from sewage backup or storm surge), professional equipment and multiple technicians are necessary. Professional teams can extract water from a flooded basement in 2-4 hours, which is 3-4 times faster than DIY methods.
After bulk water removal, the drying phase begins, which takes far longer than extraction itself. Structural drying typically requires 5-10 days depending on humidity, temperature, and air circulation. The sooner you remove standing water, the sooner the drying phase begins, and the sooner your home is truly recovered.
When to Call Professional Water Damage Restoration
Some water damage situations exceed safe DIY handling.
Category 3 water and contamination concerns demand professional handling. Category 3 water comes from sewage, floodwaters, or other sources containing dangerous pathogens and contaminants. Exposure carries serious health risks including bacterial infections, parasites, and viral illness. If your water damage involves any possibility of sewage contamination, basement flooding from a sewage backup, or water with visible discoloration or odor, do not attempt DIY extraction. Call a professional immediately.
Even Category 1 and 2 water can pose risks if you have health vulnerabilities. Pregnant women, young children, elderly household members, or anyone with respiratory conditions should avoid exposure to damp environments where mold spores develop rapidly.
Structural drying and secondary damage prevention require professional expertise and equipment. After bulk water removal, moisture remains trapped inside walls, under flooring, and in structural cavities. A professional restoration team uses moisture mapping with moisture meters and thermal imaging to identify all wet areas and monitor drying progress. They deploy industrial dehumidifiers (which remove 50-100 gallons of moisture per day) and air movers in strategic locations. Without proper structural drying, hidden moisture leads to mold growth within 48-72 hours, wood rot, and permanent damage to drywall and insulation. The cost to remediate mold and structural damage is 5-10 times higher than the cost of professional extraction and drying done immediately.
Call a professional if: the water is Category 2 or 3, the affected area exceeds 500 square feet, water has reached above the first-floor level, or you have vulnerable household members. Professional response within the first 24 hours prevents most secondary damage.
Documenting Damage and Managing Insurance Claims
Your insurance claim depends entirely on documentation. Photographs, videos, and detailed records of damage become your proof when the insurance adjuster evaluates your loss.
Photography and detailed claim documentation must begin before you start any cleanup or removal. Take photos and videos from multiple angles showing the full extent of water damage. Include wide shots showing the overall affected area, close-ups of water lines on walls, and damage to furniture and belongings. Photograph wet materials before removal.
Create a written inventory of damaged items. For each item, note: the item name, approximate age, original purchase price, and current condition. Keep all receipts for emergency mitigation expenses: equipment rental, supplies, professional services. These costs are often covered under your insurance policy’s water damage coverage, but only if you have documentation.
Working with your insurance adjuster requires clear communication and organized documentation. Contact your insurance company within 24 hours of discovering water damage. When the adjuster arrives, walk them through the damage with your photographs and inventory in hand. Point out the water line, explain how the damage occurred, and show documentation of any emergency mitigation you’ve already completed. Get the adjuster’s contact information and follow up in writing with a summary of your conversation.
Post-Extraction Monitoring and Air Quality Management
Water extraction is only the beginning of recovery. The drying phase determines whether your home fully recovers or develops hidden mold and moisture problems.
Moisture mapping and hygrometer readings track drying progress. A hygrometer measures relative humidity in a room. Normal indoor humidity ranges from 30-50%. After water damage, humidity spikes to 80-100%. Take hygrometer readings daily in the affected area. If humidity remains above 60% after 3-4 days of drying, you need additional dehumidification equipment.
A moisture meter measures actual moisture content in materials like drywall, wood, and flooring. Readings above 17% indicate the material is still wet and needs continued drying.
Dehumidification and HEPA filtration setup removes moisture from the air and prevents mold spores from spreading. A standard household dehumidifier removes 30-50 gallons of moisture per day and is adequate for drying a single room. HEPA filtration removes mold spores, dust, and contaminants from the air. Running a HEPA-filter air purifier in the affected area reduces spore concentration and slows mold development while drying occurs.
Keep windows closed during the drying phase. Open windows introduce outdoor moisture and mold spores, which slows drying and increases contamination risk. Use air conditioning if available; AC units dehumidify as they cool. Monitor air quality daily. If you notice musty odors, see visible mold growth, or experience respiratory symptoms, increase ventilation and dehumidification immediately.
Common Mistakes to Avoid During Water Mitigation
Waiting too long to begin extraction is the most costly mistake. Mold begins visible growth within 48-72 hours in warm, humid conditions. Structural materials absorb water and begin degrading within the first 24 hours. Act immediately, even if it’s 2 AM.
Using standard household fans instead of proper air movers creates a false sense of progress. Professional air movers create directional airflow that speeds evaporation 3-5 times faster than standard fans.
Neglecting hidden moisture in walls and under flooring leads to mold growth that develops invisibly. Without moisture mapping and proper drying equipment, mold develops in hidden spaces. By the time you notice a musty smell, the contamination is extensive and expensive to remediate.
Mixing water mitigation with cleanup too early spreads contamination. Remove wet materials first, then dehumidify and dry the space, then clean and disinfect.
Failing to document damage before cleanup costs you money in insurance claims. Once you’ve removed wet materials, the evidence of damage is gone.
Reoccupying the space before drying is complete exposes your family to mold spores and moisture-related health problems. Humidity readings and moisture meter readings should confirm the space is truly dry before you move furniture back in.
| Mistake | Prevention |
|---|---|
| Delaying extraction | Start removal immediately; call professionals for 24/7 response |
| Using standard fans only | Rent industrial air movers and dehumidifiers |
| Ignoring hidden moisture | Use moisture meters; monitor humidity daily |
| Mixing mitigation and cleanup | Remove wet materials first, then dry, then clean |
| No damage documentation | Photograph everything before cleanup |
| Reoccupying too early | Wait for humidity and moisture readings to normalize |
Water damage recovery depends on speed, proper equipment, and professional expertise when the situation exceeds DIY capacity. The emergency water extraction steps outlined above give you a framework for immediate action, but serious water damage requires professional intervention to prevent secondary damage and mold growth. When water strikes, contact a professional restoration service immediately for 24/7 emergency response, ensuring your home recovers completely and safely.
Frequently Asked Questions
What are the first emergency water extraction steps I should take immediately after water damage occurs?
First, ensure your safety by turning off electricity to the affected area. Then, shut off the water source at the main valve if the damage is from a burst pipe or plumbing failure. Move to higher ground if water is rising. Document the damage with photos for insurance purposes. Remove valuables and wet items to prevent secondary damage. If the water source is contaminated (Category 3 water), evacuate and call professionals immediately. For clean water, you can begin removing standing water using a wet/dry vacuum or submersible pump, but wear appropriate PPE throughout.
How long does water extraction take, and what factors affect the timeline?
Water extraction typically takes 24-72 hours for initial bulk water removal, but complete structural drying can require 3-7 days depending on factors like water volume, affected area size, humidity levels, and ventilation. Category 1 clean water extracts faster than Category 2 or 3 contaminated water. Professional teams using industrial dehumidifiers, air movers, and moisture mapping can accelerate the process. The type of materials affected, porous materials like drywall and carpet retain moisture longer than non-porous surfaces. Seasonal humidity and temperature also impact drying time significantly.
When should I call professional water damage restoration instead of handling it myself?
Call professionals immediately if water is Category 2 or 3 (contaminated or sewage-related), if structural damage is visible, if water has affected more than 100 square feet, or if mold is present. Professional intervention is essential when water has reached electrical systems, HVAC units, or insulation. If you lack proper dehumidification equipment, HEPA filtration, or moisture detection tools like hygrometers and moisture meters, professionals with IICRC-trained technicians can prevent secondary damage and mold remediation costs. For Category 1 clean water in small areas, DIY extraction is possible, but professionals ensure compliance with IICRC standards and proper sanitization.
What water extraction safety precautions must I follow to protect myself?
Always wear appropriate PPE including nitrile gloves, N95 or higher respirator, rubber boots, and protective clothing before entering water-damaged areas. Assume all water is potentially contaminated until verified otherwise. Never enter standing water without checking for electrical hazards, turn off power at the breaker if water is near outlets or appliances. Use a wet/dry vacuum or submersible pump rated for the water type. Ensure proper ventilation and air movers to prevent mold spore inhalation. If you experience any health symptoms during extraction, leave immediately and seek professional help with antimicrobial treatment expertise.
This article was written using GrandRanker