
Table of Contents
- What Causes Mold Growth in Homes
- Step 1: Identify Signs of Moisture Problems in Walls and Surfaces
- Step 2: Trace Water Damage and Locate the Source
- Step 3: Check Humidity Levels and Ventilation
- Hidden Mold Detection Tools and Equipment
- Hiring a Professional Mold Inspector
- Finding the Root Cause of Mold: Common Culprits
- Why Addressing Root Cause Matters More Than Surface Cleaning
Last Updated: August 8, 2026
What Causes Mold Growth in Homes
Mold grows wherever moisture persists long enough for spores to colonize a surface. The issue isn’t mold itself, it’s the moisture that allows it to thrive. Mold requires three things: moisture, organic material (like wood or drywall), and darkness. Remove one, and mold cannot survive. In homes, moisture is almost always the culprit, entering through leaks, condensing on cold surfaces, or accumulating in poorly ventilated spaces. Once moisture lingers for 24-48 hours on a porous material, fungal growth begins.
The most common mistake homeowners make is treating visible mold without addressing the moisture source. Cleaning the mold works temporarily, but it will return within weeks or months if the underlying moisture problem remains. [Finding the root cause of mold](/mold-removal-decatur-ga-guide/) matters more than the cleanup itself.
Step 1: Identify Signs of Moisture Problems in Walls and Surfaces
Visual indicators reveal moisture problems long before visible mold appears. Water staining, discoloration, soft spots in drywall, and peeling paint all point to moisture issues.
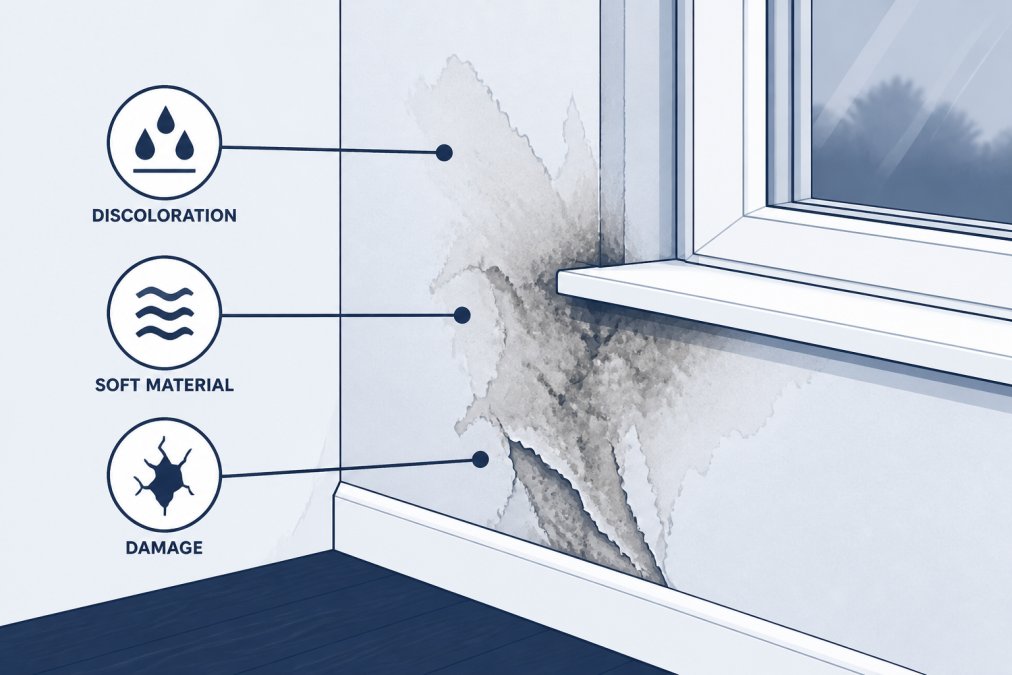
Visual indicators to look for
Water staining appears as brown, yellow, or gray discoloration on walls, ceilings, or around windows, spreading outward from the water entry location. Soft or spongy drywall indicates water saturation, press suspect areas and if the material feels mushy, moisture has compromised the structure. Peeling paint or wallpaper signals moisture moving through the wall. Efflorescence, white chalky deposits on concrete or masonry, indicates active moisture migration. Musty odors often precede visible mold growth.
Areas most prone to moisture damage
Bathrooms lack adequate ventilation and collect water from showers. Attics suffer from roof leaks and poor ventilation, causing condensation on the roof underside. Crawlspaces and basements are moisture magnets where soil moisture wicks through concrete and groundwater seeps during heavy rain. Windows and doors are thermal bridges where condensation collects at sills. Laundry rooms and kitchens generate moisture from appliances, especially dryer vents that exhaust indoors.
Step 2: Trace Water Damage and Locate the Source
Once you’ve identified moisture problems, trace water damage to its origin. Water doesn’t always travel in a straight line, it follows gravity, cracks, and the path of least resistance.
Common water entry points
Roof leaks from missing shingles, deteriorated flashing, and ice dams are the most obvious source. Window and door leaks occur around frames as caulking deteriorates. Foundation cracks and poor drainage allow groundwater seepage into basements and crawlspaces. Plumbing leaks hidden inside walls drip slowly for months before causing visible damage. Condensation on HVAC ducts, pipes, and air conditioning evaporator coils drips water into attics and crawlspaces.
Following the moisture trail
Start at visible damage and work backward. If you see a water stain on a ceiling, look directly above in the attic for roof leaks, condensation, or moisture on insulation. For wall stains, check both sides, exterior stains suggest roof or window leaks, while interior stains suggest condensation or hidden pipe leaks. Trace moisture downward since water always flows down due to gravity. Check for signs of water travel along framing, appearing as staining in lines following the wood grain.
The root cause of mold is almost never where you first see it. Water enters from outside or condenses on a cold surface, then travels through the building envelope before pooling and creating mold growth somewhere downstream. Finding where the water originates requires systematic investigation.
Step 3: Check Humidity Levels and Ventilation
Condensation is mold’s silent partner. Excess humidity creates the moisture that mold needs. Measuring relative humidity and evaluating ventilation reveals whether indoor moisture levels are promoting fungal growth.
Measuring relative humidity with a hygrometer
A hygrometer measures relative humidity, the amount of moisture in air compared to how much it can hold at that temperature. A basic hygrometer costs under $20. Healthy indoor relative humidity ranges between 30% and 50%. Above 50%, condensation begins forming on cold surfaces. Above 60%, mold growth accelerates.
Take humidity readings in multiple locations: bathroom, kitchen, basement, crawlspace, and bedrooms. High readings in specific rooms point to localized moisture generation. Record readings at different times of day, humidity spikes after showers or cooking. If morning readings consistently exceed 60%, ventilation isn’t removing moisture fast enough.
Evaluating HVAC and air circulation
Check that bathroom exhaust fans vent outside, not into the attic. Verify that dryer vents outside, venting indoors pumps enormous moisture directly into the home. Evaluate whether your HVAC system runs frequently enough to manage indoor humidity. In humid climates, air conditioning should run continuously during warm months to remove moisture.
Check ductwork for condensation. If ducts are cold, they’ll sweat and water drips into the space below. Insulating ducts or routing them through conditioned space solves this. Poor air circulation in crawlspaces compounds moisture problems, a simple crawlspace fan or dehumidifier can dramatically reduce humidity.
Hidden Mold Detection Tools and Equipment
Finding the root cause sometimes requires tools beyond visual inspection. Moisture meters and thermal imaging reveal hidden moisture you can’t see.
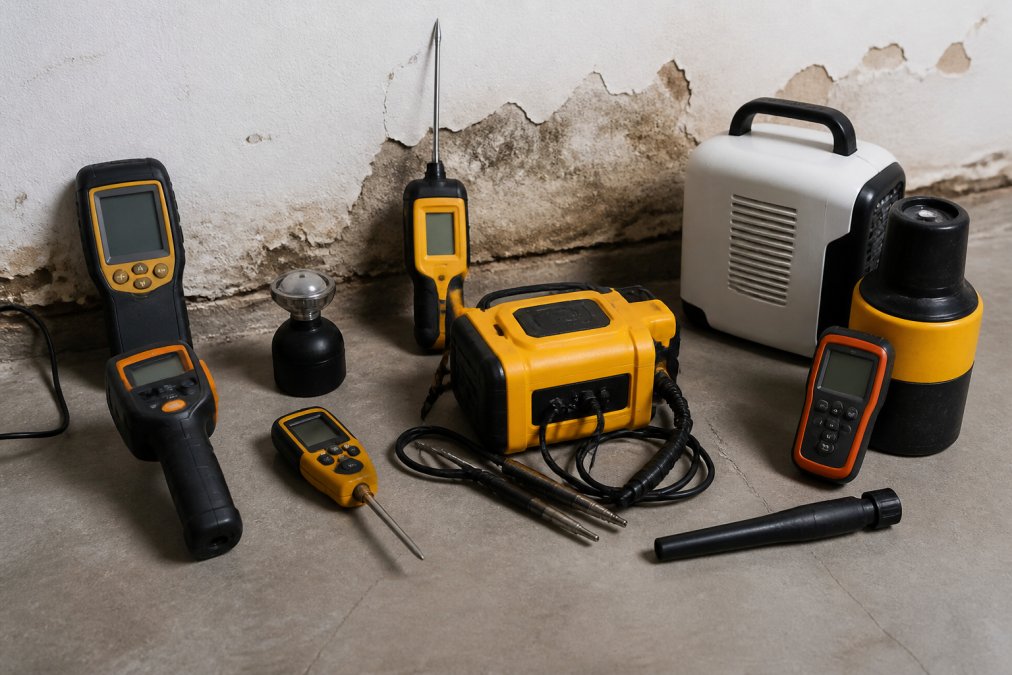
Moisture meters and thermal imaging
A moisture meter measures water content in wood and materials. Pin-type meters have two small probes you press into suspect areas, readings above 20% moisture content in wood suggest active water damage. Moisture meters confirm what your eyes suspect and map moisture levels across a wall to find the leak epicenter.
Thermal imaging cameras show temperature differences on surfaces. Water-saturated materials are cooler than dry materials because evaporating water absorbs heat. A thermal camera reveals wet spots not yet visible to the naked eye, particularly useful for finding roof leaks, window leaks, and condensation patterns. Thermal imaging also reveals thermal bridging, cold spots on interior surfaces where insulation is missing, which attract condensation and promote mold growth.
A basic moisture meter costs $30-$100. Thermal imaging cameras range from $300 for consumer models to $2,000+ for professional-grade equipment.
When to use professional-grade diagnostics
Hire a professional if you’ve found visible mold but can’t locate the moisture source after your own investigation. If you’ve had water damage and want to confirm drying was complete before closing up walls, a professional inspection provides documentation. For expensive properties or commercial spaces, professional diagnostics justify their cost. If you’re selling your home and inspection revealed mold, a professional assessment provides the clearance documentation that buyers’ lenders require.
Hiring a Professional Mold Inspector
When investigation exceeds your comfort level, or when you need documentation for insurance or real estate purposes, a professional mold inspector brings expertise and credibility.
What IICRC certification means
The Institute of Inspection, Cleaning and Restoration Certification (IICRC) is the industry standard for water damage and mold restoration professionals. IICRC-certified technicians have completed training in moisture detection, water damage assessment, and mold remediation. When hiring a professional, verify they hold current IICRC certification and ask specifically what certifications they hold.
Questions to ask before hiring
Ask how the inspector will locate the root cause of mold, not just identify visible growth. Will they use moisture meters, thermal imaging, or other diagnostic tools? Request references from past clients with similar moisture problems. Inquire about their process for documenting findings, you should receive a written report with photos, moisture readings, and specific recommendations.
Ask whether they’ll coordinate with your insurance company. Verify that the inspector is independent and doesn’t profit from recommending unnecessary remediation.
Finding the Root Cause of Mold: Common Culprits
Most mold problems trace back to a handful of moisture sources.
Roof leaks and attic moisture
Roof leaks are the single most common cause of mold in homes. Missing or damaged shingles, deteriorated flashing, and ice dams allow water to penetrate the roof deck. Water travels along framing before dripping inside, sometimes far from the actual entry point.
Attic ventilation problems create a different moisture scenario. Warm, moist air from living spaces rises into the attic and condenses on the underside of the roof in winter. Inadequate insulation makes this worse, warm air rises directly into the attic instead of being blocked by the insulation layer.
The fix requires addressing both the leak and ventilation. Repair roof damage and ensure the attic has adequate soffit and ridge vents. Proper insulation prevents warm air from rising into the attic.
Crawlspace seepage and poor drainage
Crawlspaces are moisture collection zones where soil moisture wicks up through concrete and groundwater seeps through foundation walls during heavy rain. Many crawlspaces lack proper vapor barriers, allowing soil moisture to evaporate directly into the crawlspace air.
Inadequate crawlspace ventilation compounds the problem. Open vents in summer actually increase moisture as warm, humid outside air enters and condenses on cool surfaces. Modern best practice is to seal crawlspace vents and use a dehumidifier.
The solution involves multiple steps: improve drainage around the foundation by sloping the grade away and extending downspouts, install a proper vapor barrier on the crawlspace floor, and add a dehumidifier. For serious seepage, interior or exterior drain tile systems may be necessary.
Leaking pipes and condensation issues
Hidden plumbing leaks are insidious. A pinhole leak in a copper supply line can drip for months inside a wall cavity before causing visible damage. Condensation on pipes in summer attracts water that drips onto framing below. Wrapping pipes with foam insulation prevents condensation.
The air conditioning evaporator coil can also be a moisture source. If the coil isn’t properly insulated or if the drain line is clogged, water drips into the attic or crawlspace. Regular HVAC maintenance prevents this problem.
If you discover active mold growth (black or dark green patches spreading across surfaces), do not attempt to clean it yourself without protective equipment. Disturbing mold releases spores into the air, which can spread the infestation and cause respiratory issues. For mold coverage larger than 10 square feet, hire a [professional remediation contractor](/mold-removal/).
Why Addressing Root Cause Matters More Than Surface Cleaning
The temptation when you discover mold is to clean it. Bleach and commercial mold cleaners kill visible mold quickly, but they don’t address the moisture that allowed the mold to grow. Without fixing the root cause, the problem returns within weeks or months.
Surface cleaning is a temporary fix masquerading as a solution. You’re treating the symptom, not the disease. The moisture is still there, still creating ideal conditions for fungal growth. This cycle becomes expensive, you clean, the mold returns, you clean again.
Addressing the root cause requires identifying and fixing the moisture source. Does the roof leak? Repair it. Is the crawlspace damp? Install a vapor barrier and dehumidifier. Is condensation forming on windows? Improve ventilation and reduce indoor humidity. Is a pipe leaking? Fix or replace it.
Once the moisture source is eliminated, mold cannot survive. The existing mold may still need cleaning, but it won’t return. You’ve broken the cycle. The investment in proper diagnosis and root cause remediation pays dividends in prevention. A home that stays dry stays healthy. Your property value and indoor air quality remain intact.
Addressing the root cause of mold requires patience and systematic investigation, but it’s the only approach that delivers lasting results. Whether you tackle the investigation yourself or hire a professional, the goal remains the same: find where the water is coming from, stop it, and remove the conditions that allow mold to thrive.
| Investigation Step | Tools Needed | Expected Timeline | When to Call a Professional |
|---|---|---|---|
| Visual inspection for stains and soft spots | Eyes, flashlight | 1-2 hours | If you find extensive damage or can’t locate the source |
| Humidity measurement | Hygrometer | 2-4 hours (multiple readings) | If readings consistently exceed 60% |
| Moisture meter testing | Moisture meter (optional) | 1-2 hours | If you need confirmation before deciding on remediation |
| HVAC and ventilation evaluation | Visual inspection, airflow check | 1 hour | If you suspect inadequate ventilation or ductwork issues |
| Professional mold inspection | Professional equipment (thermal imaging, moisture mapping) | 2-4 hours | If you’ve found mold, need insurance documentation, or are selling |
Frequently Asked Questions
How do I find out where mold is coming from?
Start by inspecting areas with visible moisture, water stains, or musty odors. Check roof leaks, foundation seepage, condensation on windows, and leaking pipes. Use a moisture meter to measure water content in walls and materials. Follow the water trail backward, mold grows where moisture accumulates. If moisture is hidden behind walls or under flooring, a professional with thermal imaging or moisture detection tools can locate the source without invasive inspection.
What are the most common hidden sources of moisture in a home?
Common hidden moisture sources include roof leaks dripping into attic insulation, foundation seepage in crawlspaces, condensation forming on cold surfaces due to poor ventilation, leaking HVAC ducts, plumbing leaks behind walls, and thermal bridging that causes condensation on interior surfaces. Bathrooms and kitchens with inadequate exhaust ventilation are frequent culprits. Basements and crawlspaces are especially vulnerable because groundwater pressure and poor drainage create persistent moisture that supports fungal growth.
When should I hire a professional for mold remediation?
Hire a professional if mold covers an area larger than 10 square feet, if it returns after you've cleaned it, if it's in your HVAC system or crawlspace, or if you cannot identify the root cause yourself. An IICRC-certified mold inspector can perform air quality testing and use advanced diagnostic tools to find hidden moisture sources and structural damage. Professional remediation ensures the root cause is fixed, not just the visible mold, preventing costly recurring problems.
What is the difference between surface mold and structural mold issues?
Surface mold grows on visible areas and can often be cleaned with proper ventilation and moisture control. Structural mold indicates the root cause, moisture penetrating deep into porous materials like drywall, wood, or insulation, and requires finding and fixing the water source. Structural mold compromises building envelope integrity and indoor air quality. Simply cleaning surface mold without addressing the underlying moisture will cause it to return within weeks, making root cause investigation essential for permanent solutions.
This article was written using GrandRanker