
Table of Contents
- Prioritize Safety First When Documenting Fire Damage
- Take Overview and Close-Up Photographs of All Fire Damage
- Create a Room-by-Room Inventory and Home Inventory for Insurance
- Document Structural Damage and Keep Receipts for Emergency Expenses
- Record All Communication With Your Adjuster
- Common Mistakes in Fire Insurance Claims to Avoid
- Fire Damage Insurance Claim Checklist for Complete Documentation
- Conclusion
Last Updated: August 19, 2026
When fire destroys your home, the first instinct is often to clean up and move forward. That impulse can cost you thousands in insurance claims. The difference between a fully reimbursed claim and a partial settlement often comes down to one thing: how thoroughly you documented the damage before anything was touched. This guide covers the 5 best practices for documenting fire damage for insurance that will protect your claim and ensure you capture every detail your adjuster needs to approve your settlement.
At Aquaflame Restores it, we work directly with homeowners and adjusters on fire damage claims daily. We’ve seen what documentation works and what leaves claims vulnerable to disputes. The practices outlined below aren’t just recommendations, they’re the documented standards that insurance companies expect and that public adjusters rely on when fighting for higher settlements.
Prioritize Safety First When Documenting Fire Damage
Before you pick up a camera or notepad, ensure the structure is safe to enter. Have the fire department or a structural engineer confirm the building is safe for entry. Wear appropriate protective equipment: an N95 respirator mask, gloves, and sturdy shoes with thick soles. Bring a flashlight; power may be out.
Document the fire department’s incident report number and the date they cleared the structure. Contact your insurance company immediately after the fire and report the loss within the timeframe specified in your policy, typically within 30 days. Your adjuster may want to observe some of your documentation process or provide specific guidance on what they need to see.
Keep the fire department’s incident report number and clearance documentation in a separate folder. Your adjuster will request these documents as part of the claim file.
Take Overview and Close-Up Photographs of All Fire Damage
Photography is your most powerful documentation tool. High-quality images create an undeniable record of the damage’s extent and severity.
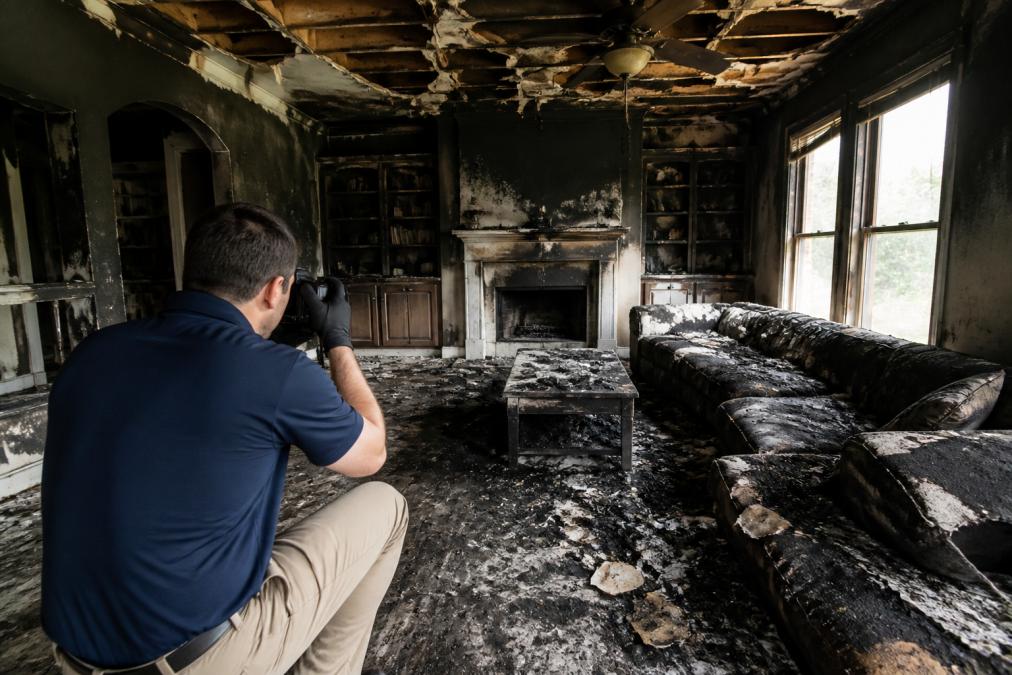
Wide-Angle Photography for Structural Damage
Start with wide-angle shots of each room showing the overall extent of damage. Photograph each room from multiple angles, from each corner and from the doorway. Include ceiling damage, wall damage, and floor damage in the same frame when possible. Capture the damage progression from areas of heavy burning to areas with light smoke damage. Use consistent lighting and include reference objects in photos when possible to give scale to the damage.
Detailed Close-Ups for Soot and Smoke Damage
After capturing wide-angle views, take detailed close-up photographs of soot and smoke damage on walls, ceilings, and surfaces. Photograph soot damage on vertical surfaces (walls), horizontal surfaces (ceilings and floors), and inside cabinets and closets. Capture close-ups of structural damage: charred wood, melted plastic, warped metal, and cracked drywall. Photograph damage to specific high-value items if they remain in the home.
Use your smartphone’s macro or close-up mode for detail shots. Take multiple angles of the same damaged area. Date-stamp all photos using your phone’s built-in feature to create metadata proving when photos were taken.
Do not move debris, clean surfaces, or remove damaged items before photographing them. Adjusters expect to see damage in its original state. Cleaning up before documentation is one of the most common mistakes that weakens insurance claims.
Create a Room-by-Room Inventory and Home Inventory for Insurance
Beyond photographs, a detailed written inventory documents what was lost or damaged. This inventory becomes the basis for your claim for personal property loss.
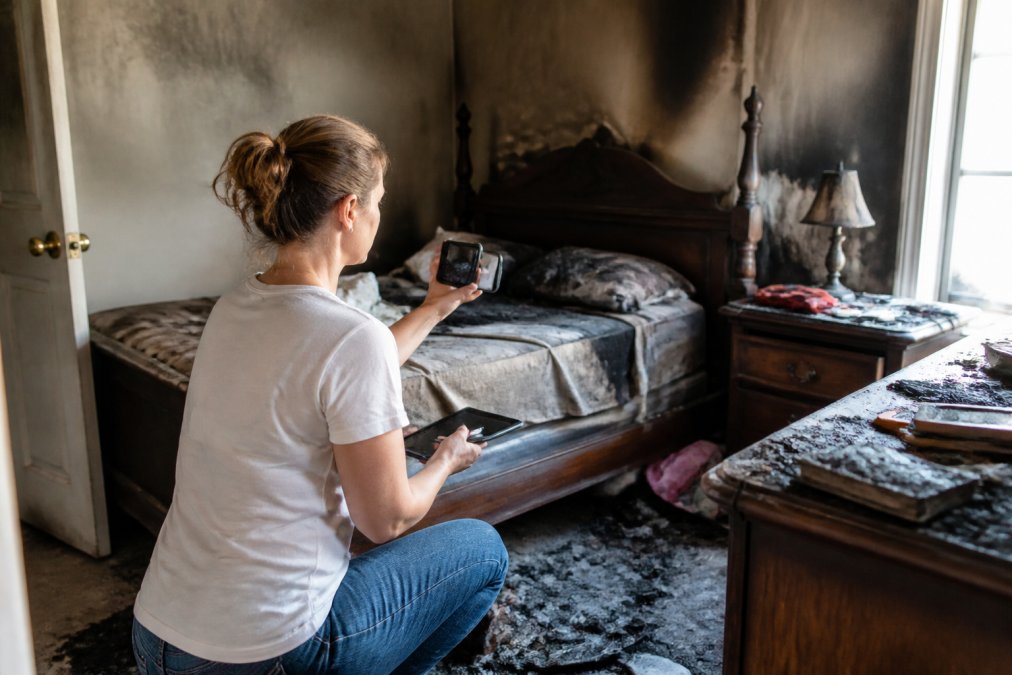
Using Digital Tools for Personal Property Documentation
Digital inventory tools simplify the documentation process and create organized records adjusters can easily reference. The NAIC Home Inventory App is a free tool developed by the National Association of Insurance Commissioners specifically for homeowners creating insurance inventories. It allows you to group belongings by room, photograph items, and export your inventory at any time.
For more comprehensive documentation, Encircle offers a free tier that allows unlimited photo uploads with tagging capabilities. Bevel uses AI to help reconstruct your personal property inventory even from old photos if you lost everything and struggle to remember what was in your home.
Use your smartphone to photograph items as you list them. Organize photos by room and category. Include close-ups of valuable items showing brand, model, and condition before the fire.
Organizing Your Inventory by Category and Location
Structure your inventory by room first, then by category within each room. Create a spreadsheet or use a note-taking app to list items by room and category:
| Room | Category | Item | Quantity | Estimated Value | Condition Before Fire | Notes |
|---|---|---|---|---|---|---|
| Master Bedroom | Furniture | Queen bed frame | 1 | $800 | Good | Solid wood, 8 years old |
| Master Bedroom | Clothing | Winter coats | 5 | $1,500 | Good | Designer brands, 2-3 years old |
| Kitchen | Appliances | Refrigerator | 1 | $1,200 | Good | Stainless steel, 5 years old |
For each item, note the quantity, estimated value, and condition before the fire. If you have receipts for major purchases, attach photos of the receipts to your documentation file. For items you can’t recall exactly, estimate based on similar items currently available for purchase.
Document Structural Damage and Keep Receipts for Emergency Expenses
Structural damage determines whether you’re filing a partial loss or total loss claim. Clear documentation of structural integrity issues prevents adjusters from underestimating repair costs.
Capturing Evidence of Structural Integrity Issues
Photograph damage that affects the home’s structural integrity: charred beams, cracked foundations, warped framing, melted roof decking, or compromised wall studs. Document water damage from firefighting efforts separately from fire damage. If you hire a structural engineer or restoration contractor to assess damage before the adjuster arrives, request a written report with photos and findings.
Keep photos of the home’s exterior, including roof damage, siding damage, and any breaches in the building envelope.
Tracking Emergency Costs and Mitigation Expenses
After a fire, you’ll incur emergency expenses: temporary housing, emergency board-up services, debris removal, water extraction, and emergency repairs to prevent further damage. Keep receipts for all of these costs. verify roof damage.
Your insurance policy typically covers reasonable mitigation expenses, costs incurred to prevent additional loss. Create a folder for all receipts and invoices related to emergency response and mitigation. Photograph or scan receipts before they fade. For large emergency expenses, request itemized invoices from contractors.
Emergency mitigation expenses are typically covered by insurance as part of the claim, not subject to your deductible. Document these costs separately from reconstruction costs.
Record All Communication With Your Adjuster
Every conversation with your insurance adjuster creates potential disputes later. Document these interactions thoroughly to protect yourself and create a clear record of what was promised or discussed.
Create a communication log with the date, time, adjuster’s name, and a summary of what was discussed. Include what damage the adjuster inspected, what documentation they requested, what timeline they provided, and any promises about coverage or payment.
If your adjuster visits the property, take photos of them inspecting damage. Request written confirmation of important discussions. If your adjuster says something will be covered, ask them to put it in writing via email. Keep all written communication from your insurance company, emails, letters, claim documents, and estimates organized chronologically.
If your adjuster seems to be undervaluing damage or denying coverage you believe is justified, request a detailed written explanation.
Common Mistakes in Fire Insurance Claims to Avoid
Understanding what weakens fire insurance claims helps you avoid costly errors that reduce your settlement.
Cleaning Up Before the Adjuster Arrives
This is the single most common mistake homeowners make. Once you’ve cleaned, shoveled debris, or thrown away damaged items, that evidence is gone. Adjusters cannot see what was there before and may assume damage was less severe than it actually was.
Wait for the adjuster to inspect the property before removing anything. If you must remove debris for safety reasons, photograph it in place first and document what you removed and why.
Failing to Document Everything Thoroughly
Adjusters rely on your documentation to understand what was damaged. Incomplete documentation leads to incomplete claims. Document every room, including hallways, closets, and storage areas. Smoke and soot migrate throughout a structure. Photograph damage to items adjusters might overlook: HVAC systems, ductwork, insulation, wiring, and plumbing.
Neglecting to File a Proof of Loss Form
A proof of loss form is a formal, sworn statement listing all property damaged or destroyed and the amount of loss. This form is required by most insurance policies and is the official basis for your claim settlement.
File your proof of loss form only after you’ve completed your documentation, photographs, inventory, receipts, and structural assessment. The proof of loss form must be accurate and complete. If you later discover additional damage, you may not be able to add it to the claim.
Fire Damage Insurance Claim Checklist for Complete Documentation
Use this checklist to ensure you’ve completed all necessary documentation steps before submitting your claim.
Pre-Claim Documentation Steps
Before the adjuster arrives, complete these documentation tasks:
- Confirm the structure is safe for entry (fire department clearance obtained)
- Wear protective equipment (N95 mask, gloves, sturdy shoes)
- Photograph all rooms from wide-angle and close-up perspectives
- Date-stamp all photographs with your phone’s built-in feature
- Document soot and smoke damage on walls, ceilings, and inside cabinets
- Photograph structural damage: charred wood, cracked drywall, warped framing
- Photograph damage to roof, exterior siding, and windows
- Create a room-by-room inventory of personal property
- Photograph valuable items showing brand, model, and condition
- Collect receipts for major purchases (electronics, furniture, appliances)
- Keep receipts for all emergency expenses and mitigation costs
- Report the loss to your insurance company within the required timeframe
- Request written confirmation of the adjuster’s appointment date and time
During-Claim Documentation Checklist
When the adjuster inspects the property:
- Be present during the inspection to answer questions
- Take notes on what the adjuster examines and comments
- Ask the adjuster to clarify what they consider significant damage
- Request written confirmation of any promises about coverage
- Photograph the adjuster inspecting damage (with permission)
- Provide copies of your documentation (photos, inventory, receipts)
- Ask about the timeline for the claim decision
- Request a detailed written estimate or damage assessment
- Clarify any areas of disagreement about damage valuation
- Ask about coverage for emergency mitigation expenses
- Request the adjuster’s contact information and claim number
Post-Claim Follow-Up Documentation
After the adjuster’s inspection:
- Organize all documentation in a dedicated folder or digital file
- Create a communication log of all conversations with the adjuster
- File your proof of loss form with detailed, accurate information
- Reference your photographs and inventory in the proof of loss
- Keep copies of all written communication from the insurance company
- Monitor the claim status and follow up if deadlines are missed
- If coverage is disputed, request a written explanation
- Gather additional documentation if the adjuster requests it
- Prepare for appeal if the settlement offer is inadequate
Documenting fire damage thoroughly takes time, but it directly determines your claim settlement. The practices outlined above, prioritizing safety, capturing comprehensive photographs, creating detailed inventories, documenting structural damage, and recording all communication, are the standards adjusters expect and that strengthen your position when disputes arise.
When fire damage affects your home, Aquaflame Restores it can manage the entire restoration process while you focus on documentation and claims. Our IICRC-trained technicians work directly with insurance adjusters, handle direct insurance billing, and provide the detailed documentation your claim requires. With our 30-minute arrival guarantee and 24/7 emergency response, we ensure mitigation begins immediately while you’re still gathering evidence. Contact Aquaflame Restores it for emergency fire damage restoration and let our team support your claim from start to finish.
Frequently Asked Questions
Should you clean up fire damage before the adjuster arrives?
No. Avoid cleaning up fire damage until the adjuster has inspected and documented everything. Removing debris, soot, or damaged items eliminates evidence the adjuster needs to assess your claim. Take photos and videos to preserve the scene, but do not discard or move items. Once the adjuster completes their inspection, you can begin mitigation and cleanup with documentation of expenses.
How do I create a home inventory for insurance that will hold up in a claim?
Create a detailed room-by-room inventory with photos and descriptions of each item, including purchase date, price, and serial numbers where applicable. Use tools like the NAIC Home Inventory App or HomeZada to organize items by category. Store receipts, warranty documents, and photos in a separate location (cloud storage or safe deposit box) so they survive the fire. Include personal property like furniture, electronics, clothing, and jewelry with estimated replacement costs.
What is the Proof of Loss form and why is it critical?
The Proof of Loss is a formal document you submit to your insurance company listing all damaged or destroyed items and their values. It is required by most insurance policies and serves as the official claim record. Incomplete or delayed Proof of Loss forms can delay claim settlement or result in denial. Include detailed descriptions, purchase dates, and replacement costs for each item. Work with your adjuster or public adjuster to ensure accuracy before submitting.
What documentation do I need to prove the value of items lost in a fire?
Provide receipts, credit card statements, bank records, photos from before the fire, warranty documents, and appraisals for high-value items like jewelry or art. If original receipts are unavailable, use comparable items from retailers to establish replacement cost. For older items, document depreciation and actual cash value separately from replacement cost. Your insurance company may accept photos from holiday cards, real estate listings, or social media showing items in your home before the fire.
This article was written using GrandRanker