
Table of Contents
- Secure Your Property and Ensure Safety First
- Document and Photograph Damage Before Any Repairs
- Create a Home Insurance Claim Documentation Checklist
- File Your Claim Promptly and Understand Your Claim Number
- Work Effectively With Your Insurance Adjuster Home Damage Estimate
- Review Your Policy Coverage, Limits, and Exclusions
- Navigate Supplemental Insurance Claims for Additional Damage
- Understand Your Insurance Claim Repair Payment Schedule
- Frequently Asked Questions
Last Updated: October 10, 2026
Secure Your Property and Ensure Safety First
When disaster strikes, prioritize safety first. Stabilize the property and protect your family before thinking about reconstruction. To manage insurance claims effectively, start by securing what matters most.
Stop any active water leaks or fires immediately if it’s safe to do so. Turn off electricity to wet areas. Move away from structural damage. Call emergency services if anyone is injured.
Once immediate dangers are controlled, document your emergency actions with photos of temporary fixes like tarps or boarded windows. Your insurer needs proof you mitigated further damage.
Contact Aquaflame Restores it for emergency stabilization. Our 24/7 response team arrives within 30 minutes to secure your property.
Keep a record of every emergency action you take. Photos and timestamps prove you acted quickly to prevent additional loss, this strengthens your claim and shows good faith to your insurer.
Document and Photograph Damage Before Any Repairs
Photographic evidence is the backbone of your claim. Take photos and videos of every affected area before repairs begin.
Photograph all damaged areas from multiple angles, including close-ups and reference objects for scale. Capture water lines, burn marks, mold growth, and structural issues.
Video also helps: walk through damaged rooms slowly, narrating what you see to show extent of loss.
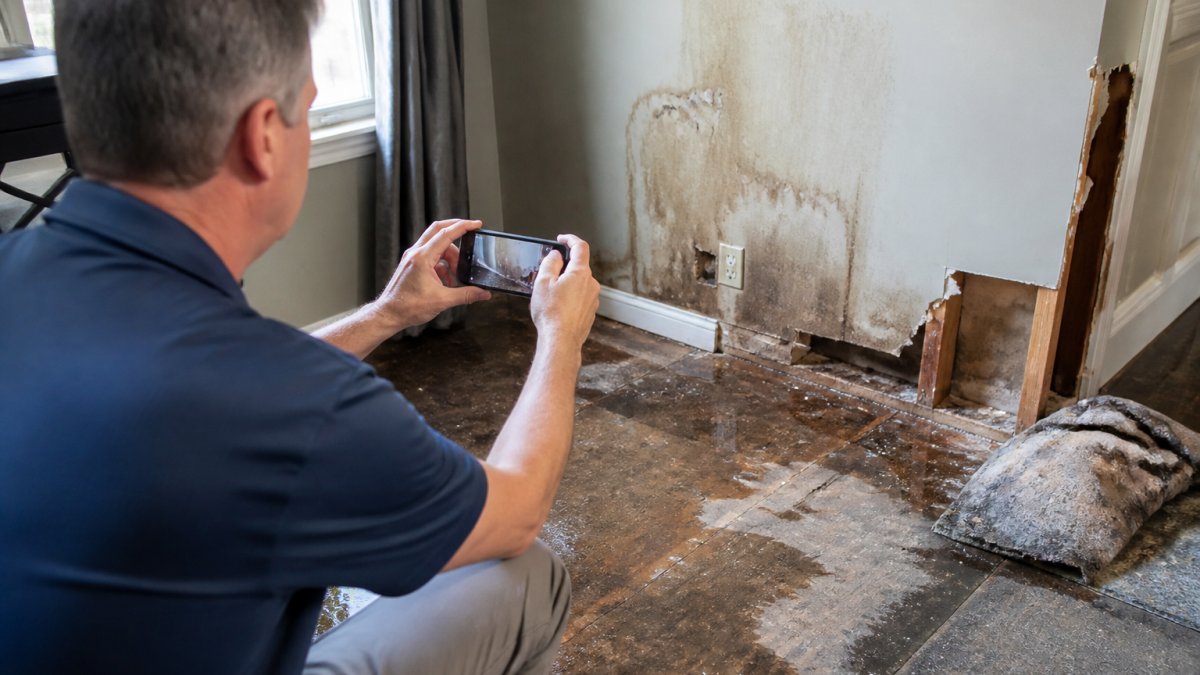
Store images and videos in multiple places: cloud backup, email, external drive. Label files with dates and room names.
Photograph damaged belongings, furniture, electronics, clothing, personal items, showing what was there and its condition after damage.
Do not throw away damaged items before your adjuster inspects them. Removing evidence can hurt your claim. Keep damaged materials available for inspection, even if they look unsalvageable.
Create a Home Insurance Claim Documentation Checklist
Keep all documents in one place. Your adjuster will ask for proof of loss, receipts, repair estimates, and communication records.
Gather these items before filing:
- Original insurance policy documents
- Photos and videos of all damage
- List of damaged items with descriptions
- Receipts for emergency repairs or temporary fixes
- Contractor estimates for reconstruction
- Proof of home value (tax assessments, appraisals, mortgage statements)
- Utility bills showing occupancy
- Maintenance records proving the home was well-kept
Create a folder labeled with your claim number. Add every document, email, and note about your claim.
Keep a written log of all conversations with your insurance company: date, time, person’s name, and discussion details. This creates a paper trail if disputes arise.
A organized claim file moves faster through the approval process. Adjusters spend less time hunting for information and more time assessing your loss. This speeds up settlement.
File Your Claim Promptly and Understand Your Claim Number
To manage insurance claims for home reconstruction, contact your insurance company as soon as it’s safe to do so. Most policies require prompt reporting; delays complicate claims.
Call your insurance company’s claims line. Have your policy number ready. Describe the damage briefly. They’ll assign a claim number and schedule an adjuster inspection.
Your claim number is your reference for everything going forward. Use it in all communication.
Request a copy of your claim file and ask what documents your adjuster needs. Provide them promptly for faster settlements.
Ask your insurance company about temporary living expenses if your home is uninhabitable. Many policies cover hotel stays and meals during reconstruction.
Work Effectively With Your Insurance Adjuster Home Damage Estimate
Your adjuster inspects damage and creates a repair estimate, which becomes the basis for your settlement. Understanding how adjusters calculate costs helps you identify underpayment.
Attend the inspection and document the adjuster’s methodology. Walk through with your adjuster and point out damage they might miss. Ask how they calculated labor rates and material prices, and whether they’re using current market costs. Request a detailed, line-item estimate in writing.
Obtain written estimates from at least two licensed contractors. Compare these line-by-line against your adjuster’s estimate. Significant gaps often appear in these areas:
- Labor rates: Contractors may charge $50-$85 per hour; adjusters sometimes use lower regional averages.
- Material costs: Lumber, drywall, flooring, and electrical materials fluctuate. Older estimates may not reflect current prices.
- Scope differences: Contractors may identify additional work, mold-damaged framing, subflooring, wiring, that the adjuster’s inspection missed.
- Permit and inspection costs: Reconstruction often requires permits and inspections. Adjusters sometimes underestimate or omit these fees.
Understand replacement cost versus actual cash value. Replacement cost (RCV) pays for new materials and current labor rates. Actual cash value (ACV) subtracts depreciation, for example, a 10-year-old roof with $12,000 replacement cost might have $7,000 ACV. Confirm which applies to each component.
Identify code upgrades and ordinance-or-law coverage. Building codes may require upgrades, updated electrical capacity, HVAC efficiency, seismic reinforcement, that cost more than simple replacement. Standard policies don’t cover code-upgrade costs unless your policy includes ordinance-or-law coverage. Review your declarations page or ask your agent.
Request a supplemental estimate when new damage emerges. Contractors often discover hidden mold, structural rot, electrical damage, or foundation issues during demolition. Document with dated photos and contractor notes.
Prepare to defend supplemental claims. Some adjusters resist supplemental requests for mold or structural damage, claiming it was pre-existing. Document the connection between the insured event and newly discovered damage. For example, if roof leak caused hidden mold, document the timeline: roof damage date, water entry path, and mold discovery date.
If your adjuster denies a supplemental claim and you believe the damage is covered, you can request an independent appraisal. An impartial third party (usually a licensed appraiser or engineer) reviews both the adjuster’s estimate and the contractor’s scope, inspects the damage, and issues a binding decision. This escalation option protects you if the adjuster’s estimate is genuinely incomplete.
Align payment schedules with your contractor. Discuss how insurance payments will be structured: initial payment for emergency work, progress payments as phases complete, and final payment after inspection. Clarify whether your contractor will wait for insurance checks or needs upfront payment.
Review Your Policy Coverage, Limits, and Exclusions
Your insurance policy defines what’s covered and what’s not. Understanding these limits prevents disappointment when the claim settles.
Read your policy carefully and note coverage limits for dwelling, personal property, and additional living expenses.
Identify exclusions, flood, earthquake, wear-and-tear, certain mold types. Know what’s excluded before filing.
Replacement cost coverage pays for new repairs at current prices. Actual cash value subtracts depreciation. Most homeowners prefer replacement cost.
Ask your insurance company what documentation proves your home’s value. Tax assessments and appraisals support higher settlements.
Review your deductible, what you pay before insurance kicks in. Higher deductibles mean lower premiums but larger out-of-pocket costs.
Navigate Supplemental Insurance Claims for Additional Damage
Supplemental insurance claims happen when reconstruction reveals damage the original estimate missed. This is common in water and fire losses.
Hidden damage appears once demolition starts. Mold behind walls. Structural rot. Electrical damage. These discoveries justify supplemental claims.
Document new damage with photos. Have your contractor note it in writing. Send this to your adjuster with a request for a supplemental estimate.
Your adjuster reviews the supplemental claim and either approves additional payment or denies it. Be prepared to defend why the damage qualifies as covered loss.
Some adjusters resist supplemental claims. If yours does, you can request an independent appraisal. An impartial third party reviews both estimates and makes a binding decision.
Aquaflame Restores it manages direct insurance billing, which simplifies supplemental claims. We coordinate with your adjuster throughout reconstruction, documenting additional damage as it’s discovered. This keeps your claim current and prevents payment gaps.
Understand Your Insurance Claim Repair Payment Schedule
Insurance companies do not pay the full settlement upfront. Payments come in stages tied to construction progress and inspection milestones. Understanding this timeline prevents cash-flow surprises and keeps reconstruction on track.
Phase 1: Emergency stabilization and initial approval (Days 1-7). The insurer assigns an adjuster who inspects damage within 3-5 business days.
Phase 2: Detailed estimate and supplemental review (Days 7-30). Your adjuster prepares a detailed estimate. You obtain contractor bids and compare them. Submit supplemental claims with supporting documentation if discrepancies exist.
Phase 3: Construction begins and progress payments commence (Weeks 4-ongoing). Your insurer schedules inspections at key milestones: after demolition/framing, after rough-in utilities, after drywall/insulation, and after finishing.
Phase 4: Final inspection and holdback release (End of construction). The adjuster conducts a final walkthrough to verify repairs match the approved scope and meet code.
Proof-of-completion and payment documentation. Your contractor must provide signed-off inspection reports, invoices showing labor and materials, lien waivers from contractor and subcontractors, and photos of completed work.
Total timeline from claim to completion. A typical reconstruction takes 8-16 weeks from initial claim to final payment, depending on damage severity and contractor availability. Emergency stabilization and initial payment: 1-2 weeks.
Payment delays are common. If your adjuster misses an inspection appointment or delays approval, contact your insurance company’s claims manager. Delays can cascade, pushing back contractor payments and extending the reconstruction timeline. Document all communication about delays and follow up in writing (email) to create a record.
Managing contractor payment expectations. Discuss the payment schedule with your contractor before work begins. Clarify:
- Whether the contractor will wait for insurance checks or requires upfront payment
- Whether the contractor will finance work if insurance payments lag (and at what interest rate)
- Whether the contractor expects progress payments from you or directly from the insurer
- What happens if the adjuster denies a supplemental claim, will the contractor absorb the cost or bill you?
Some contractors offer direct insurance billing, meaning they bill the insurer directly and you pay only your deductible and any out-of-pocket costs.
Holdback and final payment best practices. Do not release the final holdback until you’ve inspected all work and confirmed it meets your expectations. Walk through the completed home with the contractor and your adjuster. Check that:
- All damaged areas were repaired
- Repairs match the approved scope
- Workmanship is acceptable
- All fixtures and finishes are installed
- The home is clean and ready to occupy
If you find defects, document them in writing and ask the contractor to correct them before you release the holdback. Once you sign off, the insurer releases final payment and your claim closes.
Frequently Asked Questions
What should I do immediately after my home is damaged by fire or water?
First, ensure your safety and that of your family by evacuating if necessary. Once safe, stop further damage if you can do so without risk, turn off water, move belongings away from water, or open windows for ventilation. Call your insurance provider to report the loss within 24 hours. Contact a restoration company like Aquaflame Restores It for emergency mitigation. Document everything with photos and videos before touching anything. Keep all receipts for temporary repairs or emergency expenses; these are often recoverable under your policy.
How do I create a home insurance claim documentation checklist to support my claim?
Your documentation checklist should include: photos and videos of all damage from multiple angles, a written inventory of damaged items with replacement cost estimates, receipts for emergency repairs or temporary fixes, your policy number and coverage limits, repair estimates from contractors, communication records with your insurer and adjuster, proof of loss form completed and signed, and records of any temporary housing or living expenses. Keep originals and digital copies of everything. Submit this documentation to your adjuster promptly, thorough documentation strengthens your claim and speeds settlement.
What happens if my insurance adjuster’s estimate is lower than my contractor’s reconstruction estimate?
This is common and doesn’t mean you’re stuck with the lower amount. Request a detailed breakdown of the adjuster’s estimate and compare it line-by-line with your contractor’s scope of work. Ask your adjuster to explain any exclusions or depreciation applied. If there’s a significant gap, file a supplemental insurance claim for the additional damage or costs discovered during reconstruction. You can also request an appraisal process if you and your insurer cannot agree on the settlement value. Many homeowners benefit from working with a restoration company that handles direct insurance billing and can advocate for fair estimates.
How does the insurance claim repair payment schedule work during reconstruction?
Most insurers issue payments in stages: an initial payment after the adjuster’s inspection (often 80-90% of the estimate), then final payment upon completion and inspection. Some policies include holdback amounts until work is finished. Your restoration contractor typically submits invoices for completed phases, and your insurer pays directly to you or to the contractor if they’re authorized to bill directly. Staged payments protect both you and the insurer, they ensure work quality before final funds are released. Ask your adjuster for the exact payment timeline and any conditions (like receipts or inspector sign-off) required for each payment.