Table of Contents
- Why Mold Grows in Your HVAC System
- Signs of Mold in HVAC System: What to Look For
- Step 1: Turn Off the System and Contain the Area
- Step 2: How to Clean Mold from Air Ducts and Components
- Step 3: Fix the Root Cause to Prevent Recurrence
- HVAC Mold Removal Cost: What Affects the Price
- HVAC Mold Prevention: Keep It from Coming Back
- Frequently Asked Questions
Last Updated: October 17, 2026
Why Mold Grows in Your HVAC System
HVAC mold remediation starts with understanding why mold grows inside an HVAC system: the system itself supplies the three things mold needs: moisture, warmth, and a steady food source.
Your air handler pulls in warm, humid air from the house. That air hits the evaporator coil, which is cold. Water forms.
Add dust and dirt to that wet surface, and you have a food source. Spore counts rise. A musty odor starts drifting from the vents.
A common mistake is assuming mold only grows in visibly wet areas.
The first place we check on any HVAC mold call is the drain pan, not the ducts. A pan holding even a shallow layer of water feeds mold year-round, and most homeowners never look at it.
Signs of Mold in HVAC System: What to Look For
The clearest signs of mold in an HVAC system are a musty odor from the vents, visible dark spots on the return grille or around the air handler, and allergy-like symptoms that ease when you leave the house. One sign alone is not proof, but two or more together justify a closer look.
Telltale Signs You Shouldn’t Ignore
- A musty, earthy smell every time the system runs
- Dark speckling on vent covers, filters, or the air handler cabinet
- Water stains or rust near the drain pan or condensate line
Mold vs. Dust, Dirt, and Discoloration
Mold is a living fungal growth that spreads in damp conditions, while dust and dirt are settled particles that wipe away clean. That difference matters, because it decides whether you clean or call a professional.
| What You See | Likely Cause | How to Tell |
|---|---|---|
| Uniform gray film | Dust on filter or grille | Wipes off easily, no smell |
| Black streaks on vents | Soot or dirt from airflow | Dry to the touch, no odor |
| Fuzzy patches, green or black | Mold growth | Smells musty, grows back after cleaning |
| Brown water rings | Old leak or rust stain | Dry now, but signals past moisture |
If a spot grows back within days of cleaning, treat it as mold until proven otherwise.
Step 1: Turn Off the System and Contain the Area
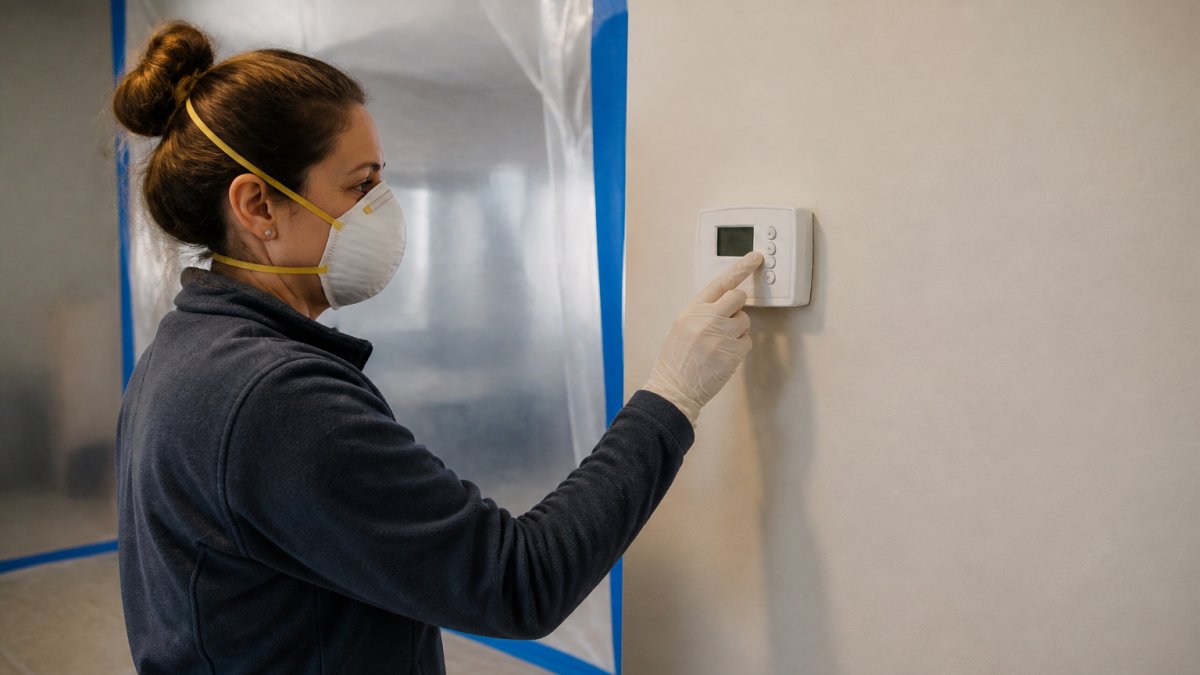
Shut the system down at the thermostat before you touch anything. Running the fan while mold is present pushes spores into every room in the house.
Here is the order we follow on every job:
- Set the thermostat to OFF. Do not just lower it. Cut the fan entirely.
- Switch off power at the breaker serving the air handler.
- Seal doorways and vents in the affected area with 6-mil plastic and tape.
- Put on an N95 mask, gloves, and eye protection before opening any panel.
- Keep occupants, pets, and anyone with breathing conditions out of the space until work is done.
Restarting the system “just to see if the smell clears” is the single most common mistake we see. It spreads spores through the whole house and can turn a small coil job into a full duct cleaning.
Step 2: How to Clean Mold from Air Ducts and Components
HVAC mold remediation starts with the components you can reach, not the ducts themselves. The decision that matters most is material-based: nonporous surfaces can usually be cleaned, while porous materials that have absorbed mold generally cannot. Wiping a porous surface only removes what is on top; the growth stays embedded.
Material-by-Material Decision Guide
| Material | Typical Location | Clean or Replace | Why |
|---|---|---|---|
| Galvanized sheet metal duct | Supply and return runs | Clean | Nonporous; HEPA vacuum then damp-wipe |
| Flexible duct with internal liner | Attic and crawlspace runs | Replace | Porous liner traps spores; cannot be fully cleaned |
| Duct board (fiberglass) | Return plenums, trunk lines | Replace if growth is more than surface dust | Porous; replacement is the reliable fix |
| Drain pan (plastic or metal) | Under evaporator coil | Clean | Nonporous; scrub, rinse, dry fully |
| Evaporator coil fins | Air handler | Clean with coil cleaner | Nonporous; use no-rinse HVAC coil cleaner per label |
| Cabinet interior (sheet metal) | Air handler | Clean | Nonporous; wipe and air dry before closing |
| Filters | Return grille or air handler | Replace | Do not clean and reuse a moldy filter |
A common pattern is that homeowners focus on the visible duct run and miss the return-side liner, which is often the most contaminated porous material in the system. If the liner is wet or shows fuzzy growth, plan on replacement, not cleaning.
Safe Cleaning Sequence for Nonporous Components
- Drain pan: Empty standing water, scrub with mild detergent, rinse, and dry completely. Do not close the cabinet while the pan is damp.
- Evaporator coil: Apply a no-rinse coil cleaner made for HVAC use, following the label directions. Rinse only if the product specifies it.
- Cabinet interior: Wipe down with a damp cloth and mild detergent, then let it air dry fully before reinstalling panels.
- Accessible metal duct runs: HEPA vacuum first, then damp-wipe hard metal surfaces. Do not run the fan during cleaning.
- Filters: Replace them. A moldy filter is not a cleaning candidate.
A diluted white vinegar wipe works on hard surfaces as a follow-up, but it is not a substitute for removing the moisture source. Cleaning products do not fix a wet system.
Containment and Occupant Safety During Cleaning
Containment is not optional. Disturbing mold without containment spreads spores through the house and can turn a small coil job into a full duct cleaning.
- Seal the work area with 6-mil plastic and tape at doorways and vents before opening any panel.
- Use an N95 mask, gloves, and eye protection whenever you open the air handler or disturb duct surfaces.
- Keep occupants, pets, and anyone with breathing conditions out of the space until work is done and surfaces are dry.
When Cleaning Isn’t Enough
Stop and call a professional when any of these are true:
- Mold covers more than a small patch on nonporous surfaces.
- Growth has soaked into duct liner, duct board, or insulation.
- Mold returns within days of cleaning.
Porous materials cannot be cleaned. They have to go. That is where a certified team matters. At Aquaflame Restores it, our IICRC-trained technicians find the moisture source first, then remove contaminated components rather than wiping over them. We also handle direct insurance billing, so you are not stuck managing the claim alone.
Step 3: Fix the Root Cause to Prevent Recurrence
Mold returns because the moisture never stopped. Fixing the source is the only step that keeps it from coming back. Cleaning without correcting the cause is a temporary fix, and most repeat mold calls we handle trace back to a missed root cause.
Work through these checks:
- Clear the condensate drain line. Flush it with water or use a shop vac on the access port.
- Level the drain pan so water drains instead of pooling.
- Repair duct leaks that let humid attic or crawlspace air into the system.
For deeper guidance on moisture control, the U.S. Environmental Protection Agency’s mold guide explains how to find and stop indoor moisture at the source.
HVAC Mold Removal Cost: What Affects the Price
HVAC mold removal cost depends on how far the growth has spread, which materials are affected, and whether reconstruction is needed. A small coil and drain pan cleaning sits at the low end. Full duct replacement plus structural repair sits at the high end.
Pricing varies by scope, so we quote after an inspection rather than over the phone. Factors that move the number:
- Square footage of contaminated ductwork
- Whether duct liner or insulation must be replaced
- Accessibility of the air handler in attic or crawlspace
Insurance Coverage for HVAC Mold
Homeowners insurance sometimes covers mold cleanup when it stems from a sudden, covered event like a burst pipe or appliance failure (Protecting your home from mold). The Insurance Information Institute outlines how property policies typically treat mold claims.
Ask your adjuster one direct question: was the moisture event sudden or gradual? That answer usually decides the claim. We bill insurers directly and document the loss from day one, which keeps the process moving.
HVAC Mold Prevention: Keep It from Coming Back
HVAC mold prevention comes down to moisture control and routine maintenance, but the part most guides skip is diagnosis. Mold returns because the moisture never stopped. A checklist without a root-cause diagnostic is a temporary fix, and most repeat mold calls we handle trace back to a missed root cause. Addressing condensation at the source remains the most effective way to prevent mold on vents and ensure that your system stays clear of recurring growth.
Root-Cause Diagnostic Checklist
Work through these in order. Each one maps to a moisture pathway that feeds mold:
- Condensate drain line: Flush it with water or use a shop vac on the access port. A slow drain keeps the pan wet.
- Drain pan level: Check that the pan slopes toward the drain. Standing water in a level pan feeds mold year-round.
- Duct leaks: Repair joints and seams that let humid attic or crawlspace air into the system. Humid air condenses on cold ducts.
A common pattern is a system that passes a visual inspection but still grows mold because the condensate trap is dry or the return duct pulls humid attic air. Those two causes are easy to miss and cheap to fix.
Routine Maintenance That Actually Prevents Recurrence
- Change the air filter every 1 to 3 months.
- Flush the condensate drain line each season.
- Check the drain pan for standing water monthly.
Verification After Remediation
Cleaning is not the finish line. Before you consider the job done, verify the system is actually dry and mold-free:
- Moisture correction: Confirm the drain pan is dry, the condensate line flows freely, and no duct surfaces are damp.
- Visual inspection: Recheck the coil, pan, cabinet, and accessible duct runs after the system has run for a few days.
- System operation: Run the system and confirm no musty odor returns from the vents.
If mold has already spread beyond a small area, or keeps returning after you clean it, professional remediation is the safer path. Aquaflame Restores it offers 24/7 emergency response with on-site arrival within one hour across metro Atlanta, and our team handles everything from removal to full reconstruction.
Frequently Asked Questions
Can mold be cleaned out of an HVAC system?
Yes, mold can often be cleaned from HVAC systems, but success depends on the extent of contamination and the material affected. Non-porous surfaces like metal ductwork and coils can usually be wiped clean with an EPA-registered antimicrobial or a vinegar solution. Porous materials such as fiberglass duct board and insulation often need to be removed and replaced. Any HVAC mold remediation should include fixing the moisture source, or the mold will return. For widespread growth or contamination inside the air handler, hire an IICRC-certified professional.
How much does HVAC mold remediation cost?
HVAC mold removal cost varies widely based on the size of the contaminated area, the components affected, and whether duct replacement is needed. Pricing depends on the scope of work, access difficulty, and any necessary repairs to the root cause. Most homeowners should request a written estimate after an on-site inspection. Aquaflame Restores It provides transparent quotes and can coordinate direct insurance billing when coverage applies.
Will homeowners insurance cover mold in HVAC?
Coverage depends on the cause of the moisture. Most policies cover mold remediation when it stems from a sudden, accidental event like a burst pipe or appliance leak. Mold that results from long-term neglect or ongoing condensation issues is typically excluded. Document the damage with photos, keep receipts, and file a claim promptly. A restoration company experienced with insurance billing can help you understand what your policy covers and manage the paperwork.
Should you run your HVAC system if you suspect mold?
No. Turn off the system as soon as you suspect mold. Running the HVAC can blow mold spores through the ductwork and into every room, spreading contamination and increasing airborne particles. Shut off the thermostat, seal the affected vents with plastic sheeting if possible, and keep occupants, especially children and anyone with respiratory conditions, out of the area until a professional inspects the system.
Mold in your HVAC system rarely fixes itself, and the longer spores circulate, the further they spread. If you have found visible growth, a musty odor, or repeat problems after cleaning, get a professional inspection before the next cooling season. Aquaflame Restores it brings IICRC-trained technicians, direct insurance billing, and complete reconstruction under one roof, so you are not coordinating multiple contractors. Call our 24/7 team and get your home back to clean, dry air.