
Table of Contents
- Identifying Mold Growth in Your Home
- Safety Precautions and Personal Protective Equipment
- Tools and Supplies You’ll Need for Mold Removal
- Step-by-Step Mold Removal Process
- DIY Mold Removal vs. Professional Services
- Cost of Mold Removal and Insurance Coverage
- Black Mold Removal: Special Considerations
- Mold Prevention: Stopping Future Growth
Mold Removal: A Step-by-Step Guide to Safe Remediation
Last Updated: July 19, 2026
When mold takes hold in your home, the clock starts ticking. Left untreated, fungal growth spreads rapidly through walls, crawlspaces, and HVAC systems, compromising air quality and structural integrity. At Aquaflame Restores it, we’ve managed hundreds of mold removal cases across metro Atlanta. Homeowners who act fast spend less money and face fewer health risks than those who delay. This guide covers identifying mold, assessing whether you can handle it yourself, and knowing when professional remediation becomes essential.
Mold removal requires understanding what you’re dealing with, containing the problem so spores don’t spread, and preventing regrowth through moisture control. The difference between successful remediation and failure within months comes down to addressing the root cause, not just treating the symptom.
Identifying Mold Growth in Your Home
Most homeowners spot mold only after it becomes visible. Telltale signs are black, green, or white fuzzy patches on surfaces, particularly in damp areas like bathrooms, basements, and around windows.
Look for these specific indicators:
- Discoloration on walls, ceilings, or drywall, dark spots that don’t wipe away
- Musty odor, often precedes visible growth
- Water stains or dampness, mold thrives where moisture lingers
- Soft or crumbling drywall, indicates fungal growth has penetrated materials
- Peeling paint or wallpaper, moisture trapped behind surfaces feeds mold
- Condensation on windows or pipes, signals high humidity enabling spore development
Location matters significantly. Surface mold on nonporous materials like tile differs drastically from contamination in porous materials like insulation, drywall, or wood framing.
If you notice a musty smell but see no visible mold, check hidden areas: behind dishwashers, under sinks, inside HVAC ducts, and in crawlspaces. Early detection prevents extensive remediation costs.
Safety Precautions and Personal Protective Equipment
Most DIY attempts fail because people underestimate health risks and skip proper PPE, inhaling spores that trigger respiratory issues, allergic reactions, and serious infections.
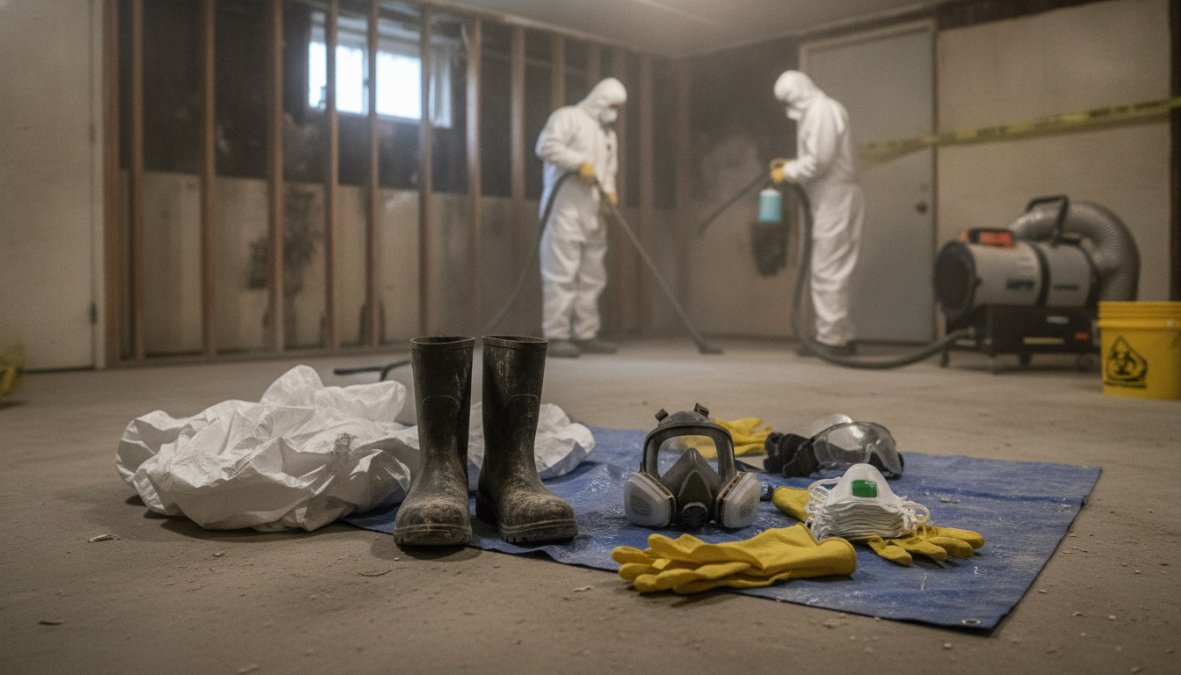
Before touching any moldy surface, gather and wear these items:
- N95 or P100 respirator mask, regular dust masks don’t filter mold spores
- Eye protection, safety goggles prevent spores from entering your eyes
- Nitrile gloves, double-glove for extra protection
- Long-sleeved shirt and pants, minimize skin contact
- Shoe covers or dedicated work shoes, prevent tracking spores through your home
Ventilation is non-negotiable. Open all windows and set up a portable HEPA filtration unit if possible. Never use your home’s central HVAC system during remediation, it will spread spores throughout the house.
If you have asthma, a compromised immune system, or respiratory issues, skip DIY mold removal entirely. Call a professional like Aquaflame Restores it, whose IICRC-trained technicians have proper equipment and protocols.
Mixing bleach with ammonia-based cleaners creates toxic chloramine gas. Never combine cleaning products.
Tools and Supplies You’ll Need for Mold Removal
Proper tools separate successful remediation from incomplete attempts that leave dormant spores ready to regrow.
| Tool/Supply | Purpose | When to Use |
|---|---|---|
| HEPA vacuum | Capture spores from hard surfaces | After initial cleaning |
| Spray bottles | Apply cleaning solutions evenly | For detergent, vinegar, or antifungal treatments |
| Stiff-bristled brush | Scrub surfaces | On drywall, tile, grout, wood |
| Plastic sheeting and duct tape | Create containment barriers | Seal off affected areas |
| Dehumidifier | Lower humidity after cleaning | Essential for preventing regrowth |
| Moisture meter | Measure water content in materials | Verify drywall and wood are dry |
| Heavy-duty garbage bags | Dispose of contaminated materials | Double-bag for safe disposal |
| Cleaning solutions | Kill fungal growth | Detergent, vinegar, or commercial antifungal products |
For small surface mold (less than 10 square feet), basic household items work. For larger infestations or mold in porous materials, use commercial-grade antifungal treatments.
A dehumidifier is critical. Many homeowners clean thoroughly, only to watch mold return within weeks because they didn’t control moisture. Running a dehumidifier for 48-72 hours after remediation prevents this common mistake.
Step-by-Step Mold Removal Process
The mold removal process follows a strict sequence. Skip steps or rush through them, and you’ll either miss hidden contamination or fail to prevent regrowth.
Containment and Ventilation
Start by isolating the affected area to prevent spores from spreading during cleaning.
Step 1: Seal the work area
Use plastic sheeting and duct tape to create a barrier around the moldy section. For bathrooms, seal the doorway and vents. For attics or crawlspaces, close off access points.
Step 2: Set up ventilation
Open windows in the affected area. Position a portable HEPA filtration unit to run continuously. For interior spaces without windows, a HEPA-equipped air scrubber becomes essential.
Step 3: Turn off the HVAC system
Disable central air conditioning and heating during remediation. If you must use them, close and seal all vents in the contaminated area.
Containment takes 30-45 minutes but prevents the entire house from becoming contaminated.
Cleaning Hard vs. Porous Surfaces
The cleaning method depends on what the mold is growing on. Nonporous surfaces like tile and glass respond well to surface cleaning. Porous materials like drywall and insulation often require removal and replacement.
Nonporous surfaces (tile, bathtub, glass, sealed stone):
- Apply a cleaning solution: detergent mixed with water, undiluted white vinegar, or commercial antifungal cleaner
- Scrub with a stiff-bristled brush for 2-3 minutes
- Wipe clean with a damp cloth
- Dry thoroughly with towels or a dehumidifier
- Optional: Apply an antimicrobial sealant to prevent future growth
For stubborn mold on tile grout, a 1:1 bleach-to-water solution works, but use it only as a last resort.
Porous materials (drywall, insulation, wood, carpet):
If mold has penetrated drywall or insulation, removal and replacement is almost always necessary. Surface cleaning doesn’t work because fungal growth extends deep into the material’s structure.
- Cut out the affected drywall section (typically a 2-foot border around visible mold)
- Remove contaminated insulation and dispose in sealed bags
- Allow the cavity to dry completely (48-72 hours with a dehumidifier)
- Install new drywall and insulation
- Seal seams with antimicrobial joint compound
Porous materials with mold deeper than 1/8 inch almost never recover with surface cleaning alone. Removal and replacement is the only reliable solution.
Common Mistakes to Avoid During Remediation
Mistake 1: Painting over mold. Mold grows right through paint. Always clean and dry before painting.
Mistake 2: Using a regular vacuum instead of a HEPA vacuum. Standard vacuums disperse mold spores into the air, making the problem worse.
Mistake 3: Skipping the dehumidifier. Mold thrives in humidity above 50%. Running a dehumidifier for 72 hours after remediation is non-negotiable.
Mistake 4: Not addressing the moisture source. If you clean the mold but don’t fix the leak or ventilation problem, the mold returns within weeks.
Mistake 5: Disturbing mold without containment. Scrubbing moldy surfaces without plastic barriers and HEPA filtration sends spores throughout your home.
Mistake 6: Attempting black mold removal without professional help. Large infestations of black mold require professional remediation with proper containment and disposal.
DIY Mold Removal vs. Professional Services
The decision between handling mold removal yourself and hiring a professional depends on three factors: size, location, and your comfort level.
DIY is appropriate when:
- The mold covers less than 10 square feet
- It’s on nonporous surfaces (tile, glass, sealed stone)
- It’s in accessible areas like bathrooms or kitchen
- There’s no history of regrowth in that location
- You have no respiratory issues or immune compromises
Professional remediation is necessary when:
- Mold covers more than 10 square feet
- It’s in porous materials like drywall, insulation, or wood
- It’s in HVAC systems, crawlspaces, or attics
- You suspect black mold (stachybotrys)
- Previous DIY attempts failed and mold returned
- You have health concerns or respiratory conditions
Aquaflame Restores it handles all levels of mold remediation. Their IICRC-trained technicians identify moisture sources, perform post-remediation verification to confirm spore levels have dropped to acceptable ranges, and provide documentation for insurance claims. The 24/7 emergency response and 30-minute arrival guarantee mean they address active water damage before mold starts growing.
Many homeowners attempt DIY removal, discover it’s more complex than expected, and then hire professionals anyway, paying twice. Getting it right the first time often costs less overall.
Cost of Mold Removal and Insurance Coverage
The cost of mold removal varies based on size, location, and whether structural materials need replacement. Small bathroom mold might cost a few hundred dollars to address yourself. Extensive mold in a crawlspace or attic requiring professional remediation runs into thousands.
Insurance coverage depends on the cause. If mold resulted from a covered peril, like a burst pipe or roof leak, your homeowner’s policy typically covers remediation. If mold developed from poor ventilation or chronic moisture issues, it’s usually not covered.
When you hire a professional like Aquaflame Restores it, they handle direct insurance billing. Their team manages the entire claims process, submits detailed documentation, and ensures the work meets insurance standards. This saves you thousands in out-of-pocket costs.
Before starting any mold removal, contact your insurance agent to clarify what’s covered. Request the claim in writing for documentation.
Black Mold Removal: Special Considerations
Black mold (Stachybotrys chartarum) produces mycotoxins that pose serious health risks, particularly for children, elderly individuals, and people with compromised immune systems. Any black mold infestation warrants professional assessment.
Black mold typically grows in areas with prolonged moisture exposure: crawlspaces with poor drainage, basements after flooding, or attics with roof leaks.
Why black mold requires professional handling:
-
Mycotoxin exposure. Black mold produces compounds that trigger respiratory issues, headaches, and immune system reactions.
-
Hidden extent. Black mold often extends deeper into materials than visible growth suggests. Surface cleaning misses the problem.
-
Proper containment. Disturbing black mold without professional-grade containment spreads mycotoxins throughout your home.
-
Remediation verification. After removal, air quality testing confirms spore levels have returned to normal.
Professional black mold removal involves negative air pressure containment, HEPA-filtered equipment, safe disposal of contaminated materials, and post-remediation air quality testing.
If you suspect black mold, do not attempt DIY removal. The health risks and likelihood of incomplete remediation make professional services essential.
Mold Prevention: Stopping Future Growth
Once you’ve completed mold removal, prevention becomes your priority. Mold regrowth is preventable through moisture control and ventilation.
Control humidity levels:
- Keep indoor humidity between 30-50% using a dehumidifier
- Run exhaust fans in bathrooms during and 30 minutes after showers
- Ensure kitchen exhaust vents to the outside
- Insulate cold water pipes to prevent condensation
Fix moisture sources:
- Repair leaky roofs, gutters, and downspouts immediately
- Grade soil away from your foundation
- Seal cracks in foundation walls and basement floors
- Install sump pumps in basements or crawlspaces with standing water risk
Improve ventilation:
- Open windows on dry days for air circulation
- Clean HVAC filters monthly
- Ensure crawlspace vents are clear
- Install ventilation fans in bathrooms and kitchens
Regular inspection:
- Check under sinks monthly for leaks
- Inspect crawlspaces and attics quarterly, especially after heavy rain
- Look for water stains, soft spots, or musty odors
- Address any moisture issues within 48 hours
Research from the EPA’s mold guidance emphasizes that moisture control is the single most effective mold prevention strategy. You can’t eliminate all mold spores, but you can prevent conditions that allow them to grow.
Mold removal is manageable when you catch it early and understand the process. For surface mold on nonporous materials in accessible areas, DIY remediation works. For extensive infestations, black mold, or mold in structural materials, professional intervention saves time, money, and health risks.
Aquaflame Restores it specializes in comprehensive mold remediation across metro Atlanta. Their IICRC-trained technicians provide 24/7 emergency response with a 30-minute arrival guarantee, handle direct insurance billing, and deliver post-remediation verification documentation. If mold has taken hold in your home or you’re uncertain whether your situation requires professional help, contact Aquaflame Restores it for a free assessment.
Frequently Asked Questions
How much does mold removal typically cost?
Mold removal costs vary significantly based on the extent of contamination, affected surface area, and whether professional remediation is needed. Small DIY projects using basic supplies may cost under $100, while professional mold removal can range much higher depending on the scope. For an accurate quote tailored to your specific situation, contact a certified restoration company that can assess the damage and provide transparent pricing based on your property's unique needs.
Can I remove mold myself, or do I need a professional?
DIY mold removal is possible for small, isolated areas (typically under 10 square feet) on hard surfaces like tile or concrete, using proper PPE and antifungal cleaners. However, if mold has affected porous materials like drywall or insulation, involves black mold, covers a large area, or stems from water damage, professional remediation is strongly recommended. Professionals use HEPA filtration, containment strategies, and proper disposal methods to prevent spore spread and ensure complete removal of the fungal growth.
What kills mold permanently and prevents it from returning?
Effective mold removal requires addressing both the visible growth and its root cause, usually excess moisture. Antifungal treatments and antimicrobial cleaners kill active mold, but permanent prevention depends on controlling humidity levels (below 50%), improving ventilation, fixing water leaks, and using dehumidifiers in damp areas. Hard surfaces can be cleaned with bleach or vinegar solutions, while porous materials often need replacement. Without moisture control, mold will return regardless of the cleaning method used.
How do I know if I have black mold, and is it more dangerous than other mold?
Black mold (stachybotrys) appears as dark, slimy growth and typically develops in consistently wet environments. While black mold can produce mycotoxins, all mold poses health risks through spore exposure and should be treated seriously. The danger depends on the amount, duration of exposure, and individual sensitivity, not solely on the mold type. Any suspected black mold should be handled with strict safety protocols, including full PPE and professional remediation, as disturbing it can release harmful spores into the air.
This article was written using GrandRanker