Table of Contents
- What Complete Restoration from One Team Actually Means
- The Emergency Water Damage Mitigation Timeline: What Happens in the First 24 Hours
- Why IICRC Certified Restoration Services Matter for Your Property
- How to Choose a Disaster Restoration Company: A Vetting Checklist
- Insurance Claim Documentation: What Your Restoration Team Should Handle
- Post-Restoration Maintenance: Protecting Your Property After the Crew Leaves
- Verdict: What the Best Complete Restoration from One Team Looks Like
- Frequently Asked Questions
Last Updated: September 16, 2026
What Complete Restoration from One Team Actually Means
Complete restoration from one team means a single company handles every phase of your recovery: emergency mitigation, structural drying, debris removal, reconstruction, and final walkthrough. You make one phone call, sign one contract, and deal with one project manager from the first hour of damage until the last coat of paint dries.
That definition matters more than it sounds. At Aquaflame Restores it, we’ve watched too many property owners get passed between a mitigation crew that extracts water and a separate general contractor who rebuilds. Each handoff introduces delay, and delay introduces mold. According to FEMA guidance on disaster recovery, secondary damage from delayed mitigation is one of the most common and preventable losses after a water event.
Mitigation vs. Reconstruction: Why the Handoff Matters
Mitigation stops the damage; reconstruction reverses it. Mitigation covers water extraction, structural drying, dehumidification, and site stabilization. Reconstruction covers drywall, flooring, cabinetry, painting, and permits.
The problem is the gap between those phases. A mitigation-only company dries your home, packs up, and hands you a list of contractors to call, leaving you to manage bids, schedules, and insurance paperwork while your kitchen sits half-demolished. A single-team provider closes that gap because the same company already holds the moisture readings, photos, and scope of work.
The handoff between mitigation and reconstruction is where most projects lose time, money, and coverage. One team means one scope of work, one set of documentation, and one party accountable when something slips.
The Emergency Water Damage Mitigation Timeline: What Happens in the First 24 Hours
The emergency water damage mitigation timeline is the sequence of actions a restoration crew takes between your first call and the end of day one. Speed at each stage reduces how much of your property ends up replaced instead of dried.
Hour 1: Emergency Call Response and Site Stabilization
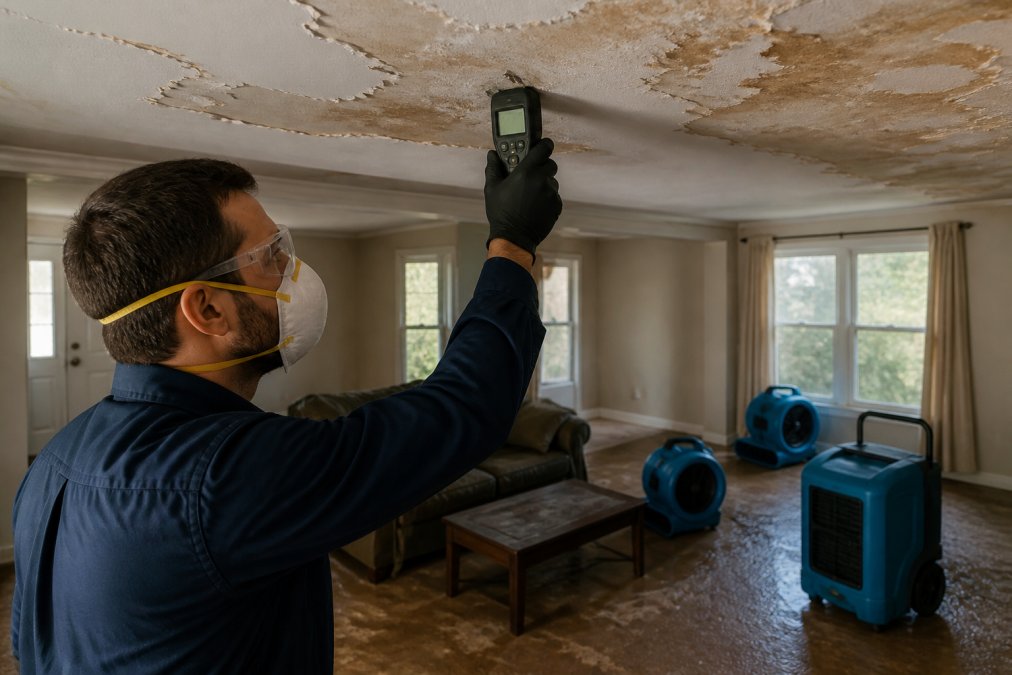
The first hour is about stopping the source and making the property safe. A rapid response team shuts off the water supply, inspects for electrical hazards, and identifies structural risks before moving equipment inside.
Site stabilization includes emergency board-up and tarping when damage came through a roof, window, or exterior wall, without it, rain or wind keeps feeding the loss. Technicians also document initial conditions with photos and thermal imaging, the foundation of your insurance claim.
Hours 2-24: Water Extraction, Structural Drying, and Moisture Mapping
Water extraction comes first, using truck-mounted or portable units to pull standing water from carpets, subfloors, and crawlspaces.
Why IICRC Certified Restoration Services Matter for Your Property
IICRC certified restoration services follow written standards for inspection, drying, and remediation rather than a crew’s personal judgment.
How to Choose a Disaster Restoration Company: A Vetting Checklist
Choosing a disaster restoration company comes down to verifying four things before you sign: licensing, insurance, certifications, and how they handle the insurance side.
Step 1: Verify the License, Not Just the Claim of One
Every state that licenses contractors publishes a public lookup tool, usually through the department of licensing or contractor registration board.
Step 2: Read the Certificate of Insurance
- General liability coverage with limits appropriate to residential or commercial work
- Workers’ compensation coverage for every person who will enter your property
- The policy effective dates, so you know coverage is current
Step 3: Confirm IICRC Certifications by Name
- WRT (Water Damage Restoration Technician) for water losses
- ASD (Applied Structural Drying) for complex drying projects
- FSRT (Fire and Smoke Restoration Technician) for fire and smoke
- AMRT (Applied Microbial Remediation Technician) for mold
Step 4: Pressure-Test the Insurance Handling
- Photograph and video the loss before, during, and after mitigation
- Log moisture readings daily with a calibrated meter
- Produce a line-item scope of work using industry estimating software
- Communicate with the adjuster directly rather than routing everything through you
Step 5: Watch for These Red Flags
The most expensive mistake homeowners make is signing with a mitigation-only crew that offers a “trusted contractor” referral for the rebuild. That referral usually means a second contract, a second schedule, and no single party accountable when the drying wasn’t sufficient. Ask about reconstruction before the first fan gets plugged in.
Questions to Ask Before You Sign Anything
Save the license number, COI, and certification numbers in one folder on your phone before work starts. If a dispute arises later, that folder is your evidence trail.
Insurance Claim Documentation: What Your Restoration Team Should Handle
Insurance claim documentation is the paper trail that determines what your carrier pays.
The Documentation Checklist Your Team Should Produce
- Pre-mitigation photos and video of every affected room, including closets, cabinets, and the underside of flooring where accessible
- Thermal imaging and moisture meter readings taken at the start of the job and daily until dry standard is reached
- A moisture map showing where water traveled, including wall cavities and subfloor areas that look dry on the surface
- A line-item scope of work listing affected materials, quantities, and the method of repair or replacement
- Daily drying logs with equipment placement, run times, temperature, and relative humidity readings
- Disposal documentation for damaged materials removed from the property
- Post-mitigation verification showing the structure reached dry standard per the applicable IICRC standard
What You Should Document Yourself
- Photograph every affected area before anything is moved or removed
- Photograph the source of the loss (the burst supply line, the failed A/C drain pan, the roof penetration)
- Keep a written timeline of when you noticed the damage, when you called, and when the crew arrived
- Save every email, text, and voicemail from the restoration company and the adjuster
- Keep receipts for any out-of-pocket costs, including temporary lodging, meals, and replacement of essentials
- Photograph the serial and model numbers of any appliance or system that failed
Most carriers allow additional living expense (ALE) coverage when a home is uninhabitable. That coverage is almost always reimbursed only with receipts, so keep every one, even small ones.
How Direct Insurance Billing Actually Works
Direct insurance billing changes the experience.
When Documentation Matters Beyond the Claim
The claim does not move on the strength of your story. It moves on the strength of the file. Photos, moisture logs, a line-item scope, and a dry-standard verification are what turn a disputed claim into a paid one.
Post-Restoration Maintenance: Protecting Your Property After the Crew Leaves
Post-restoration maintenance keeps a repaired space from becoming a repeat loss.
Verdict: What the Best Complete Restoration from One Team Looks Like
The best complete restoration from one team looks like this: a certified crew on site fast, a documented drying plan with moisture mapping and thermal imaging, reconstruction handled by the same company, and insurance documentation managed without you in the middle.
Frequently Asked Questions
How quickly should an emergency restoration team arrive?
Response time varies by company and location. Some restoration providers offer a 30-minute arrival guarantee for emergency calls, while others may take several hours depending on demand and distance. When evaluating a complete restoration provider, ask about their average response time and whether they have technicians stationed nearby. Rapid arrival matters because water damage worsens by the hour. Within 24 to 48 hours, moisture can penetrate drywall, warp flooring, and create conditions for mold growth, turning a manageable repair into a major reconstruction project.
Does a single restoration team handle both mitigation and reconstruction?
The best complete restoration providers handle both. Mitigation covers emergency water extraction, structural drying, dehumidification, and site stabilization. Reconstruction covers drywall repair, flooring replacement, painting, and structural rebuilds. When one team manages both phases, you avoid the delays and miscommunication that happen when a mitigation crew hands off to a separate general contractor. Ask any restoration company directly whether they self-perform reconstruction or subcontract it, because that answer affects your timeline and your insurance claim.
How does direct insurance billing work with restoration services?
With direct insurance billing, the restoration company communicates with your insurance adjuster, provides documentation such as moisture mapping reports, thermal imaging results, and photo evidence, and bills the insurer directly for covered work. You typically pay only your deductible and any costs beyond your policy limits. Not every restoration company offers this. Before hiring, confirm whether they bill insurance directly, what documentation they provide, and how they handle disputes if your adjuster questions part of the claim.
What is the difference between emergency mitigation and full restoration?
Emergency mitigation stops the damage from spreading. It includes water extraction, emergency board-up, tarping, structural drying, and sanitization. Full restoration returns your property to its pre-loss condition through reconstruction, which covers drywall, flooring, cabinetry, painting, and structural repairs. Mitigation typically happens within the first 24 to 72 hours. Reconstruction follows once the structure is dry and the insurance scope is approved. A complete restoration provider manages both phases under one project, which reduces downtime and keeps accountability with a single team.
What certifications should a professional restoration team have?
Look for IICRC certification, which stands for the Institute of Inspection, Cleaning and Restoration Certification. IICRC-certified technicians are trained in water damage restoration, fire and smoke cleanup, mold remediation, and odor control. Beyond certification, verify that the company is licensed and insured in your state. Ask whether their technicians hold current certifications or whether the company itself is certified while sending uncertified crews. A reputable provider will share certification details and can show proof of completed jobs similar to yours.
Water and fire damage don’t wait for business hours, and neither should your restoration team. Aquaflame Restores it handles emergency response, structural drying, mold remediation, board-up, and full reconstruction under one roof, with direct insurance billing and a 30-minute arrival guarantee. Get started with Aquaflame Restores it and put one certified team in charge of your property from first call to final walkthrough.