
Table of Contents
- Immediate Actions: First 24 Hours After Water Damage
- Emergency Water Extraction Tools and Techniques
- Drying and Dehumidification Process
- Water Damage Restoration Timeline: What to Expect
- Cleaning, Sanitization, and Mold Prevention After Water Damage
- Water Damage Restoration Insurance Claim Process
- Structural Repairs and Final Reconstruction
- Conclusion
Last Updated: August 12, 2026
Immediate Actions: First 24 Hours After Water Damage
The first day after water damage determines whether you contain the problem or watch it spiral. Most homeowners waste critical hours deciding what to do instead of acting. At Aquaflame Restores it, we’ve responded to emergency calls, and the pattern is always clear: the fastest response prevents the worst outcomes.
Your immediate priorities are straightforward. Stop the water source if it’s safe to do so. Turn off electricity to affected areas. Move valuables and furniture to dry spaces. Open windows and doors to increase air circulation. These actions take minutes but prevent thousands in secondary damage.
Document everything before cleanup begins. Take photos and videos of all damaged areas, standing water, and affected belongings. This documentation becomes essential when filing your insurance claim. Many homeowners skip this step and regret it later when adjusters ask for proof of what was damaged.
Call a professional restoration company immediately. The 24-hour window is critical because water begins migrating into walls, subfloors, and structural materials within hours. What looks like surface damage often masks deeper saturation. Professional assessment with moisture mapping equipment reveals the true extent before it becomes invisible.
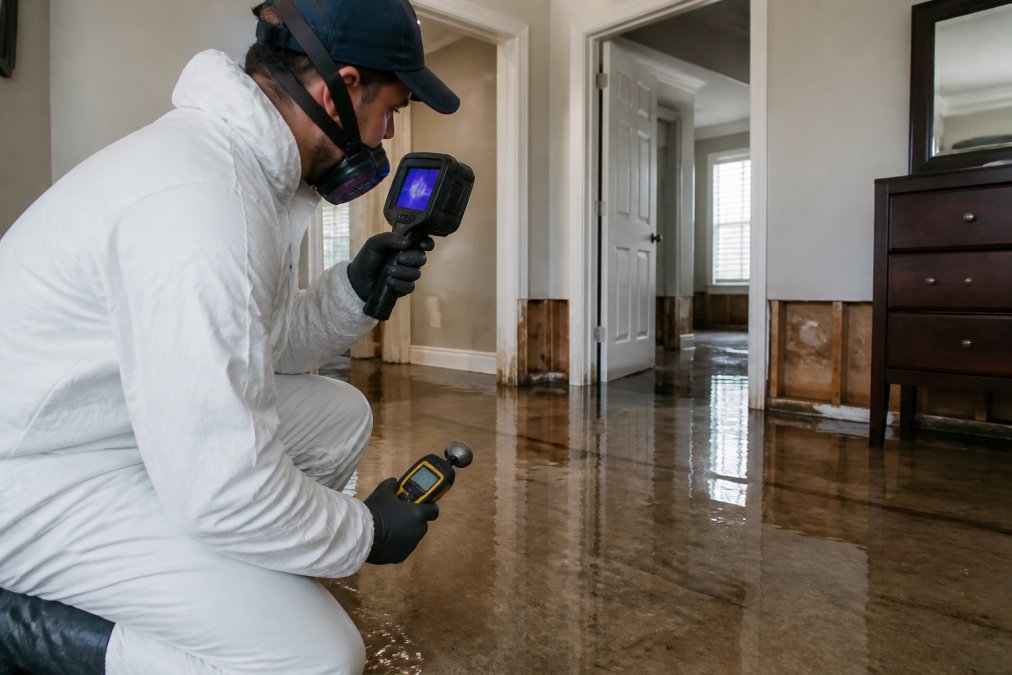
Extract standing water as quickly as possible. Every hour matters. Use a wet vacuum if you have one, but don’t delay waiting for equipment. Call professionals who have industrial-grade extraction tools. They remove water far faster than consumer equipment, which directly reduces drying time and mold risk.
Emergency Water Extraction Tools and Techniques
Water extraction is the foundation of water damage restoration steps. Professional extraction removes a significant amount of standing water in hours, while homeowner methods take longer and often miss water trapped in subfloors and wall cavities.
Submersible pumps handle large volumes of standing water quickly. These pumps sit directly in water and discharge it outside or into a drainage area. A professional-grade submersible pump removes water faster than a wet vacuum.
Truck-mounted extractors are often used in professional restoration. These powerful units connect to hoses that reach into rooms, extracting water from carpets, padding, and subfloors simultaneously. The suction force can reach levels impossible with portable equipment, pulling water from depths where mold growth would otherwise begin.
Portable extractors work for smaller jobs and accessible areas. They’re useful for extracting water from carpets and hard surfaces but may not have the power to reach trapped water in wall cavities or under subfloors. Many professionals use these as supplementary tools after truck-mounted extraction.
Moisture mapping identifies where water has traveled. Thermal imaging cameras and moisture meters reveal water in places you can’t see. A wall might appear dry on the surface while moisture sits trapped inside the cavity, creating perfect conditions for mold growth. Professional restoration often includes moisture mapping before declaring an area dry.
The extraction sequence matters. Professionals extract standing water first, then move to carpet and pad removal if saturation is severe. They extract subfloor moisture before attempting to dry in place. This sequence prevents water from redistributing as air circulates.
Drying and Dehumidification Process
Drying is where water damage restoration steps separate amateur attempts from professional results. Incomplete drying creates the conditions for mold growth within 48 hours.
Professional drying combines three elements: air movement, dehumidification, and monitoring. Air movers push moisture from surfaces into the air. Dehumidifiers remove that moisture from the air. Hygrometers measure relative humidity to confirm when areas reach safe levels (below 50% relative humidity).
Air movers position strategically to create airflow patterns that move moisture toward dehumidifiers. Professionals position multiple units to create cross-ventilation, pushing moisture toward exhaust points. This systematic approach can cut drying time compared to random fan placement.
Dehumidifiers extract moisture from the air. Refrigerant dehumidifiers work well in warm conditions but lose efficiency in cold environments. Desiccant dehumidifiers work in any temperature and are often preferred for winter restoration jobs. Professional restoration uses multiple dehumidifiers sized appropriately for room volume.
Structural drying focuses on moisture trapped in materials. Drywall saturation requires different treatment than carpet saturation. Professionals may remove baseboards, drill holes in drywall, or remove carpet and padding to expose subfloors for faster drying. These techniques help prevent hidden moisture from becoming a long-term mold problem.
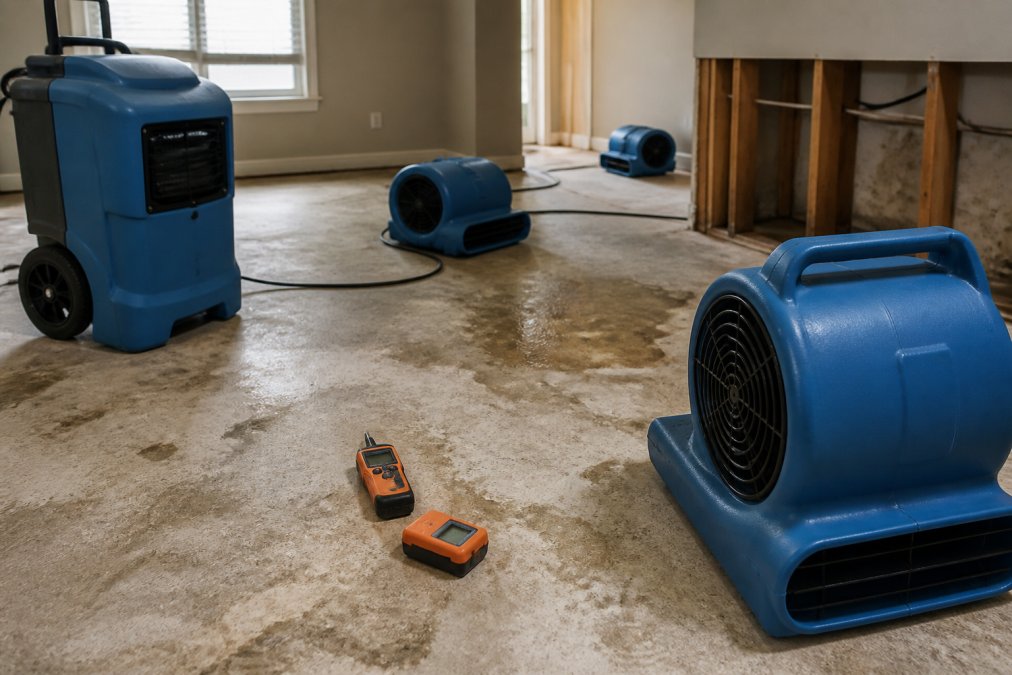
Monitoring continues daily. Professionals take hygrometer readings to track moisture levels. When readings plateau before reaching target levels, they adjust equipment placement or add additional units. This data-driven approach helps ensure thorough drying rather than stopping when surfaces feel dry.
Drying timelines depend on damage severity, material types, and environmental conditions. Light water damage in warm, dry conditions might dry in 3-5 days. Severe saturation with cold, humid conditions can require 2-3 weeks. Aquaflame Restores it monitors progress continuously and adjusts strategies to achieve safe drying.
Water Damage Restoration Timeline: What to Expect
Understanding the water damage restoration timeline helps you plan recovery and coordinate with insurance. Most comprehensive restoration takes time from emergency call to completion, though timelines vary significantly based on damage scope.
Days 1-3: Assessment and Extraction. Emergency response begins immediately. Professional assessment identifies damage categories and scope. Water extraction removes standing water. Initial drying equipment deploys. Insurance documentation begins. Expect frequent professional visits as equipment adjusts based on moisture readings.
Days 4-7: Structural Drying. Drying intensifies with multiple air movers and dehumidifiers running continuously. Moisture mapping confirms water migration patterns. Subfloor and cavity drying progresses. If mold prevention treatment is needed, it typically begins during this phase. Daily monitoring adjusts equipment based on hygrometer readings.
Days 8-14: Remediation and Preparation. Once structural drying reaches acceptable moisture levels, removal of damaged materials begins. Wet drywall, carpet, padding, and insulation are removed. Affected areas are cleaned and treated with antimicrobial solutions. Structural repairs are assessed and planned.
Days 15-28: Reconstruction. Drywall replacement, flooring installation, and painting begin. HVAC systems are inspected and cleaned to remove contaminants. Final inspections confirm all moisture levels are safe. Mold clearance testing is completed if required by your lender or insurance.
Complications extend timelines. Black water damage (category 3 water from sewage or contaminated sources) requires extensive remediation before reconstruction. Structural damage affecting subfloors or framing requires longer drying and assessment. Winter conditions slow drying significantly. Insurance claim disputes delay authorization for repairs.
The water damage restoration timeline is not negotiable on the front end. Rushing extraction or drying creates mold problems that cost far more to remediate than taking proper time initially. Aquaflame Restores it manages this timeline to balance speed with thoroughness, using monitoring to accelerate progress safely.
Cleaning, Sanitization, and Mold Prevention After Water Damage
Cleaning and sanitization transform a water-damaged space from a health hazard into a safe environment. This step is critical because water carries contaminants that pose health risks if not properly removed.
Category 1 water (clean water from burst pipes or roof leaks) requires standard cleaning and drying. Affected materials that can be salvaged are cleaned and dried. Affected materials that cannot be dried adequately are removed.
Category 2 water (gray water from appliances, toilet overflow, or minor sewage contact) requires antimicrobial treatment. All affected materials must be cleaned with approved disinfectants. Porous materials that absorbed gray water are typically removed rather than salvaged because residual contamination risks remain even after cleaning.
Category 3 water (black water from sewage, flooding, or contaminated sources) requires professional remediation. Affected materials are almost always removed. Surfaces are cleaned with hospital-grade disinfectants. The space is treated as a biohazard until clearance testing confirms safety.
Antimicrobial treatment prevents mold growth in materials that will be retained. Professionals apply EPA-approved antimicrobial solutions to affected surfaces and cavities. This treatment doesn’t replace proper drying, it supplements it. Mold requires moisture to grow, so thorough drying remains the primary prevention method.
Deodorization removes odors from affected materials and air. Water damage creates musty, unpleasant smells that linger even after visible moisture is gone. Professional deodorization uses various methods depending on odor source and material type. Many homeowners underestimate odor problems and end up with persistent smells that require professional treatment months later.
Mold prevention focuses on keeping relative humidity below 50% during and after restoration. Aquaflame Restores it uses continuous monitoring and aggressive drying to prevent mold growth before it starts. If mold is discovered during restoration, containment prevents spore spread, and affected materials are removed and replaced.
Water Damage Restoration Insurance Claim Process
Insurance claims determine whether restoration costs become your financial burden or your insurer’s. Understanding the process prevents disputes and ensures proper compensation.
Documentation is your foundation. Photos and videos taken immediately after damage occurred prove what was damaged and its condition. Inventory lists showing damaged items, their age, and replacement cost support your claim. Receipts for items damaged provide proof of value. Professional assessment reports from restoration companies document damage scope and required repairs.
Notify your insurance company immediately. Don’t wait days to file. Most policies require prompt notice. Early notification allows the adjuster to assess damage while evidence is fresh. Some policies have time limits for filing claims, and missing deadlines can result in denial.
Understand your coverage. Most homeowner policies cover sudden, accidental water damage from burst pipes or roof leaks. Most policies exclude water damage from flooding, which requires separate flood insurance. Sewer backup damage is often excluded unless you purchase a rider. Gradual water damage from maintenance issues is typically not covered. Review your specific policy language or ask your agent what’s covered before damage occurs.
Work with a professional restoration company that handles insurance billing. Aquaflame Restores it manages direct insurance billing, which means they bill your insurance company directly rather than requiring you to pay out of pocket and seek reimbursement. This approach helps eliminate financial stress during recovery and ensures the insurer receives detailed invoices for the work performed.
Cooperate with the adjuster’s assessment. The adjuster’s job is to determine what’s covered and estimate repair costs. Provide access to all damaged areas. Share photos and documentation. Answer questions thoroughly. The adjuster’s report determines what your insurance company will pay, so cooperation is essential.
Keep receipts for all restoration expenses. Even with direct insurance billing, you may have out-of-pocket costs for temporary repairs, temporary housing, or items not covered by insurance. Receipts prove these expenses if you need to dispute the adjuster’s assessment.
Disputes happen. If you disagree with the adjuster’s assessment or coverage determination, you have options. Request a second opinion from another adjuster. Hire a public adjuster who advocates for your interests. File a complaint with your state’s insurance commissioner if you believe the denial was unfair. Understanding these options prevents you from accepting inadequate settlements.
Structural Repairs and Final Reconstruction
Reconstruction transforms a damaged property into its pre-damage condition. This phase begins once drying is complete and all moisture has been removed from structural materials.
Subfloor replacement is necessary when moisture has saturated wood subfloors beyond recovery. Professionals remove affected subfloor sections, assess underlying structural framing for damage, and install new subfloor material. This step is often invisible to the final result but critical for structural integrity and preventing future moisture problems.
Drywall replacement occurs when drywall saturation exceeds 48 hours or when moisture has penetrated cavities. Wet drywall loses structural integrity and creates ideal conditions for mold growth even after drying. Professionals remove affected drywall sections, treat the exposed framing with antimicrobial solutions, and install new drywall.
Flooring restoration depends on material type and saturation duration. Hardwood flooring may be salvageable if dried quickly and completely. Laminate and vinyl flooring are typically replaced because they cannot withstand the drying process. Carpet and padding are usually removed and replaced because they retain moisture and odors even after drying.
HVAC system inspection and cleaning ensures contaminated air isn’t recirculated. Water damage can introduce sediment and contaminants into ductwork. Professionals inspect the system, clean ducts if necessary, and replace filters. The system is tested to confirm proper operation before the property is occupied.
Painting and finishing covers repaired areas and restores the property’s appearance. Professional painters match existing colors and ensure seamless integration between repaired and original surfaces.
Final inspections and clearance testing confirm the property is safe for occupancy. Moisture readings verify all materials are dry. Mold clearance testing (if required by your lender or insurance) confirms no mold growth has occurred. Only after passing all inspections is the property considered fully restored.
Water damage restoration steps follow a proven sequence that balances speed with thoroughness. The first 24 hours determine whether damage stays contained or spreads into structural materials. Professional extraction, systematic drying, proper cleaning, and comprehensive reconstruction restore your property safely and completely.
Aquaflame Restores it’s 24/7 emergency response and 30-minute arrival guarantee ensure your property receives immediate professional attention. Our IICRC-trained technicians manage the entire restoration process from initial assessment through final reconstruction, handling direct insurance billing to eliminate financial stress during recovery. When water damage strikes, professional restoration isn’t optional, it’s the only way to prevent secondary damage and ensure your property is truly restored.
Frequently Asked Questions
What should I do immediately after water damage occurs?
Stop the water source if safe to do so, turn off electricity to affected areas, remove valuables and documents, document damage with photos for insurance, and call a professional water damage restoration company immediately. Do not attempt to dry the space yourself, standing water and moisture can spread rapidly and cause mold growth within 24-48 hours. Professional teams use moisture mapping and extraction equipment to prevent secondary damage.
How long does the water damage restoration timeline typically take?
Most water damage restoration projects take 5-7 days from initial extraction to final drying, depending on damage severity and water category. Initial extraction happens within hours, drying and dehumidification takes 3-5 days, and structural repairs may extend the timeline. The water damage restoration timeline varies based on square footage, drywall saturation levels, and whether category 1, 2, or 3 water is involved. Professional assessment determines the exact schedule.
How do I prevent mold after water damage?
Mold can begin growing within 24-48 hours, so rapid extraction and dehumidification are critical. Prevent mold after water damage by ensuring complete drying, using antimicrobial treatment on affected surfaces, maintaining relative humidity below 50%, and addressing any remaining moisture in subfloors and wall cavities. Professional restoration includes moisture content monitoring and thermal imaging to catch hidden moisture before mold colonies establish. Proper ventilation during and after drying prevents mold spore proliferation.
Will my homeowners insurance cover water damage restoration?
Coverage depends on the water damage cause. Sudden, accidental damage from burst pipes, roof leaks, or appliance failure is typically covered. Gradual leaks, flooding, and water intrusion from poor maintenance are usually not covered. Your insurance adjuster will assess the damage and determine coverage. Direct insurance billing with your restoration company simplifies the process, they handle claim documentation and coordinate directly with your insurer, reducing out-of-pocket costs and paperwork burden.
What's the difference between category 1, 2, and 3 water damage?
Category 1 (clean water) comes from broken pipes or rain and poses minimal health risk. Category 2 (gray water) contains some contaminants from appliances or toilets and requires sanitization. Category 3 (black water) is contaminated with sewage, pathogens, or hazardous materials and demands professional remediation with antimicrobial treatment. Classification determines sanitization protocols and equipment specifications used during restoration. Professional assessment identifies water category to ensure proper contamination protocols.
When should I call a professional versus attempting DIY water damage restoration?
Call a professional immediately for any water damage affecting more than a small area, any category 2 or 3 water, or damage involving structural materials like drywall saturation or subfloor moisture. DIY drying often fails to address hidden moisture in wall cavities and crawlspaces, leading to mold growth and structural damage. Professional teams use moisture mapping, hygrometers, and thermal imaging to identify all affected areas. IICRC-trained technicians follow restoration protocols that prevent secondary damage and ensure insurance compliance.
What equipment do professionals use for emergency water extraction?
Professional emergency water extraction tools include submersible pumps for standing water removal, truck-mounted extraction systems for large volumes, air movers to accelerate evaporation, industrial dehumidifiers to reduce relative humidity, hygrometers to monitor moisture content, thermal imaging for moisture mapping, and moisture meters to measure drywall saturation levels. Equipment specifications vary by damage severity and water category. Professional teams strategically position air movers and dehumidifiers based on structural drying principles to prevent mold growth and material degradation.
This article was written using GrandRanker