
Table of Contents
- Understanding Hardwood Floor Buckling: What You’re Dealing With
- Step 1: Identify the Moisture Source Before Fixing Hardwood Floor Buckling
- Tools Needed to Fix Buckled Floors: Your Complete DIY Toolkit
- Step 2: Assess Damage and Determine Your Repair Path
- Hardwood Floor Water Damage Repair: Moisture Control First
- Step 3: Prepare the Floor for Repair
- Step 4: Execute the Repair or Replacement
- Post-Repair Refinishing and Restoration
Last Updated: July 14, 2026
Understanding Hardwood Floor Buckling: What You’re Dealing With
Hardwood floor buckling occurs when wooden planks warp and lift away from the subfloor, creating an uneven, sometimes dangerous walking surface. This guide walks you through identifying the problem, diagnosing its root cause, and executing repairs that actually stick.
Understanding what you’re looking at before you act is critical. Confusing buckling with cupping or crowning costs money because the fixes are completely different.
Buckling vs. Cupping: Key Differences
Buckling happens when wood planks lift at their edges or center, creating visible gaps and an uneven surface. Cupping occurs when the edges of boards curl upward while the center stays flat. Crowning is the opposite: the center rises while the edges stay down.
Buckling almost always signals serious moisture problems that demand immediate attention. Cupping and crowning can sometimes resolve themselves once humidity is controlled. Buckling rarely does without intervention.
Severity depends on lift height. Less than an eighth-inch might be repairable by controlling moisture and applying weight. More than a quarter-inch usually requires replacement. Moderate buckling (one-eighth to one-quarter inch) requires assessing both the moisture source and subfloor integrity before deciding on repair or replacement.
Why Moisture Content and Humidity Matter
Wood is hygroscopic, it absorbs and releases moisture based on relative humidity. Hardwood flooring typically ships at 6-9% moisture content. When installed correctly, it should acclimate to the home’s climate before being sealed down.
When wood absorbs excess moisture, it expands. Hardwood can expand 1-2% across its width with significant humidity changes. If the floor is nailed down tightly with no expansion gap at the walls, the boards buckle upward.
A moisture meter becomes your diagnostic tool. Wood should measure 6-9% moisture content in most climates. Anything above 12% is a red flag. Above 15% signals serious water damage requiring immediate drying before any repair.
Step 1: Identify the Moisture Source Before Fixing Hardwood Floor Buckling
You cannot fix buckling without stopping the moisture source. This is the most critical step. People repair the boards and refinish the floor, then watch the same buckling return because they never addressed the cause.
Using a Moisture Meter for Diagnosis
A pin-type moisture meter costs $30-60 and is essential. Insert the pins into the hardwood at multiple locations, especially near walls, under windows, and in corners. Compare readings to the baseline: 6-9% is normal, 9-12% is elevated but recoverable, above 12% means active moisture intrusion, above 15% indicates serious damage.
Test the subfloor too. If the subfloor reads higher than the hardwood, moisture comes from below. If the hardwood reads significantly higher, moisture comes from above.
Take moisture readings in at least five spots, including the worst buckling areas and areas that look fine. The pattern reveals whether the problem is localized or widespread.
Checking Subfloor and Vapor Barrier Integrity
The subfloor is your second line of defense. Concrete slabs require a vapor barrier, typically 6-mil polyethylene sheeting laid before hardwood installation. Over time, this barrier can degrade or tear.
If you have basement access, inspect the vapor barrier visually for tears, gaps, or missing sections. A moisture meter reading on the concrete itself reveals if the slab is wicking moisture upward. Concrete can read 15-20% moisture content and still feel dry.
For wood subfloors, check for soft spots, discoloration, or visible mold. These indicate rot, which compromises structural integrity. Soft subfloor wood cannot support hardwood flooring and must be replaced before any floor repair.
If you lack basement access, carefully remove a few nails around the buckling area and lift a board slightly to insert the moisture meter underneath.
Tools Needed to Fix Buckled Floors: Your Complete DIY Toolkit
Essential Diagnostic Equipment
A moisture meter is mandatory. A hygrometer ($15-25) tells you the relative humidity in the room. A straightedge or level assesses buckling severity. A flashlight helps you see into dark spaces. A moisture barrier test kit gives precise readings of concrete slab moisture emission.
Repair and Removal Tools
You’ll need a pry bar to remove baseboards, a nail set and hammer to remove nails, and a power sander to smooth repaired areas. For board replacement, a circular saw or miter saw cuts hardwood to length. A pneumatic nailer sets new boards properly. A moisture barrier membrane goes down before reinstalling hardwood over concrete. A commercial-grade dehumidifier is essential for drying after water damage.
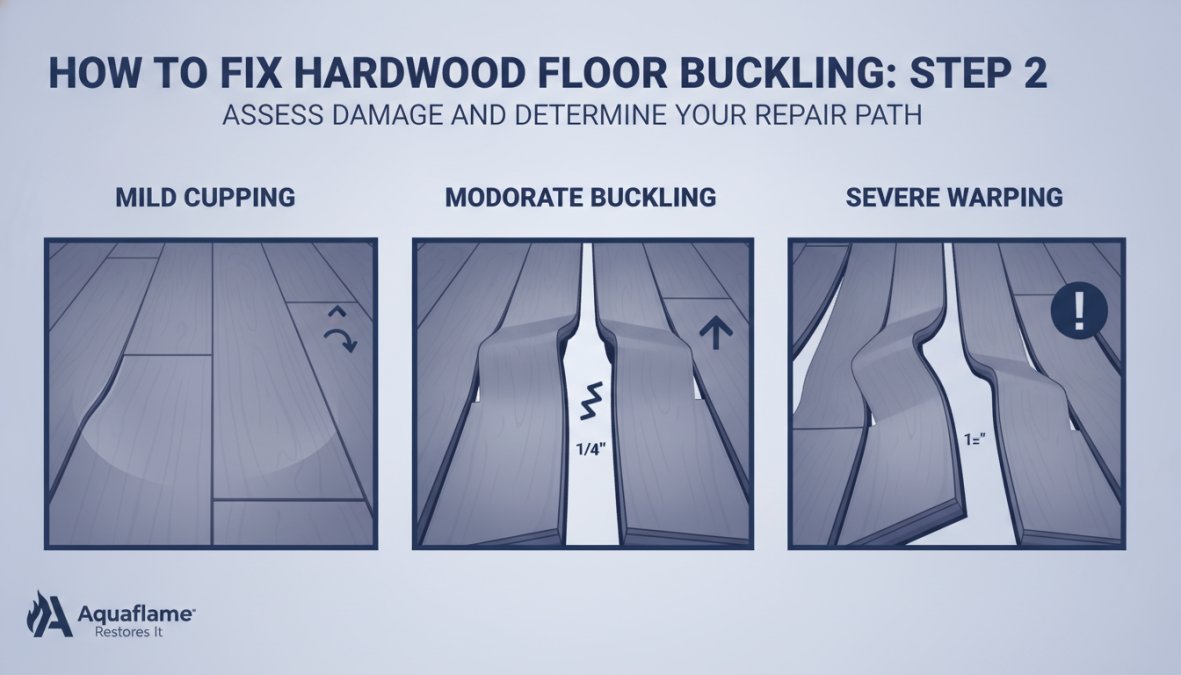
Step 2: Assess Damage and Determine Your Repair Path
Once you know the moisture source, decide: repair or replace? This depends on severity, location, and subfloor condition.
Visual Diagnostic Guide for Severity Levels
Mild buckling (less than 1/8 inch lift): Boards are raised slightly. The subfloor feels solid. This often responds to moisture control alone. Monitor closely but no immediate repair is needed.
Moderate buckling (1/8 to 1/4 inch lift): Visible gaps appear between boards. The subfloor is solid. This requires intervention, either aggressive moisture control plus weight and time, or selective board replacement.
Severe buckling (more than 1/4 inch lift): Boards are dramatically raised, creating tripping hazards. The subfloor may feel soft or show water damage. This almost always requires board replacement.
Take photographs from multiple angles to document severity and help decide whether DIY repair is realistic.
When to Replace vs. When to Repair
Replace boards if the subfloor is soft or moldy, buckling is severe, the affected area exceeds 50 square feet, or the wood shows visible water staining or black mold.
Repair (flatten and refinish) if the subfloor is solid and dry, buckling is mild to moderate, the affected area is under 20 square feet, the moisture source has been stopped, and the hardwood is structurally sound.
Engineered hardwood resists buckling better than solid hardwood because the plywood core is more forgiving. If your floor is engineered and damage is moderate, flattening with weight and time is more likely to succeed.
Hardwood Floor Water Damage Repair: Moisture Control First
Water damage repair starts with stopping the water, not fixing the floor. If you repair while moisture is present, you’re wasting time and money.
Controlling Relative Humidity and Climate
The ideal indoor relative humidity for hardwood flooring is 30-50%. Below 30% and the wood dries excessively, causing gaps. Above 50% and you invite buckling and mold.
After a water event, stop the source first. Patch the leak, fix the gutter, seal the foundation crack. Then dry the space aggressively.
Open windows if outside humidity is lower than inside humidity. Run ceiling fans to improve air circulation. If the weather is humid outside, keep windows closed and rely on mechanical drying.
Do NOT open windows if outdoor humidity is high. You’ll pump moisture into the space instead of removing it. Check the humidity forecast first.
Using Dehumidifiers and HVAC Systems
A commercial-grade dehumidifier removes moisture far more effectively than passive ventilation. Rent or buy one rated for your affected space’s square footage. A 1,500-square-foot room needs a dehumidifier with at least 30-50 pints per day capacity.
Run the dehumidifier continuously until the room’s relative humidity drops to 40-50% and stays there. This can take days or weeks. Empty the water collection tank regularly or connect it to a drain line.
Your home’s HVAC system plays a role too. Run air conditioning if available, it removes moisture as part of cooling. Turn off any furnace humidifier during the drying period.
If you lack air conditioning, a portable air conditioner combined with a dehumidifier is your best option. The investment ($400-800) pays for itself if it prevents a $3,000 floor replacement.
Step 3: Prepare the Floor for Repair
Once moisture is under control and readings confirm the wood is back to normal (6-9%), prepare for repair.
Removing Baseboards for Expansion Gap Access
Baseboards hide the expansion gap, the space between hardwood and the wall that allows seasonal expansion and contraction. To flatten buckled boards, you often need access to this space.
Remove baseboards carefully by driving a thin pry bar behind them, working from one end to the other. Number them on the back with a pencil to help reinstall them correctly. Save all nails for reuse.
Inspect the expansion gap once baseboards are off. It should be 1/2 to 3/4 inch wide. If it’s narrower or filled with caulk, that’s part of your problem. The floor had nowhere to expand, so it buckled upward.
Acclimation and Flattening with Weight and Time
If buckling is mild to moderate and the subfloor is solid, try flattening without replacement. This works best if moisture has been under control for at least a week and readings confirm normal moisture content.
Place heavy, flat weights on the buckled area. Sandbags, concrete blocks, or heavy books work. Distribute weight evenly across the buckled boards. Leave weights in place for 2-4 weeks.
Maintain the room’s humidity at 40-50% using a dehumidifier if needed. The combination of controlled moisture and sustained pressure can flatten moderate buckling. Check progress every few days. If boards aren’t responding after two weeks, replacement is likely necessary.
This approach works better for engineered hardwood than solid hardwood, which can develop a "memory" of its buckled shape if left that way too long.
Step 4: Execute the Repair or Replacement
Once you’ve determined whether to repair or replace, execute the work carefully.
Repairing Individual Floorboards and Tongue-and-Groove Joints
For mild buckling where you’re keeping original boards, check existing nails. If they’ve pulled out or loosened, drive new nails at an angle through the tongue into the subfloor. Use a pneumatic flooring nailer if possible to avoid splitting the wood.
If the tongue-and-groove joint is damaged, that board should be replaced. A damaged joint will never seal properly.
For boards that are staying but need refinishing, sand the surface smooth once buckling is resolved. Start with 80-grit sandpaper, progress to 120-grit, and finish with 150-grit.
Replacing Severely Damaged Boards
Measure affected boards carefully. Standard hardwood flooring is 3/4 inch thick and 2 1/4 inches wide. Remove damaged boards by carefully prying them up with a floor scraper.
Inspect the subfloor underneath. If it’s soft, discolored, or moldy, it needs repair or replacement before installing new hardwood. Sand or scrape the subfloor smooth and let it dry completely. Apply a moisture barrier if installing over concrete.
Fit new boards carefully, leaving a 1/2-inch gap at all walls and fixed objects. Tap boards together with a block and mallet to seat tongue-and-groove joints tightly. Drive flooring nails through the tongue at a 45-degree angle, spaced 8-10 inches apart.
Post-Repair Refinishing and Restoration
Once repair or replacement is complete, refinishing brings the floor back to its original appearance.
Sanding and Finishing Restored Sections
Sand the repaired area with a belt sander, working parallel to the grain. Start with 80-grit, progress to 120-grit, then 150-grit. Sand the surrounding floor lightly (150-grit only) to blend the repair into the existing floor.
Vacuum thoroughly to remove all dust. Tack the floor with a damp cloth to remove fine particles that would interfere with stain and finish.
If the existing floor is stained, match the stain color. Apply stain to the repaired area, let it dry, and compare to the existing floor in natural light. Multiple thin coats blend better than one thick coat.
Once stain is dry, apply polyurethane finish. Use the same product (water-based or oil-based) as the existing floor. Apply at least two coats, sanding lightly between coats with 220-grit sandpaper.
Blending New Wood with Existing Flooring
The hardest part of refinishing is making new or repaired boards blend seamlessly with the existing floor. New wood will be lighter than aged, sun-exposed existing floor. Stain helps, but the color match may not be perfect immediately. Over time, as new wood ages and receives sunlight, it will darken and blend better.
For large repairs, consider having the entire room refinished by a professional. The cost ($1,500-3,000 for a typical room) is worth it for a seamless, professional result.
If doing the work yourself, sand and finish the repaired area plus a 3-4 foot border around it. This blending zone helps hide the transition between new and old.
| Repair Method | Best For | Time to Complete | Moisture Control Required |
|---|---|---|---|
| Flattening with weight | Mild to moderate buckling, solid subfloor | 2-4 weeks | Yes, continuous |
| Individual board replacement | Severe buckling, localized damage | 3-7 days | Yes, before and after |
| Full room refinishing | Large repairs, multiple boards | 5-10 days | Yes, before work begins |
| Professional restoration | Extensive damage, structural issues | 1-2 weeks | Professional handles |
Hardwood floor buckling is fixable, but only if you address the moisture source first. A floor that buckles again six months after repair is telling you that water is still getting in. The diagnosis phase, moisture meter readings, humidity checks, subfloor inspection, takes time but saves money by preventing failed repairs.
If buckling is severe, the subfloor is compromised, or moisture damage is extensive, professional help is worth the investment. Specialists in water damage restoration can identify moisture sources that homeowners miss, provide 24/7 emergency response, and handle everything from initial drying to subfloor repair to hardwood refinishing in one coordinated project.
Frequently Asked Questions
What causes hardwood floors to buckle?
Hardwood floor buckling is primarily caused by excess moisture and high relative humidity. When moisture content in wood rises above normal levels, typically from water damage, flooding, or persistent humidity, the wood expands. Since hardwood cannot expand uniformly across the floor, boards cup, crown, or buckle upward. Subfloor moisture and inadequate vapor barriers are common culprits. Solid hardwood is more susceptible than engineered wood because it responds more dramatically to moisture changes.
Can buckled hardwood floors be repaired or do they need replacement?
Many buckled hardwood floors can be repaired if caught early and the underlying moisture source is addressed. Minor to moderate buckling may flatten after moisture levels normalize and humidity is controlled with dehumidifiers and HVAC adjustments. However, severely damaged boards with structural integrity compromised typically require replacement. A moisture meter reading and visual inspection determine repairability. Professional flooring contractors can assess whether floorboards and tongue-and-groove joints can be salvaged or if individual boards need replacing.
How do you fix water-damaged buckled wood floors?
Fixing water-damaged hardwood floors requires a three-step approach: First, identify and eliminate the moisture source, check the subfloor, vapor barrier, and slab for ongoing water intrusion. Second, control relative humidity using dehumidifiers and climate control to bring moisture content down. Third, allow time for the wood to acclimate and flatten naturally, sometimes with added weight on boards. If damage is severe, remove baseboards for expansion gap access and replace damaged floorboards. Post-repair refinishing may be needed to restore the floor's appearance.
When should you call a professional for buckled hardwood floors?
Contact a professional flooring contractor or restoration specialist if buckling affects more than 10% of your floor, if moisture levels remain high despite your efforts, if structural integrity is compromised, or if the subfloor shows signs of rot or mold. Professionals have moisture meters and equipment to accurately diagnose moisture sources and can handle complex repairs like slab moisture issues or extensive board replacement. For emergency water damage, a 24/7 restoration team with IICRC-trained technicians can assess and begin repairs immediately to prevent further deterioration.
This article was written using GrandRanker