
Last Updated: October 23, 2026
Quick Summary
Water damage in attic spaces usually starts small, with stains, damp insulation, or a musty odor rather than a sudden ceiling collapse. Inspect your attic twice a year and after major storms, and act within the first hour of finding a leak to limit damage. Call a professional if the leak is active, widespread, or near electrical wiring.
- Brown rings, dark streaks, and rusted nails on rafters are the most common signs of a roof leak.
- A safe attic inspection takes about 20 minutes with a flashlight, screwdriver, gloves, mask, and notebook.
- A handheld moisture meter under $50 confirms active moisture; readings above 20% mean wet wood.
- Wet fiberglass or cellulose insulation usually has to be removed and reinstalled rather than dried.
- Structural drying with professional equipment typically takes 3 to 5 days.
Table of Contents
- 7 Signs of a Roof Leak in the Attic You Should Never Ignore
- How to Inspect Your Attic Safely and Trace the Source of the Leak
- Emergency Triage: What to Do First When You Find Water Damage in the Attic
- Attic Water Damage Cleanup: Drying, Removal, and What Must Go
- Homeowners Insurance Coverage for Roof Leaks: What’s Usually Covered
- Repair Costs, Timelines, and When to Call a Professional
- Prevention and Routine Monitoring to Stop the Next Leak
- Conclusion
- Frequently Asked Questions
7 Signs of a Roof Leak in the Attic You Should Never Ignore
Water damage in attic spaces almost never starts with a dramatic ceiling collapse. It starts small: a faint ring on a rafter, a whiff of damp air when you open the hatch. Catching those early signals is the difference between a weekend fix and a full restoration job.
Here are the seven signs that matter most, and what each one actually tells you.
Stains, Streaks, and Discoloration on Rafters and Decking
Brown rings, dark streaks, or white chalky marks on wood are the most common signs of a roof leak in the attic. Fresh stains look wet and dark; old ones turn brown or gray with a tide-line ring where water stopped spreading.
Rusted nails are another tell: when nails holding the roof decking rust, moisture has been sitting around them. Sagging or dark, spongy patches on the decking boards mean water has soaked in.
Damp or Wet Insulation, Musty Odor, and Mold Growth
Wet insulation is a silent problem. Fiberglass loses most of its insulating value once soaked and won’t dry well on its own in an enclosed attic. If it feels damp or clumps together, moisture is present.
Mold growth in an attic often shows up as fuzzy black, green, or white patches on rafters and decking and can spread fast in warm, humid conditions. This step-by-step guide to safe mold remediation covers DIY steps, when to call professionals, and prevention tips.
How to Inspect Your Attic Safely and Trace the Source of the Leak
A safe attic inspection takes about 20 minutes and a few basic tools: a bright flashlight, screwdriver, gloves, mask, and notebook. Never step on the drywall ceiling between joists, stay on the joists or lay a board across them to spread your weight.
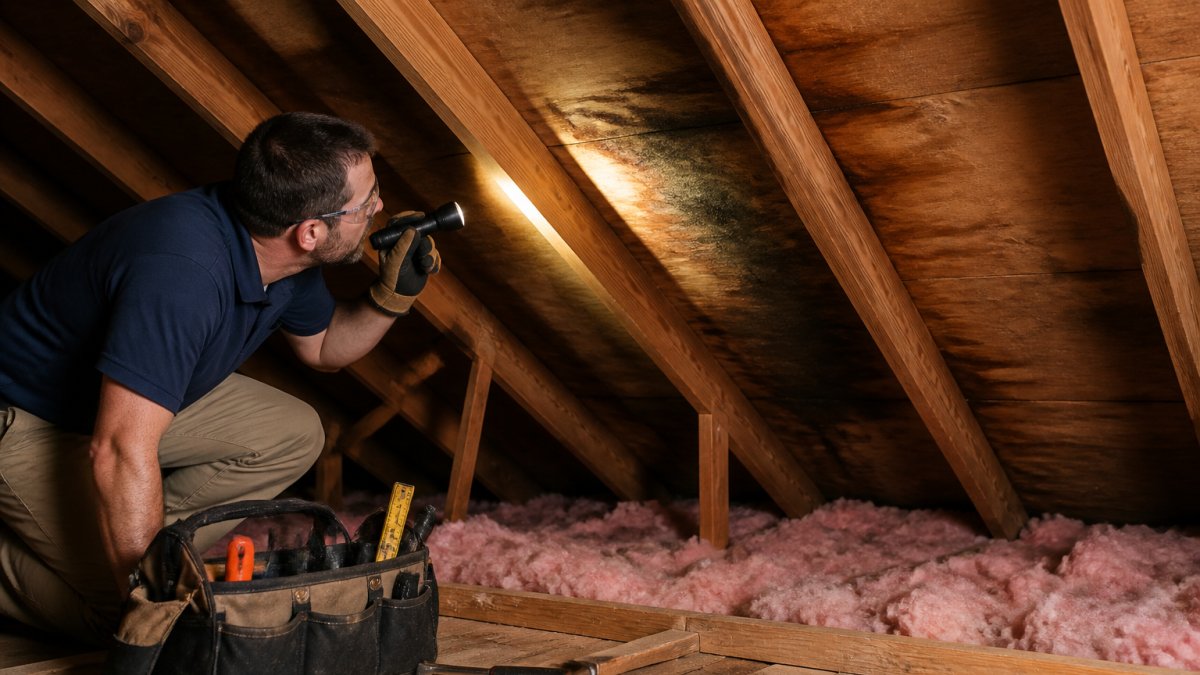
Work through this sequence:
- Start at the attic hatch and scan the ceiling and rafters with the flashlight.
- Look for water stains, streaks, and discoloration, marking each one with tape.
- Check insulation for damp patches and compression.
- Trace each stain upward toward the roof decking.
- Inspect nails and decking for rust and rot.
- Note any daylight showing through the roof boards.
- Photograph everything for your records.
A Step-by-Step Source-Tracing Process
Most homeowners assume every wet spot in the attic is a roof leak.
Step 1: Map the moisture pattern. Sketch the attic layout and mark every damp area, stain, and drip point.
Step 2: Check the roof decking from underneath. Dark streaks, drip marks, or staining running in one direction mean water is entering from above.
Step 3: Inspect penetrations and transitions. Roof leaks most often start at flashing around chimneys, vents, skylights, and where roof planes meet.
Roof Leaks, Flashing, and Condensation: Telling Them Apart
Not every wet spot is a leaking roof. Condensation appears evenly across the underside of the decking, often near vents and the attic hatch.
The test is simple. Condensation leaves frost or uniform dampness in cold weather. Water intrusion leaves streaks, drip marks, and staining that travel in one direction. If you can’t tell the difference, a professional assessment settles it quickly.
Photograph each moisture area with a ruler or coin for scale, and note the date and weather conditions. This record helps a roofer or restoration professional diagnose the source faster and supports any insurance claim.
Emergency Triage: What to Do First When You Find Water Damage in the Attic
Act fast, but act in order. These critical steps to stop water damage spreading walk you through the first hour and beyond. The first hour matters most for limiting property damage.
- Contain the drip. Place buckets under active leaks and lay plastic sheeting over belongings below.
- Cut the water source. If the leak traces to a pipe or HVAC line, shut off the supply.
- Protect yourself. Wear gloves and a mask before touching wet insulation or mold.
- Document everything. Photograph and video the damage before moving anything.
- Remove standing water and soaked items that can be safely moved.
- Start airflow. Open vents and run fans to slow mold growth.
- Call for help if the leak is active, widespread, or near electrical wiring.
Attic Water Damage Cleanup: Drying, Removal, and What Must Go
Attic water damage cleanup follows one rule: wet materials that can’t dry within a day or two have to go. Extract standing water first with a wet/dry vacuum, then start airflow, open vents, set up fans, and run a dehumidifier.
What usually must be removed:
- Soaked fiberglass or cellulose insulation
- Waterlogged drywall or ceiling panels
- Moldy wood that can’t be cleaned and dried
Structural drying is where DIY efforts often stall. Learn more about structural drying and dehumidification and how it handles moisture trapped in walls, floors, ceilings, insulation, and framing.
How to Dry Attic Insulation (and When to Replace It)
Most wet insulation should be replaced, not dried. Fiberglass batts that absorbed clean water can sometimes be dried if caught within a day, but they rarely return to full performance.
To attempt drying fiberglass: separate the batts, prop them up so air reaches both sides, run fans and a dehumidifier, and check moisture daily. If it smells musty or stays damp after two days, replace it.
Never dry insulation that was soaked by contaminated water, such as sewage backup or roof water carrying debris. Replace it entirely, and disinfect the framing first.
Homeowners Insurance Coverage for Roof Leaks: What’s Usually Covered
Most homeowners insurance policies cover sudden, accidental water damage from a roof leak, including ceilings, insulation, and belongings.
Your claim gets stronger with documentation. Before cleanup, photograph every stain, damp patch, and damaged item. Keep receipts for any emergency repairs.
Coverage varies by policy and by how the damage happened. For a deeper walkthrough of the claims process, see this homeowner’s guide to roof leak insurance claims.
Repair Costs, Timelines, and When to Call a Professional
Repair costs depend on how far the water traveled and what materials were affected. Because pricing varies so much by scope, we give homeowners a written estimate after inspection. Here are the main cost drivers and typical timelines.
What Drives the Cost
- Roof repair scope. A small patch around a vent or flashing is at the low end; replacing a section of decking or shingles costs more. Roofing contractors typically price by the square (100 square feet) and by the type of material.
- Insulation replacement. Wet fiberglass or cellulose usually has to be removed and reinstalled. Blown-in insulation is priced by the bag and by the square foot of coverage.
- Drywall and ceiling repair. Water-stained or sagging drywall must be cut out, replaced, and repainted. The larger the stained area, the higher the cost.
Typical Timelines
- Emergency stabilization (tarping, stopping active leaks): same day.
- Structural drying with professional equipment: typically 3 to 5 days, depending on materials and humidity.
- Roof repair or replacement: a small repair may be a one-day job; a full roof replacement usually takes one to three days depending on size and weather.
Timelines stretch when the source isn’t fixed first. Drying a wet attic while the roof still leaks wastes time and money.
When to Call a Professional
Call a professional when:
- The leak is active or you can’t find the source
- Insulation or drywall is soaked through
- You see mold or smell a musty odor
Aquaflame Restores it offers 24/7 emergency response with on-site arrival within one hour. Our IICRC-trained technicians handle extraction, drying, and reconstruction as one team, and we bill your insurance directly. Book emergency water damage restoration when you need help now.
Get a written scope of work that separates the source repair (roofing) from the water damage restoration (drying, insulation, drywall, mold). Mixing the two in one estimate makes it harder to compare bids and to document your insurance claim.
Here are the typical timelines homeowners can expect for each stage of attic water damage repair.
| Stage | Typical timeline |
|---|---|
| Emergency stabilization (tarping, stopping active leaks) | Same day |
| Structural drying with professional equipment | Typically 3 to 5 days |
| Roof repair or replacement | Small repair one day; full replacement one to three days |
| Insulation replacement | Usually one day once the attic is dry |
| Drywall repair and painting | One to three days after drying is complete |
| Mold remediation | Several days to a week or more |
Prevention and Routine Monitoring to Stop the Next Leak
Prevention comes down to regular home maintenance. Check your roof after major storms, clear gutters so water doesn’t back up under shingles, and inspect and reseal flashing around chimneys and vents each season. Inside the attic, run a flashlight check twice a year, ideally before and after the rainy season.
Watch for these warning signs of water infiltration:
- New stains after heavy rain
- Daylight through roof boards
- Damp insulation or musty odor
Small fixes now beat emergency repairs later. A roofing contractor can inspect shingles and flashing, while an attic check keeps you ahead of slow leaks.
Mark the date of every attic inspection on your calendar. Homeowners who check twice a year catch most leaks while they’re still a patch job.
Conclusion
Water damage in attic spaces rarely announces itself. It hides in insulation, stains rafters, and grows mold while the ceiling below still looks fine. The homeowners who come out ahead check, document, and act early.
When the leak is beyond a quick fix, Aquaflame Restores it is ready. Our IICRC-trained technicians offer 24/7 emergency service with on-site arrival within one hour, direct insurance billing, and full reconstruction from one team.
Frequently Asked Questions
Will homeowners insurance cover water damage from a roof leak?
It depends on the cause. Most policies cover sudden, accidental damage, such as a storm tearing off shingles and rain pouring in. They usually exclude damage from a roof you neglected to maintain. Document everything with photos before cleanup, keep receipts, and file promptly. Ask your adjuster whether the loss is classified as sudden or gradual, because that distinction decides the claim. A restoration company that bills your insurer directly can reduce the back-and-forth on paperwork.
What should I do first when I find water damage in my attic?
Stop the water if you can, then protect the structure. Move stored items off wet decking, place buckets under active drips, and photograph every stain and damp area before touching anything. Do not walk on sagging ceiling areas. If the leak is active or the damage covers more than a small patch, call a restoration crew the same day. Attic water damage spreads into insulation and framing fast, and mold can start within 24 to 48 hours in warm, humid conditions.
How long does it take for attic water damage to dry?
A small, caught-early leak may dry in 2 to 3 days with good airflow and dehumidification. Soaked insulation, wet decking, or saturated framing typically takes 3 to 5 days with professional drying equipment, and longer if the source keeps running. Humidity and ventilation in the attic decide the pace. If the space still smells musty or readings stay high after a week, the drying was incomplete and the moisture source needs another look.
Is there a way to check if my attic has moisture in it?
Yes. Look for water stains, water streaks, or discoloration on rafters, beams, and roof decking. Check insulation for clumps, sagging, or a damp feel. A musty odor or visible mildew points to excess moisture. Rusted nails and bubbling paint are quieter clues. A pin-type moisture meter gives a fast reading on wood, and a cheap hygrometer shows relative humidity. Readings above roughly 60 percent humidity in the attic warrant a closer inspection.
