
Table of Contents
- Step 1: Protect the Room and Your Safety
- How to Find the Source of the Ceiling Leak
- Step 3: Dry Out the Wet Ceiling and Wall Cavity
- Signs of Mold After a Water Leak: What to Watch For
- Step 5: Assess and Repair the Damaged Drywall
- Ceiling Water Damage Repair Cost and Insurance Claims
- Preventing Future Ceiling Leaks and Water Stains
- When to Call a Professional Restoration Company
- Frequently Asked Questions
Last Updated: September 6, 2026
A sagging, discolored, or actively dripping ceiling is one of the most stressful problems a homeowner can face. When you search for what to do for wet ceiling situations, most advice stops at “call a professional,” leaving you standing in a puddle with no plan. This guide from Aquaflame Restores it walks you through the immediate safety steps, source detection, drying strategy, and repair process so you can act with confidence before the damage spreads.
A wet ceiling is a sign that water has saturated your ceiling drywall, which compromises its structural integrity and creates a prime environment for mold growth. The first hour matters more than most people realize. Water migrates along ceiling joists and drywall seams, so a small stain on the ceiling can hide a much larger saturated area above. Below, we break down the exact sequence used on every water damage call, from the moment you spot the stain to the final coat of primer.
Step 1: Protect the Room and Your Safety
Your safety comes before protecting the floor or the furniture. Water and electricity do not mix, so if the ceiling is near light fixtures, ceiling fans, or outlets, shut off power to that room at the breaker panel immediately. If you cannot reach the panel without walking through standing water, call an electrician before proceeding.
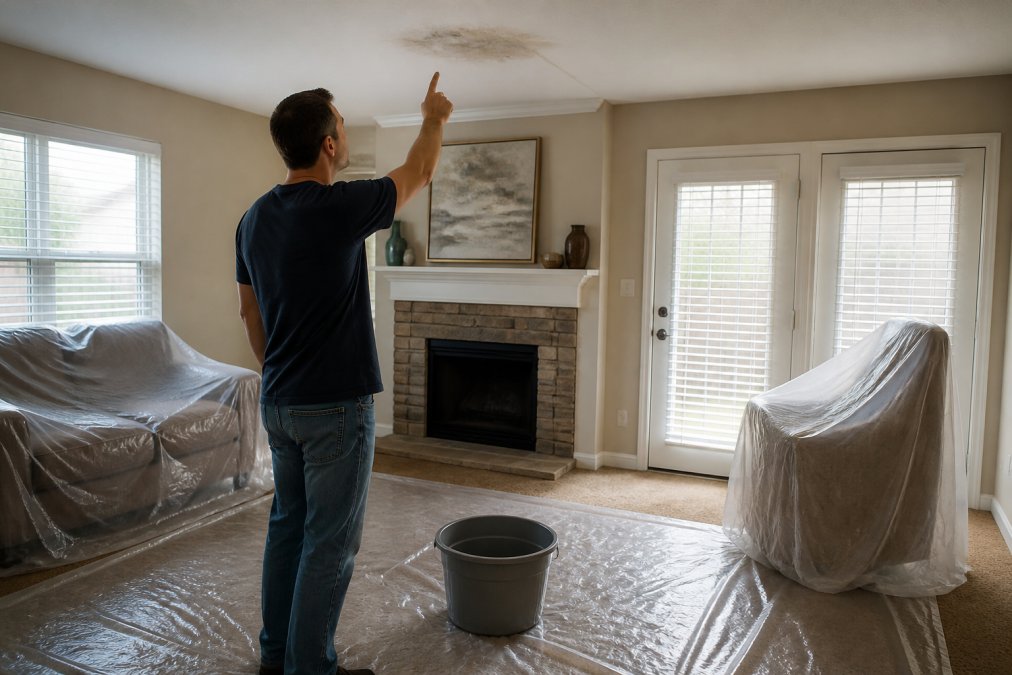
Once power is off, move furniture and electronics out of the affected area. Place a plastic bucket or trash can under the active leak to catch dripping water, and lay down plastic sheeting or tarps to protect flooring. If you have a two-story home, place a bucket on the floor below the leak, not just on the ceiling level.
A common mistake is poking a hole in the sagging drywall to let water drain. If the ceiling is bulging, that pocket of water can collapse on its own, bringing down soaked drywall and insulation. If you must relieve the pressure, use a screwdriver to puncture the center of the bulge over a bucket, but be ready for a rush of dirty water.
Do not walk directly under a sagging ceiling. A water-filled drywall section can weigh over 50 pounds and collapse without warning, causing serious injury ([the CDC](https://www.cdc.gov/infection-control/hcp/reopen-health-facilities/water-wind-damage.html)).
How to Find the Source of the Ceiling Leak
The source is rarely where the water stain appears. Water travels horizontally along ceiling joists and plumbing lines before it drips, so the visible stain may be several feet from the actual breach. Start by checking the most common sources in order.
Roof leaks are the top cause when the stain appears on the top floor. Inspect the attic for daylight coming through the roof deck, dark streaks on rafters, or wet insulation. Look for damaged shingles, rusted flashing around chimneys and vents, and clogged gutters that force water under the roof edge.
Plumbing leaks are more likely in single-story homes or when the stain is near a bathroom or kitchen. Check for dripping supply lines, leaking toilet seals, and condensation on cold water pipes. A running toilet or a shower used earlier that day can produce a slow leak that takes hours to show on the ceiling below.
HVAC condensation is a frequent culprit in humid climates. A clogged condensate drain line or a dirty evaporator coil can cause water to overflow the drain pan and soak the ceiling below the unit.
For a definitive answer, use a moisture meter to trace the wet boundary across the ceiling. The moisture content will be highest nearest the source. If you cannot identify the source within a few hours, shut off the main water supply and call a plumber before cutting into the ceiling.
Take photos and video of the stain, the water trail, and any visible damage before you start repairs. Insurance adjusters rely on this documentation to approve [ceiling water](/how-to-stop-ceiling-water-leaks/) damage repair cost claims.
Step 3: Dry Out the Wet Ceiling and Wall Cavity
Once the active leak is stopped, drying must begin immediately. A wet ceiling left to air dry will develop mold within 24 to 48 hours in warm conditions, and the moisture will wick into surrounding drywall and framing (the EPA). The goal is to remove moisture from the ceiling cavity, not just the visible surface.
Start by removing wet insulation from the attic above the damaged area. Saturated insulation loses its R-value and holds water against the ceiling drywall, so bag and dispose of it. If the drywall is visibly sagging or saturated, cut out the damaged section with a drywall saw. Cut back to the center of the nearest ceiling joists so you have solid framing to attach the replacement piece.
Set up the drying equipment:
- Place a dehumidifier in the room to pull moisture from the air
- Position fans to create air circulation across the wet surface and into the open ceiling cavity
- Keep dehumidifier settings on high and run fans continuously for at least 48 hours
Monitor progress with a moisture meter. The drywall and framing should reach a moisture content below 15 percent before you begin any repairs (energystar.gov). Sealing a damp cavity traps moisture and guarantees mold problems later.
Drying is not complete when the surface feels dry. Measure the moisture content of the drywall and framing with a meter. If you do not own one, rent one from a home improvement store or hire a professional to verify the cavity is dry before closing it up.
Signs of Mold After a Water Leak: What to Watch For
Mold can begin growing within 24 to 48 hours of water exposure, and it does not always appear as obvious black spots. Knowing the signs of mold after water leak events helps you catch contamination before it spreads through the ceiling cavity and into your living space.
Visible discoloration is the most obvious sign. Look for black, green, or gray patches on the ceiling or walls, but also check for fuzzy white or orange growth that can appear on damp wood and drywall. Musty odors are often the first indicator of hidden mold inside a wall or ceiling cavity. If the room smells earthy or like wet socks after the surface has dried, mold is likely growing behind the drywall.
Health symptoms in household members, including worsened allergies, coughing, or eye irritation that improves when you leave the house, can point to hidden fungal growth. Blistering or bubbling paint and efflorescence, a white chalky residue on masonry, also signal ongoing moisture problems that support mold. spot roof leaks.
If you find visible mold growth larger than a small patch, or if the contamination is inside the ceiling cavity, do not attempt to clean it yourself. Disturbing mold releases spores into the air. Professional mold remediation contains the area with negative air pressure and removes contaminated materials safely.
Step 5: Assess and Repair the Damaged Drywall
Once the cavity is completely dry, assess whether the drywall can be saved or must be replaced. Drywall that has been saturated but dried without sagging, cracking, or delamination can often be repaired. Drywall that is crumbling, sagging, or shows a brown watermark through the paper facing needs replacement.
For small stains and minor damage, the repair is straightforward. Sand the area to remove loose paint and texture, then apply a stain-blocking primer sealer. Ordinary latex primer will not block water stains, which will bleed through the new paint within weeks. Use a shellac-based or oil-based primer specifically designed to seal water damage.
For larger damaged sections, cut out the wet drywall in a rectangle that spans the nearest ceiling joists. Screw in a new piece of drywall, tape the seams with drywall tape, and apply three coats of joint compound, sanding between each coat. Match the ceiling texture before painting, since a smooth patch in a textured ceiling is immediately visible.
Painting over an active water stain without fixing the source and drying the cavity is the most common DIY mistake. The stain will bleed through the new paint, and trapped moisture will cause the repair to fail and mold to grow.
Ceiling Water Damage Repair Cost and Insurance Claims
The ceiling water damage repair cost varies widely depending on the extent of the damage, the source of the leak, and whether mold remediation is required. A small stain that needs spot repair may cost little more than primer and paint, while a large section of saturated drywall with mold can require significant drywall replacement, repainting, and professional drying equipment.
Most homeowners insurance policies cover sudden and accidental water damage, such as a burst pipe or a roof leak from a storm. They typically do not cover damage from gradual leaks, such as a slow plumbing leak that has been ongoing for months. Review your policy and contact your insurer promptly, since most policies require you to report damage within a reasonable timeframe.
Before calling your insurance company, document everything. Photograph the stain, the source if you found it, and any damaged belongings. Keep receipts for emergency supplies like buckets, tarps, and fans, and track any temporary repairs you made. Save samples of wet carpet or drywall if you need to prove the extent of the damage.
Choosing a restoration company that handles direct insurance billing simplifies the claim process. Aquaflame Restores it manages the paperwork and communicates with your adjuster directly, so you are not navigating the claims process alone while managing a damaged home.
Preventing Future Ceiling Leaks and Water Stains
Prevention starts with routine maintenance that catches small problems before they become ceiling damage. Inspect your roof twice a year, in spring and fall, looking for damaged, curled, or missing shingles, rusted flashing, and clogged gutters. Clean gutters regularly to keep water flowing away from the roof edge.
Check plumbing fixtures and exposed pipes for signs of slow leaks. Look for corrosion on fittings, dampness under sinks, and water stains on cabinet floors. Replace worn toilet flappers and supply lines before they fail. Insulate cold water pipes in unconditioned spaces to prevent condensation that can drip onto ceilings below.
Service your HVAC system annually. A professional will clean the evaporator coil, check the condensate drain line, and ensure the drain pan is clear. In humid climates, a clogged condensate line is one of the most common causes of mysterious ceiling stains.
Install a water leak detection system that shuts off the main water supply when a leak is detected. These systems cost less than a typical water damage deductible and can prevent catastrophic damage while you are away from home.
When to Call a Professional Restoration Company
Some water damage situations are beyond the scope of DIY repair. If the leak has been active for more than a day, if the water came from a sewage line or floodwater, or if you see visible mold growth, call a professional restoration company immediately.
Professional restoration teams bring industrial-grade drying equipment that homeowners cannot rent. Commercial air movers and desiccant dehumidifiers dry wall cavities and framing in days, not weeks, and moisture meters verify that the area is fully dry before repairs begin. They also handle the full scope of work, from water extraction and structural drying to mold remediation and reconstruction, so you coordinate with one team rather than juggling multiple contractors.
For homeowners in metro Atlanta, Aquaflame Restores it provides 24/7 emergency response with a 30-minute arrival guarantee. Their IICRC-trained technicians handle everything from emergency water extraction to complete reconstruction, and they manage direct insurance billing so you avoid the stress of fighting with your adjuster. If you are facing a wet ceiling and the damage is beyond a quick fix, call a professional before the damage spreads to framing, insulation, and your family’s health.
A wet ceiling is a warning sign that should never be ignored. The longer water sits in your ceiling cavity, the more extensive the damage to drywall, insulation, and framing, and the higher the risk of mold growth that can affect your family’s health. Acting quickly to stop the source, dry the area, and document the damage is the difference between a manageable repair and a major restoration project. When the job is beyond DIY, trust a team that handles the entire process from extraction to reconstruction. Contact Aquaflame Restores it for emergency water damage response across metro Atlanta, and let their IICRC-trained technicians dry, repair, and restore your ceiling with professional speed and expertise. Get started with Aquaflame Restores it and take the stress out of water damage recovery.
Frequently Asked Questions
How do you dry out a wet ceiling?
Start by moving furniture and placing buckets to catch drips. Remove any soaked insulation in the attic to expose the drywall. Set up fans and a dehumidifier to promote air circulation and pull moisture from the ceiling cavity. Keep the area ventilated for several days. Do not paint over the stain until the moisture content in the drywall returns to normal, which you can check with a moisture meter.
Does a ceiling need to be replaced if it gets wet?
Not always. If the drywall is structurally sound and dries completely within a few days, it can often be repaired and repainted. However, if the drywall is sagging, crumbling, or was saturated with contaminated water, it must be cut out and replaced. Prolonged wetness compromises the material and creates a prime environment for mold growth behind the painted surface.
Does homeowners insurance cover a water leak from the ceiling?
Coverage depends on the leak’s cause. Sudden and accidental damage, like a burst pipe or an appliance overflow, is typically covered. Damage from long-term neglect or lack of maintenance, such as a slowly leaking roof, is often excluded. Document the damage with photos, save samples of any removed material, and contact your insurance company promptly to start the claim process.
How long does it take for a wet ceiling to grow mold?
Mold can begin to grow within 24 to 48 hours of a material becoming wet. This is why rapid drying is critical. If you notice a musty odor, or see discoloration or dark spots forming on the ceiling within a few days of a leak, you likely have mold growth. At this point, professional remediation is often necessary to ensure the mold is completely removed and does not spread.