
Table of Contents
- Safety First: Hazard Identification Before Inspection
- Document Flood Damage for Insurance Claim Success
- What Not to Throw Away After a Flood
- Assess Water Damage: DIY Inspection Checklist
- Prepare for Professional Inspection: What Inspectors Look For
- Hiring Professional Water Damage Restoration Services
- Personal Protective Equipment and Safety Protocols
- Frequently Asked Questions
Last Updated: October 1, 2026
Safety First: Hazard Identification Before Inspection
Before entering a flood-damaged property, identify real hazards that can cause injury.
Floodwaters carry sewage, chemicals, and pathogens; standing water hides debris and sharp objects; water exposure weakens structural integrity. Understanding how to prepare property for post-flood inspection starts with prioritizing safety.
Start by checking these hazards:
- Downed power lines near the property
- Standing water that could hide debris or be contaminated
- Visible structural damage to walls, ceilings, or floors
- Gas smell or signs of a gas leak
- Mold growth already visible on surfaces
- Soft spots in flooring that indicate water damage underneath
Electrical and Gas Safety Checks
Turn off power at the main breaker if safe to access. Do not enter if the breaker box is submerged or damaged. If unsure, call a licensed electrician.
Check for gas leaks by smell (rotten-egg odor). If detected, evacuate immediately and call your gas company from outside. Do not use matches, lighters, or electrical switches.
Assessing Structural Integrity
Look for obvious structural damage before proceeding. Water-soaked materials lose strength; drywall softens, wood swells and warps, concrete and masonry crack.
Test each step carefully. If a floor feels soft or bouncy, stop, it may collapse. Check walls for bulging, indicating trapped water and potential structural failure.
The water line on walls shows flood height. Water above door frames or window sills indicates significant infiltration; water above the first floor indicates heavy flooding.
Document Flood Damage for Insurance Claim Success
Documentation separates successful claims from rejected ones. Creating a detailed record of all damage before cleanup is essential when preparing your property for post-flood inspection.
Creating a Photographic Evidence Record
Photograph and video every damaged area, starting outside and working inward. Capture water lines on exterior and interior walls, baseboards, and flooring.
Capture close-ups of specific damage:
- Water-soaked drywall
- Damaged baseboards and trim
- Flooring that’s warped or discolored
- Furniture and belongings with water damage
- Mold growth if visible
- Debris scattered throughout
Organizing Your Documentation Workflow
Create a folder with photos/videos by room, damaged items list, receipts, insurance documents, adjuster contact info, and timeline notes. Organization speeds the claim process.
What Not to Throw Away After a Flood
Most homeowners clean up too fast and discard evidence insurers need. Before you prepare your property for post-flood inspection, understand what to keep.
Assess Water Damage: DIY Inspection Checklist
A basic DIY inspection helps you understand damage scope. Preparing your property for post-flood inspection means knowing which areas are safe to clean yourself versus which require professional help.
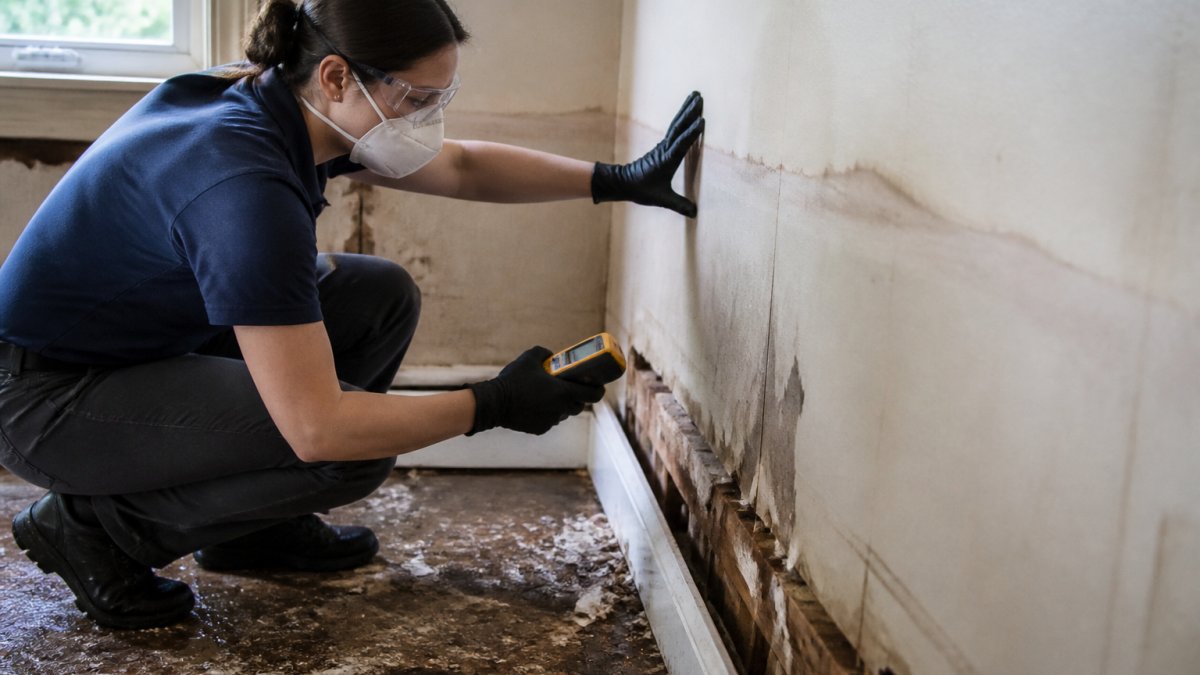
Use this checklist as you walk through:
- Check for visible mold growth (black, green, or orange spots)
- Test moisture levels with a moisture meter if you have one
- Identify the water line on all walls
- Check for soft spots in flooring
- Look for bulging in walls or ceilings
- Note any smell of mold or sewage
- Photograph all visible damage
- Document water-soaked materials
- Check crawlspaces and attics for water damage
- Assess structural damage to framing or support beams
Identifying Safe-to-Clean vs. Professional Restoration Areas
This is the critical decision point. Some water damage you can handle. Some requires professionals.
Clean it yourself if:
- Water came from a clean source (burst pipe, rain)
- Damage is surface-level only
- Moisture readings are below 20 percent
- No mold is visible
- No structural damage is apparent
- Water didn’t reach electrical outlets or appliances
Call professionals if:
- Water came from sewage or contaminated sources
- Damage goes deep into materials
- Moisture readings exceed 20 percent
- Mold is visible or suspected
- Structural damage is obvious
- Water reached electrical systems or gas lines
Prepare for Professional Inspection: What Inspectors Look For
Understanding what inspectors check helps you learn how to prepare property for post-flood inspection effectively.
Moisture Readings and Mold Growth Indicators
Inspectors take moisture readings at exterior walls, interior walls, flooring, baseboards, and inside walls.
Water Line Evidence and Contamination Assessment
The water line on walls shows how high floodwaters reached. This line appears as a discolored band or stain. It tells inspectors exactly what water touched and how much of the property was affected.
Hiring Professional Water Damage Restoration Services
You’ll likely need professionals. Water damage restoration involves extraction, drying, decontamination, and rebuilding. It’s complex work that requires equipment and expertise.
When to Call Professionals vs. DIY Cleanup
Call professionals immediately if:
- Floodwaters came from sewage or contaminated sources
- Water damage covers more than a small area
- Moisture readings exceed 20 percent
- Mold is visible or suspected
- Structural damage is apparent
- Water reached electrical systems
Professional restoration services handle water extraction with pumps and vacuums. They set up drying equipment like dehumidifiers and air movers. They remove contaminated materials and disinfect surfaces. They rebuild damaged areas.
Personal Protective Equipment and Safety Protocols
Before you enter a flood-damaged property, you need proper protective equipment. Floodwaters carry serious health hazards including mold spores, bacteria, viruses, and chemical contaminants. Generic protection isn’t enough, you need the right gear fitted correctly.
Respiratory Protection: Choosing the Right Mask
N95 Respirators filter at least 95 percent of airborne particles 0.3 microns or larger (the CDC). These work for general mold spore exposure and dust during cleanup of clean-water damage. They are disposable and typically cost $1-$3 per mask. However, N95 masks do not protect against chemical vapors or gases.
- Shave facial hair before fitting
- Get a fit-test at a local occupational health clinic or ask your restoration contractor to perform one
- Perform a seal-check each time you put on the mask by covering the intake and inhaling, the mask should collapse slightly if sealed properly
- Replace cartridges when you notice resistance to breathing or odors penetrating the mask
Full Body Protection
Wear these items in addition to respiratory protection:
- Nitrile or latex gloves that extend above the wrist (double-glove if sewage is involved)
- Waterproof boots with good traction and ankle support; rubber boots rated for chemical exposure are preferred over standard work boots
- Long sleeves and long pants made of water-resistant material; avoid cotton which absorbs and holds contaminated water
- Eye protection (safety glasses or a full-face shield) to shield from splashes and airborne particles
- Hard hat if structural damage is visible or if you’re working in areas with overhead hazards
- Disposable coveralls (Tyvek or similar) if contamination is heavy; these prevent cross-contamination of your regular clothes
Contamination Protocol and Decontamination
How you remove and dispose of protective equipment matters. Improper removal can transfer contamination to your skin or clothes.
Removal sequence (from most contaminated to least):
- Remove outer gloves carefully by peeling from the wrist, turning inside-out as you remove them
- Remove coveralls by unzipping and stepping out, avoiding contact with the outer surface
- Remove boots by using a boot scraper or stepping out onto a clean surface
- Remove eye protection
- Remove respirator by unstrapping from the back of your head, not touching the front
- Remove inner gloves using the same peeling technique
After leaving the contaminated area:
- Place all disposable PPE in a heavy-duty garbage bag
- Seal the bag and dispose of it in regular trash (not recycling)
- Shower and wash your hair if you were exposed to visible mold or sewage
- Wash clothes separately from other household laundry using hot water
- Do not bring contaminated clothing into living areas
When to Upgrade Your PPE
If you encounter any of these conditions, stop work and upgrade your protection or call professionals:
- Visible mold growth anywhere in the property, upgrade to P100 or PAPR
- Sewage odor or visible sewage contamination, upgrade to P100 or PAPR and consider full-body Tyvek coverage
- Chemical smell (gasoline, paint thinner, pesticides), stop work immediately; these require professional remediation
- Respiratory symptoms (coughing, shortness of breath, wheezing) while wearing a mask, the mask may not be sealed properly or the contamination level exceeds what your PPE can handle
- Structural instability (soft floors, sagging ceilings), wear a hard hat and consider professional assessment before proceeding
Frequently Asked Questions
What should I avoid doing before a post-flood inspection?
Do not remove drywall, baseboards, or flooring before the inspector arrives, these show the extent of water damage and water line evidence. Avoid cleaning contaminated surfaces without proper PPE. Do not dispose of damaged materials until documented. Do not turn on electrical systems if there’s any doubt about safety. Do not attempt mold remediation yourself if mold growth is extensive. Let professionals assess what requires removal versus what can be salvaged for your flood damage insurance claim documentation.
How do I document flood damage for an insurance claim?
Take photographic evidence of all affected areas from multiple angles, including water lines on walls and furniture. Document the date and time of photos. Create a written inventory listing damaged items, their approximate value, and condition. Keep receipts for any emergency repairs or temporary fixes. Record moisture readings if you have access to a meter. Organize all documentation in a folder with dates clearly marked. Provide this flood damage insurance claim documentation to your adjuster and restoration company to support your claim.
Should I clean up before the flood insurance inspector arrives?
No. Do not remove water-damaged materials, clean contaminated surfaces, or dispose of debris before inspection. The adjuster needs to see the full extent of damage to assess your claim accurately. You can remove standing water for safety reasons and document what you remove with photos. Focus on hazard mitigation only, securing downed power lines, turning off gas if safe, and preventing further damage. Professional restoration companies will handle remediation after inspection.
What documentation do I need for a flood insurance adjuster?
Provide photographic evidence of all damage, including close-ups of water lines, affected materials, and the overall room condition. Include a written inventory of damaged items with descriptions and estimated values. Keep receipts for any temporary repairs or emergency services. Document moisture readings if available. Maintain a timeline of when the flood occurred and when you first contacted your insurance company. Organize all flood damage insurance claim documentation chronologically. Have your policy number and claim number ready for reference.