
Table of Contents
- What You’ll Need Before You Start
- How to Check for Moisture Behind Drywall: A Room-by-Room Workflow
- Signs of Water Damage in Walls You Should Never Ignore
- How to Use a Moisture Meter for Drywall Correctly
- Thermal Imaging Cameras and Their Limits
- Finding the Source: Plumbing Leak vs. Condensation vs. Exterior Intrusion
- Safety Precautions Before You Probe or Open a Wall
- When to Call a Professional for Hidden Moisture Detection
- Frequently Asked Questions
Last Updated: October 6, 2026
What You’ll Need Before You Start
Hidden moisture is water trapped inside a wall cavity where you cannot see it. It soaks into drywall, wood, and insulation and stays there for weeks, feeding mold and rotting framing long before a stain shows up.
You do not need expensive gear to start. Most homeowners already own half of what this job requires.
Here is your basic kit:
- A flashlight or headlamp (a bright one, not your phone)
- A pin-type moisture meter
- A pinless moisture meter, if you have one
A moisture meter measures water content in building materials. Pin meters use two probes that pierce the surface; pinless meters scan through it without leaving holes.
Buy a meter that reads in percent moisture content (%MC), not just a “wet/dry” light. A number tells you how bad the problem is. A light only tells you it exists.
How to Check for Moisture Behind Drywall: A Room-by-Room Workflow
Most people check the one spot that looks wet and stop. That is how they miss the real problem. Water travels along studs and joists, so the source is often several feet from the stain.
Work through your home in a fixed order so nothing gets skipped. Start low, finish high.
Mapping Each Room in Order
For each room, follow the same five steps:
- Scan the floor line and baseboards first
- Check every wall corner, inside and out
- Look under sinks, behind toilets, and around supply lines
- Inspect ceilings for sagging or discoloration
- Test any wall that backs onto a bathroom, kitchen, or exterior
Mark each spot you test with tape and write down the reading. This is moisture mapping, and it turns a vague worry into a record you can compare week to week.
For a full walkthrough of the visual checks, the EPA’s mold and moisture guidance for homes is a solid reference for what damp conditions actually do to a building.
Signs of Water Damage in Walls You Should Never Ignore
Water damage in walls rarely announces itself. It shows up as small changes you would normally brush off.
The tricky part is that several of these signs look like normal wear. A little peeling paint near a shower? Easy to ignore. That is exactly how a small leak becomes a mold job.
Visual Inspection Checklist
Run through this list in every room:
- Water stains, yellow or brown rings on walls or ceilings
- Discoloration that spreads or darkens over time
- Paint that peels, bubbles, or blisters
Any one of these is worth a meter test. Two or more in the same room means you likely have an active leak.
How to Use a Moisture Meter for Drywall Correctly
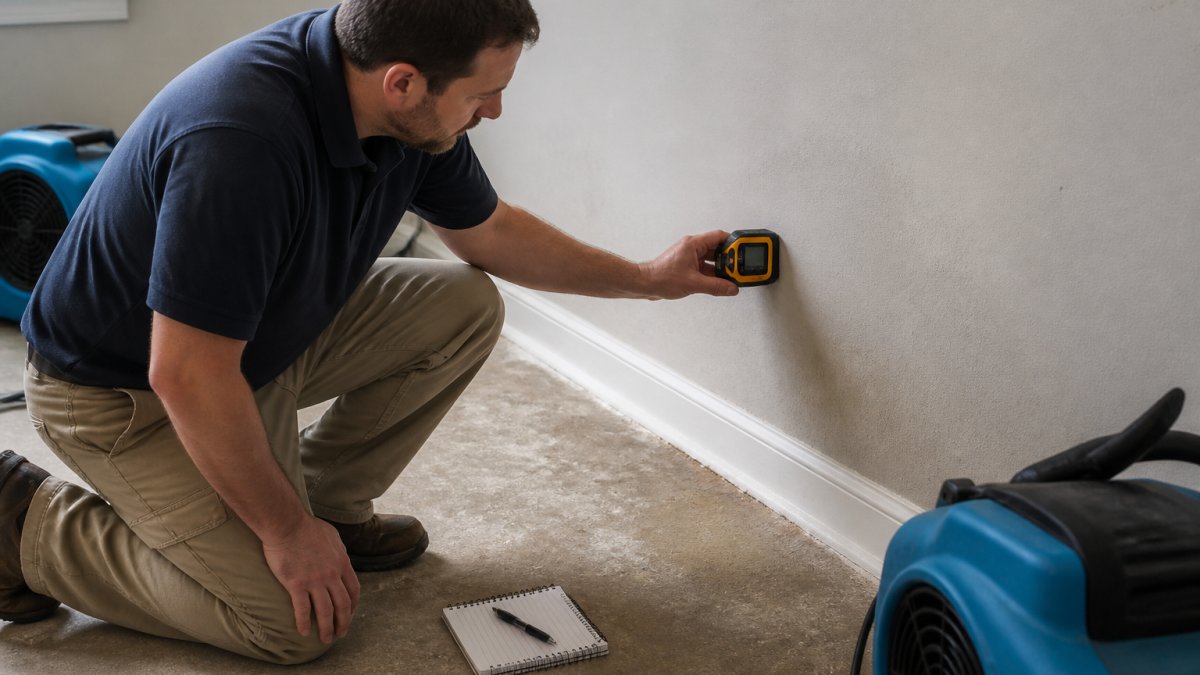
A moisture meter for drywall works best when you test the same material the same way every time. Different materials give different readings, so a dry piece of wood and a dry piece of drywall will never match, which is why most homeowners misread their own results.
Pin vs. Pinless Methods
Pin meters push two probes into the material and measure resistance between them. Water conducts electricity, so wetter material reads higher.
Pinless meters use electromagnetic sensors to scan through the surface without damage, making them ideal for a first pass across a whole room.
The practical approach: scan with the pinless meter to find suspect areas, then confirm with a pin meter.
Set the Material Mode Before You Trust Any Number
Most meters sold for home use have a material selector, typically wood, drywall, concrete, or a generic “building materials” setting. The meter converts its raw signal into a percent moisture content (%MC) using an assumed density for the material you selected.
If you leave the meter on the wood setting while testing drywall, the number on screen is meaningless, it is answering a different question.
Reading the Numbers and Setting a Dry Baseline
Before you test anything suspicious, test something you know is dry. Pick an interior wall in a room with no plumbing and no water history, take three readings a foot apart, and average them.
Now compare every suspect spot against that baseline, not a number you saw online. Meter brands and calibration vary enough that a fixed “safe” threshold is unreliable.
A common pattern practitioners use:
- Within a point or two of baseline, treat as dry
- Clearly above baseline but not extreme, elevated, investigate the source
- Well above baseline, or climbing as you move along the wall, active moisture, and you are tracking its path
Why a Single Reading Lies to You
Meters give false highs for reasons unrelated to water. Metal studs, foil-faced insulation, copper plumbing, and metal corner bead all read high on a pinless meter because the sensor reacts to the metal itself. Freshly painted or skim-coated drywall can read high because the joint compound is still curing. Distinguishing these common false positives from actual saturation is essential before you begin to fix water damaged drywall to ensure that you are addressing a genuine structural issue rather than a temporary surface condition.
Do not trust a single reading. Test three spots at least a foot apart before you conclude anything. If only the spot directly over a stud reads high, suspect the stud, not a leak.
When a Reading Means “Call Someone”
A meter tells you a wall is wet. It cannot tell you how far the moisture has spread, whether the framing is compromised, or whether mold is already growing in the cavity. If readings are consistently well above baseline across more than a small area, or the number keeps climbing as you scan, stop probing and bring in someone with penetrating meters and thermal imaging.
Thermal Imaging Cameras and Their Limits
A thermal imaging camera shows temperature differences on a surface.
That is useful, but it is not proof. A thermal imaging camera cannot measure moisture. It only shows you where to point your meter.
Common false positives include:
- Missing insulation, which reads cold but is bone dry
- Air leaks around windows and doors
- Metal framing that conducts heat differently
Treat thermal imaging as a shortcut to the right wall, not a diagnosis. Every hot or cold spot still needs a meter reading to confirm.
Finding the Source: Plumbing Leak vs. Condensation vs. Exterior Intrusion
Once you know a wall is wet, the next question is why. The fix depends entirely on the answer, and guessing wrong means you dry the wall, repaint it, and watch the stain come back in a month. This step decides whether the problem is a weekend fix or a professional job.
A Symptom-to-Source Decision Path
Work through these questions in order. Each answer narrows the likely source.
Does the stain grow when it rains? Mark the edge of the stain with painter’s tape and date it.
Does it grow steadily, rain or shine? A stain that spreads over days regardless of weather points to a plumbing leak.
Does it come and go with the season or the weather? Moisture that appears on cold mornings and fades by afternoon is usually condensation.
The Tape-and-Date Test
This is the single most useful DIY diagnostic step, and it costs nothing. Mark the outer edge of the stain with tape, date it, and check it in one week.
- Growth means an active leak, plumbing or exterior, depending on the rain test
- No change points toward condensation or an old, dried event that already resolved
- Growth only during rain points to exterior intrusion
Photograph the tape and the stain each time you check. If you end up calling a professional, that photo timeline is exactly what they need to skip the guesswork.
Before You Open Anything
Finding the source often means opening a wall, and that is where homeowners get hurt. Two hazards matter more than the moisture itself.
Electrical. Water and live wiring are a dangerous combination, and you cannot see what is behind the drywall. Shut off the breaker for that circuit and confirm it is dead with a non-contact voltage tester before you cut or drill.
Asbestos and lead. Homes built before the 1980s may contain asbestos in joint compound, insulation, and some wall assemblies, and lead paint was common before 1978. Cutting into those materials can release fibers or dust far more dangerous than the water damage.
If you smell gas, see black or fuzzy growth, or find standing water behind the wall, stop. Those are not DIY problems, and no moisture reading is worth the risk.
When the Source Stays Hidden
Some sources do not reveal themselves with a tape test, a slow supply-line pinhole inside a wall cavity, a failed shower pan liner, or a roof leak that only shows up in driving rain. If your meter says the wall is wet, the tape test shows growth, and you cannot trace it to a fixture or weather event, bring in someone with thermal imaging and penetrating meters.
Safety Precautions Before You Probe or Open a Wall
Never drill or cut into a wall without shutting off the power to that circuit first. Water and live wiring are a dangerous combination, and you cannot see what is behind the drywall.
Before you open anything:
- Turn off the breaker for that room and confirm with a non-contact voltage tester
- Put on gloves and an N95 mask if you suspect mold
- Check for asbestos in homes built before the 1980s
If you smell gas, see black or fuzzy growth, or find standing water behind the wall, stop. Those are not DIY problems.
The goal of a home inspection is to find the problem and document it, not to fix it. If your meter reads high, your job is to know where and how bad, then hand it off safely.
When to Call a Professional for Hidden Moisture Detection
Call a professional when the moisture is behind a wall you cannot safely open, when the source is unclear, or when mold is already visible.
A qualified restoration team uses moisture meters, thermal imaging, and sometimes penetrating meters that reach deep into wall cavities. They also document everything for your insurance claim, which matters more than most homeowners expect.
At Aquaflame Restores it, our IICRC-trained technicians handle hidden moisture detection, structural drying, and full reconstruction as one job.
If you are selling a home and an inspector flagged moisture or mold, proper clearance documentation is often required before closing.
Frequently Asked Questions
Can a moisture meter detect water behind drywall?
Yes, a moisture meter can detect elevated moisture behind drywall, but it doesn’t measure water directly. Pin meters read moisture at the surface or just below it when pins penetrate the drywall. Pinless meters scan deeper without making holes. Both can flag hidden moisture, but they can also give false positives from metal studs, wiring, or dense materials. Use meter readings alongside visual inspection and, if needed, thermal imaging to confirm.
What are the most common signs of water damage in walls?
Look for water stains, discoloration, peeling or bubbling paint, and visible mold or mildew. A musty odor is a strong clue even when walls look dry. Check baseboards, corners, and wall edges for soft spots or separation. These signs of water damage in walls often appear before you notice a leak. If you find any of them, test the area with a moisture meter to measure hidden moisture levels.
How do I check for moisture behind drywall without causing damage?
Start with a non-destructive approach: use a pinless moisture meter to scan the wall surface, then a thermal imaging camera to spot temperature differences that suggest moisture. These tools let you check for moisture behind drywall without cutting into it. If readings are consistently high, you may need to make a small hole for a pin meter or call a professional to inspect further. Always turn off power to the area before probing.
When should I call a water damage restoration professional?
Call a professional if you find elevated moisture readings across a large area, smell a musty odor that won’t go away, see visible mold, or can’t locate the source of the leak. Hidden moisture can lead to structural rot and mold growth within 24 to 48 hours. A trained technician uses moisture mapping, thermal imaging, and specialized drying equipment to find and fix the problem. If you’re in metro Atlanta, a team like Aquaflame Restores it can respond 24/7.
Water behind a wall does not fix itself. It spreads, it feeds mold, and it quietly weakens the structure while you wait for a stain to appear. If your meter readings are high, the source is unclear, or you have already found mold, do not guess. Aquaflame Restores it offers 24/7 emergency service, direct insurance billing, and complete restoration from one team, from extraction through reconstruction. Call us and we will find the water, dry it out, and put your home back together.