Last Updated: October 24, 2026
Quick Summary
The top crawl space moisture control solutions are a professional moisture assessment to find the source, a correctly sized crawl space dehumidifier, a Class 1 vapor barrier or full encapsulation, sump pump and drainage for standing water, and ventilation or vent sealing fixes. Target below 50% relative humidity and fix the envelope before upsizing equipment.
- Tape clear plastic over bare soil for 24 hours to tell soil vapor from air movement or a plumbing leak.
- Size 70-pint dehumidifiers for 1,000-2,000 square feet, especially where condensation on ducts and joists is visible.
- Run the dehumidifier drain hose to a sump pit, floor drain, or condensate pump that lifts water to grade.
- A 70-pint unit costs roughly $25-$60 per month in electricity at common residential rates.
- Professional encapsulation ranges from roughly $1,500 to $15,000, with a national average near $5,500.
Table of Contents
- How to Diagnose the Source of Crawl Space Moisture
- Quick Comparison: 10 Crawl Space Moisture Control Solutions
- Crawl Space Dehumidifier Options for High Humidity
- Crawl Space Vapor Barrier Thickness: What the Specs Mean
- Crawl Space Encapsulation: The Full-Seal Solution
- Sump Pumps, Drainage, and Ventilation Fixes
- Crawl Space Moisture Control Cost: What Drives the Price
- When to Call a Restoration Team for Crawl Space Moisture
- Frequently Asked Questions
How to Diagnose the Source of Crawl Space Moisture
Most crawl space moisture problems get misdiagnosed in the first five minutes. A homeowner sees damp joists, calls for a dehumidifier, and six months later the mold is back.
Before you buy a single product, find out where the water is actually coming from. There are three main suspects.
Groundwater, Condensation, or Air Leaks: Telling Them Apart
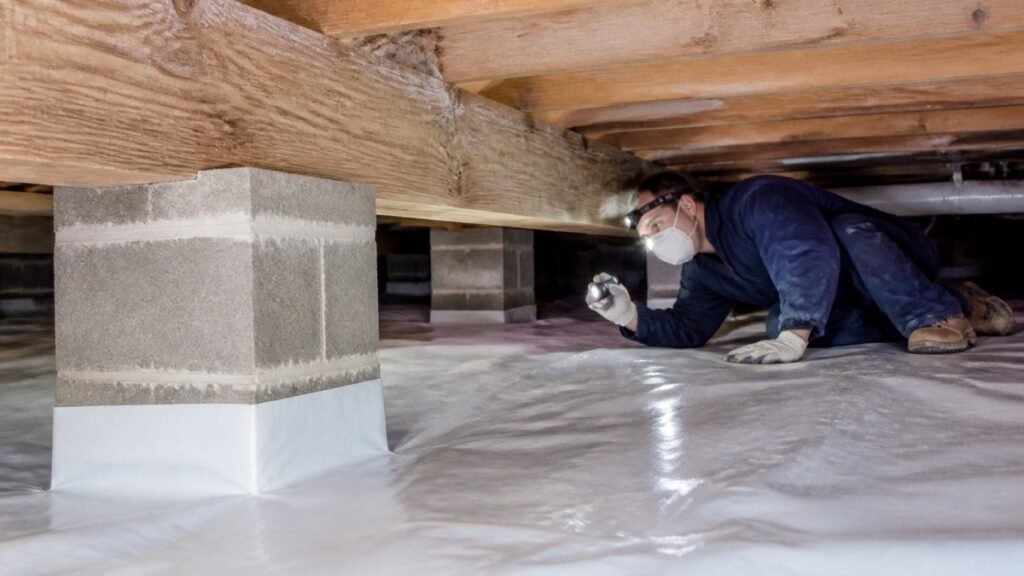
A simple test: tape clear plastic over bare soil for 24 hours. Condensation underneath points to soil vapor; a dry sheet points to air movement or a plumbing leak.
Once you know the source, the fix becomes obvious. If you find rot alongside the moisture, our guide on how to prevent wood rot in a crawl space walks through the next steps.
Quick Comparison: 10 Crawl Space Moisture Control Solutions
Each solution targets a different piece of the moisture puzzle, so the right pick depends on your diagnosis.
| Solution | Best For | Relative Cost | Ongoing Maintenance |
|---|---|---|---|
| Professional moisture assessment | Unknown source | Low to moderate | None |
| Crawl space dehumidifier | High humidity, condensation | Moderate | Empty drain hose, clean filter |
| Vapor barrier | Soil vapor, ground moisture | Low to moderate | Inspect seams yearly |
| Full encapsulation | Chronic, widespread moisture | High | Occasional inspection |
| Sump pump and drainage | Standing water, groundwater | Moderate | Test pump seasonally |
| Ventilation correction | Trapped humid air | Low | Clear vents |
| Sealed vents | Humid climate, air intrusion | Low | Minimal |
| Gutter and grade corrections | Water intrusion at foundation | Low | Clean gutters twice yearly |
| Humidity monitoring | All setups | Low | Replace batteries |
| Professional restoration | Rot, mold, active intrusion | Varies | Varies |
Crawl Space Dehumidifier Options for High Humidity
A crawl space dehumidifier is a purpose-built unit that pulls moisture from the air and drains it away, holding relative humidity at a level that stops mold and wood rot. Standard household dehumidifiers freeze up, overflow, and die in the cold, dirty conditions under a house.
Dedicated crawl space models are the right tool. The AprilAire E070 70-pint unit earned a top spot in a 2026 Bob Vila review for crawl space use.
Sizing a Dehumidifier: Pint Capacity vs. Square Footage
Sizing matters more than brand. An undersized unit runs constantly and never catches up; an oversized one short-cycles and wastes energy. Most practitioners size by pint rating at standard test conditions (80°F and 60% relative humidity) against footprint and moisture load:
- 30-50 pint units suit small, tight crawl spaces under roughly 1,000 square feet with moderate humidity and a working vapor barrier.
- 70-pint units are the common pick for 1,000-2,000 square feet, especially where condensation on ducts and joists is visible.
- 90-155 pint units fit larger footprints, wetter soil, or spaces without a sealed barrier, where the latent load is high.
These are starting points, not rules: a 1,200-square-foot space with standing water needs more capacity than a 2,000-square-foot encapsulated one. If unsure, size up, undersizing is the most common reason a dehumidifier “doesn’t work.”
What Relative Humidity Should You Target?
A hygrometer ($15-$30) is the cheapest diagnostic tool you can buy. Place it mid-crawl-space, away from soil and joists, and read it after 24 hours closed.
- Below 50% relative humidity is the common target for wood-frame crawl spaces; it keeps wood moisture content in a range that resists mold and decay.
- 50-60% is a watch zone, acceptable short-term, but persistent readings here usually mean the barrier, drainage, or air sealing needs attention.
- Above 60% is where mold growth and wood rot become likely, and where a dehumidifier is doing real work rather than idling.
If readings stay above 60% with a running dehumidifier, the unit is undersized, the drain is clogged, the filter is packed, or, most often, the space is unsealed and humid outside air replaces dry air as fast as the unit removes it.
Placement, Drainage, and the Mistakes That Kill Units
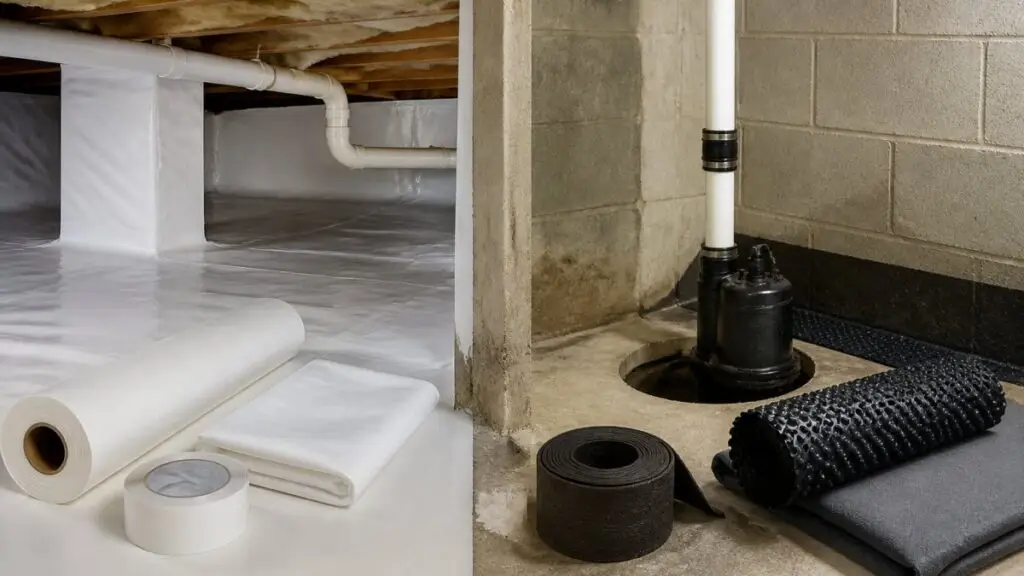
Skipping continuous drainage is the most common installation mistake we see: a unit that shuts off when its bucket fills does nothing for a wet crawl space. Run the drain hose to a sump pit, floor drain, or condensate pump that lifts water to grade, and confirm it slopes downhill the whole way.
Other placement rules that matter:
- Set the unit on a level, raised surface (a concrete paver or a dedicated stand) so it stays out of standing water and soil splash.
- Keep at least 6-12 inches of clearance around the intake and exhaust so air actually moves through the coil.
- Do not duct a dehumidifier’s exhaust into a sealed encapsulation without checking the manufacturer’s static-pressure limits; a restricted duct can burn out the fan.
Operating Cost and Maintenance
A crawl space dehumidifier is the one solution here with a real monthly electric bill. A 70-pint unit draws roughly 5-7 amps at 115 volts, or about $25-$60 per month at common residential rates.
Maintenance is simple but not optional: confirm the drain line monthly, clean the filter quarterly, check the coil and fan annually. Ignored units fail early, and a failed dehumidifier in a sealed space is worse than none, because humidity climbs unchecked.
Pair a dehumidifier with a hygrometer and a written log. Reading the number once tells you little; a two-week record tells you whether the unit is keeping up, whether the space needs sealing, or whether you have a water source the dehumidifier was never going to fix.
If you are comparing specific products, our roundup of the 5 best vapor barriers for crawl space pairs well with dehumidifier sizing, the barrier controls the soil vapor load, and the dehumidifier handles what is left in the air.
Crawl Space Vapor Barrier Thickness: What the Specs Mean
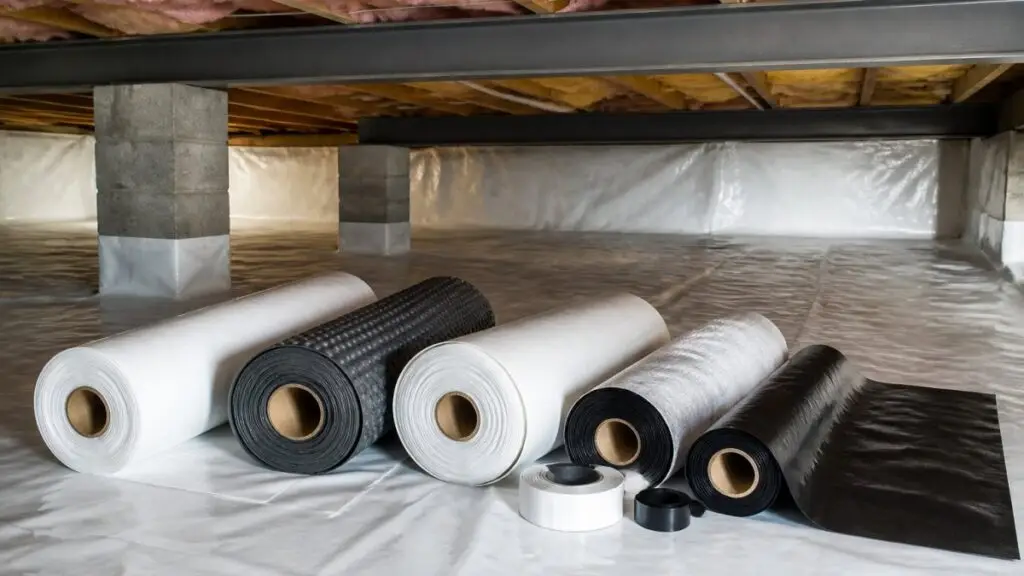
Vapor barrier thickness determines how well polyethylene sheeting blocks vapor transmission from the soil. Class 1 barriers are the standard for crawl space use, and Polyguard’s guidance on crawl space vapor barrier selection recommends them for limiting vapor diffusion and controlling moisture intrusion and condensation.
Thicker is not automatically better, but thin painter’s plastic is a false economy: it tears during installation, seams pull apart, and it fails under foot traffic.
Installation quality decides whether the barrier works, loose laps, unsealed seams, and gaps around piers let vapor straight through. Our roundup of the 5 best vapor barriers for crawl space matches picks to the thickness guidance here.
Crawl Space Encapsulation: The Full-Seal Solution
Crawl space encapsulation is a full-seal approach that covers the floor, walls, and vents with a heavy-duty barrier, turning a vented crawl space into a conditioned, dry one.
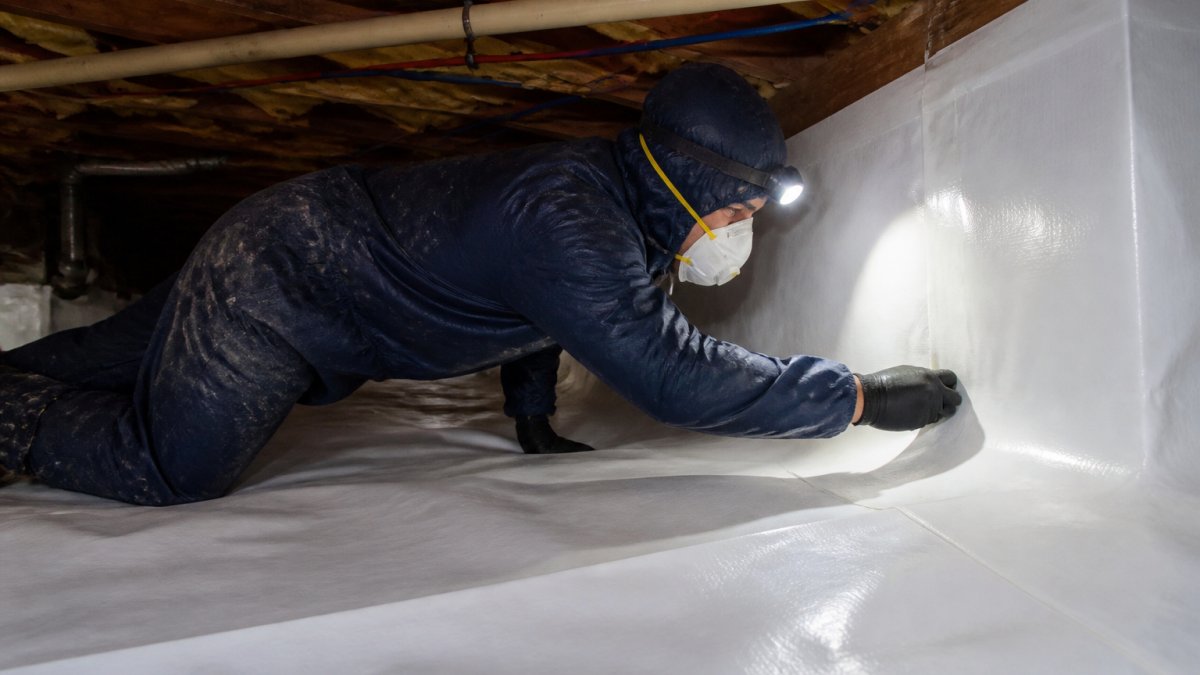
Encapsulation makes sense when moisture is chronic and widespread: wet soil, sweating ducts, musty odors, and recurring mold at once.
This is not a weekend DIY job. The barrier must be cut, fitted, and sealed around piers, pipes, and HVAC lines, and the space needs proper drainage first.
Sump Pumps, Drainage, and Ventilation Fixes
Standing water needs a sump pump and drainage, full stop. A sump pit with a pump moves groundwater and runoff out before it saturates the soil and wicks into the structure.
Ventilation is the more debated fix. Crawl space vents were long thought to dry out a space, but in humid climates open vents pull moist outside air in and worsen condensation (Unvented, Conditioned Crawlspaces – Building America Top Innovation).
Gutter maintenance and grading belong here too. Clogged gutters dump water at the foundation, and soil sloping toward the house sends it straight into the crawl space, cheap fixes with outsized impact.
Crawl Space Moisture Control Cost: What Drives the Price
Pricing depends on the diagnosis, the size of the space, and how much damage has occurred. Any quote given before an inspection is a guess, so understand the line items instead.
Line-Item Cost Ranges
The biggest cost driver is encapsulation. Professional encapsulation can range from roughly $1,500 to $15,000, with a national average near $5,500 and a per-square-foot cost of about $3 to $7. The other solutions break down roughly like this:
| Solution | Typical Installed Cost | What Drives the Number |
|---|---|---|
| Professional moisture assessment | $150-$500 | Inspection scope, moisture-metering, written report |
| Vapor barrier (professionally installed) | $1,000-$4,000 | Square footage, thickness/class, wall coverage, seam sealing |
| Crawl space dehumidifier | $1,200-$3,000 installed | Pint capacity, drainage setup, electrical |
| Sump pump and drainage | $800-$3,000 | Pit excavation, pump grade, discharge line length |
| Vent sealing / ventilation correction | $300-$1,500 | Number of vents, insulation, air-sealing scope |
| Gutter and grade corrections | $200-$2,500 | Gutter guards, downspout extensions, regrading |
| Humidity monitoring | $15-$30 | One hygrometer; more for multi-point logging |
| Mold remediation (if present) | $1,500-$6,000+ | Affected area, containment, clearance testing |
These ranges are for planning, not for holding a contractor to. A low quote often excludes wall coverage, seam sealing, or drainage prep, the parts that make the barrier work. Ask what is and is not included before comparing two numbers.
DIY vs. Professional: Where the Money Goes
Encapsulation is not a weekend DIY job: the barrier must be cut, fitted, and sealed around piers, pipes, and HVAC lines, and drainage must be handled first.
Dehumidifiers and sump pumps sit in the middle. A handy homeowner can install either, but electrical work, discharge routing, and condensate lifting are where mistakes get expensive, worth getting right the first time.
Lifecycle Cost: What You Pay After Installation
Ongoing costs separate the solutions more than install quotes do:
- Dehumidifier electricity: roughly $25-$60 per month at common residential rates for a 70-pint unit, less in a sealed space that lets it cycle.
- Filter and maintenance: a few dollars per filter, changed every one to three months; annual coil cleaning if you want the unit to last.
- Sump pump testing and replacement: test seasonally; pumps typically need replacement every 7-10 years, and a failed pump during heavy rain undoes everything else.
A $1,500 barrier that lasts 20 years is cheaper per year than a $400 barrier that fails in three. That is the comparison worth making when quotes come in.
What Changes the Math
Mold changes the math. If growth is present, remediation must happen before or alongside moisture control, and that is where insurance questions come up. Our guide on whether mold removal is covered by insurance explains what policies typically cover and what causes denials.
Access changes it too. A low, tight crawl space takes longer to work in than a 4-foot space with a full door, and labor is the largest line in most quotes.
The cheapest quote is rarely the cheapest outcome. Compare quotes on scope, wall coverage, seam sealing, drainage prep, and disposal, and add the first three years of operating cost before you decide which number is actually lower.
If you are weighing whether to hire out, our breakdown of whether professional crawl space repair is worth it covers the trade-offs honestly.
When to Call a Restoration Team for Crawl Space Moisture
Call a professional when you find wood rot, visible mold, standing water that keeps returning, or a moisture source you cannot pin down, signs the problem has moved past a product fix into structural repair.
This is where Aquaflame Restores it comes in. Our IICRC-trained technicians diagnose the source, not just the symptom, and handle drying, mold remediation, and full reconstruction with one team.
When water is actively coming in, go straight to water damage restoration near you for emergency response details.
Frequently Asked Questions
What is the most effective way to control crawl space moisture?
For most homes, a combination works better than any single product. A sealed vapor barrier stops ground vapor, a crawl space dehumidifier pulls remaining humidity out of the air, and drainage handles standing water. Encapsulation bundles all three. Start by finding the moisture source, since a dehumidifier alone will not fix groundwater pushing through the floor.
What is the best thickness for a crawl space vapor barrier?
Class 1 vapor barriers are the recommendation for crawl spaces because they limit vapor diffusion and condensation. In practice that means a reinforced polyethylene liner in the 10 to 20 mil range, with 20 mil preferred where foot traffic or gravel is present. Thinner sheeting tears at seams and around piers, which is exactly where vapor transmission restarts. Seal every seam and lap the material up the foundation wall before fastening it.
How much does it cost to fix moisture in a crawl space?
Full encapsulation can range from $1,500 to $15,000, with an average near $5,500 and a typical rate of $3 to $7 per square foot. Standalone fixes cost less: a vapor barrier or a dehumidifier addresses one problem rather than the whole space. Your actual crawl space moisture control cost depends on square footage, how much water intrusion is present, and whether structural repair or mold treatment is needed first.
Does crawl space encapsulation stop moisture?
Encapsulation stops vapor from the soil and outside air, but it does not stop a plumbing leak, a roof leak, or groundwater rising through the slab. That is why a proper install includes drainage and a dehumidifier inside the sealed space. If moisture returns after encapsulation, the cause is usually an unsealed penetration or a water source nobody diagnosed. A moisture meter reading before and after the job tells you whether it worked.
How can you tell if a crawl space has too much moisture?
Musty odors, condensation on ducts and joists, mold or mildew on wood, and sagging or cupping floors are the visible signs. Measured relative humidity above 60% is the number to act on, with 50% or lower as the target. Wood rot and increased energy bills often follow. If you smell damp air inside the house, the crawl space is usually the source, and an inspection with a hygrometer confirms it in minutes.
The hardest part of crawl space moisture is not the fix. It is finding the source before mold and rot take hold. If you are seeing musty odors, damp joists, or water that keeps coming back, Aquaflame Restores it can diagnose the cause, dry the space, and rebuild what the moisture damaged. Our team offers 24/7 emergency response, on-site arrival within one hour, direct insurance billing, and complete reconstruction from one crew. Get started with Aquaflame Restores it and stop treating the symptom.